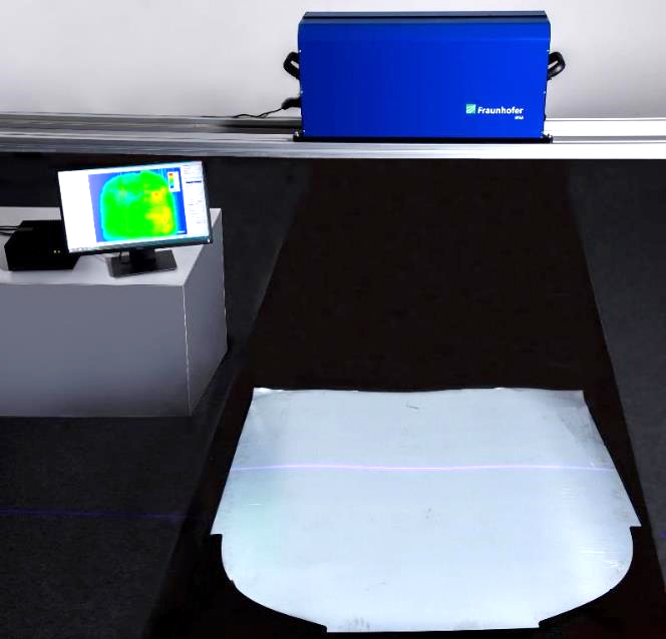
Before sheet metal is formed, the exact dosage of the oil quantity is crucial: If too little oil is applied, the metal could crack later, while overcompensation could significantly impair the next processing steps (e.g. joining processes). With the F-Scanner 1D, the Fraunhofer Institute for Physical Measurement Techniques IPM in Freiburg is presenting a fluorescence system that can check 100 percent of the oil applied to a sheet during the production cycle. Integrated in an oiling system, a workpiece can thus be selectively re-oiled in the event of a shortage.
During an inspection, the actual state of the oil distribution is first determined using fluorescence imaging methods. While conventional inline systems only measure the surface at specific points, the F-Scanner 1D records the thickness and homogeneity of oil films over a wide area and in real time. The test specimen is scanned over its entire width with a UV laser, enabling seamless measurement of oil coverage. Due to their inherent fluorescence, the oils convert part of the excitation light into light of a longer wavelength. In contrast, this does not occur in areas of the sheet surface without oil coating, so that these areas can be detected as defective areas. The fluorescence of the oils is evaluated by means of spectral filtering, so that high-contrast and unambiguous measurement images of the thickness and homogeneity of the oil layer on the entire surface are obtained. The oil layer is measured with an accuracy of +-0.05 g/m²; the detection limit of the oil layer is in the range of 0.01 g/m². Automated image processing based on pattern recognition allows the fluorescence images to be evaluated and categorized in real time. If the defined limit value of an oil coating is exceeded or not reached, the component can be sorted out, the spot marked or the amount of oiling adjusted. Integrated in a Raziol spraying system with fast nozzle control, the oil quantity can thus be controlled 100 percent.

