Material characterization with 3MA II

In order to ensure their material properties in the desired manner, components in mechanical, automotive and plant engineering must be heat treated and machined. Metallographic analyses, residual stress measurements with X-ray diffraction and conventional hardness indentation methods are usually used for this purpose. These methods have in common a low testing speed and the destructive character of the test, which is why they are largely unsuitable for testing the surface layer properties already during or immediately after a manufacturing step in the process chain.

The 3MA II test method developed at Fraunhofer IZFP enables, above all, characterization of the characteristics of the surface layers, which cannot be satisfactorily tested non-destructively using conventional methods. It is fully automatable and can be directly integrated into the manufacturing process. Its high testing speed enables 100 percent inspection in most applications, while allowing rapid and simultaneous evaluation of several relevant quality characteristics of the surface layer (0 mm to 8 mm component depth).
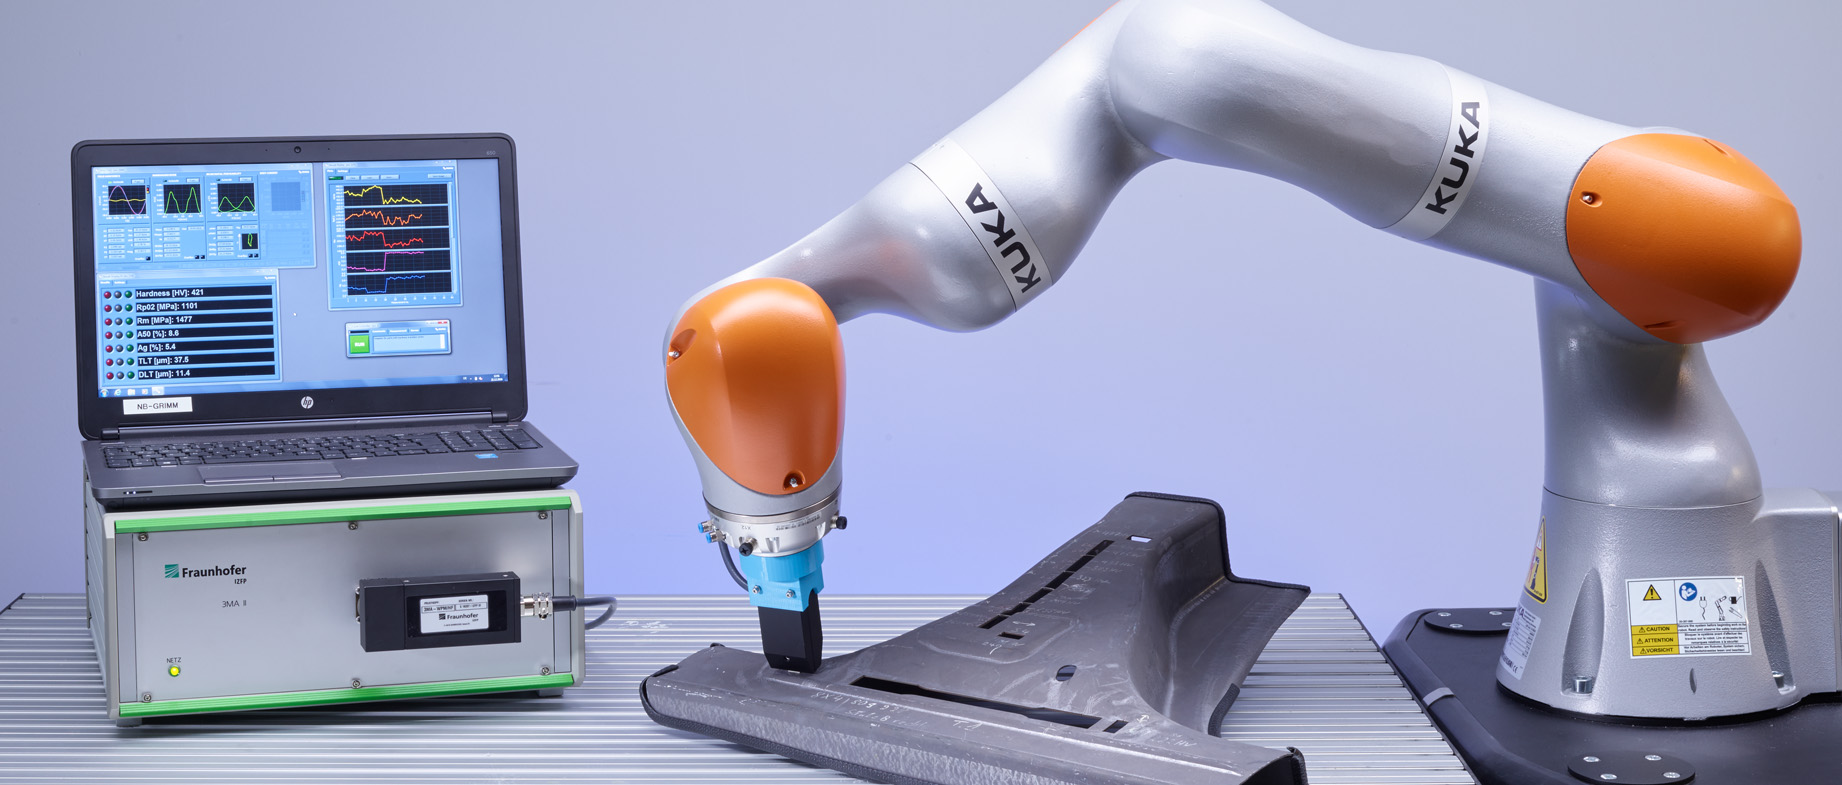
Materialcharakterisierung 3MA-Technologie
© Fraunhofer IZFP
Reinforcing elements in the automotive sector, which are made of ultra-high-strength steels, can be examined non-destructively using 3MA testing technology.

Combination of several micromagnetic measurement methods through 3MA technology

3MA II combines the four micromagnetic measurement methods Barkhausen noise, superposition permeability, harmonic analysis of the tangential magnetic field and multi-frequency eddy current method. Several test quantities are evaluated for each of these methods. A total of 41 different micromagnetic test quantities are available.

The advantages of combining test quantities in a multiparameter method are manifold. Such a combination of methods is particularly indispensable when the target quantities to be measured (e.g. hardness, hardness depth) and the disturbance quantities (temperature, residual stresses, etc.) can vary simultaneously. Since the individual micromagnetic test quantities have differently weighted sensitivities to target and disturbance quantities, the influence of the disturbance quantities can be eliminated or at least reduced in this way.

The only prerequisite for this is, in addition to ferromagnetic, i.e. magnetizable material, a previous calibration. Multiple regression analyses or »nearest neighbor« pattern recognition algorithms are used to determine approximation functions that link the desired quality characteristics (target quantities) with the 3MA measurement parameters (test quantities).  

3MA Prüfung ferromagnetischen Materialien
© Fraunhofer IZFP
3MA technology for 100 percent non-destructive testing of ferromagnetic materials

Applications

  • Spatially resolved determination of hardness, hardness depth, residual stresses in hard fine machining → Detection and characterization of machining defects
  • Continuous recording of tensile strength, yield strength, etc. in steel strips or plates → One hundred percent verification and documentation of steel quality
  • Hardness, hardening depth in induction, case, laser hardening, nitriding → Shortened set-up and changeover times
  • Deep drawing properties and residual stresses in sheet steel → Incoming goods inspection during sheet metal forming
  • Determination of residual stresses in installed components → Assembly control, bond strength
  • Early detection of thermal aging, fatigue, creep damage → Periodic inspection of safety-relevant components

Contact Press / Media

M.Sc. Frank Leinenbach

Fraunhofer Institute for Nondestructive Testing IZFP
Campus E3 1
66123 Saarbrücken, Germany

Phone +49 681 9302-3627