Passive online thermography

Principle

Passive thermographic online measurement
© Fraunhofer WKI
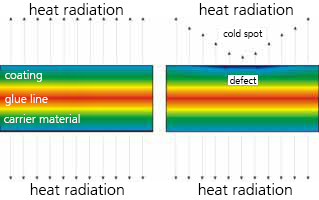
Passive thermographic online measurement of adhesion defects, cracks and inhomogeneities.

For online measurement of material weaknesses, the material heated in the production process is moved uniformly on a conveyor belt under a thermography line scan or area scan camera. The camera must be mounted at an appropriate height above the object to be measured so that the area to be examined can be examined with the optics used. The line of the line scan camera or the individual lines of the area scan camera are aligned so that they record the thermal image of the object perpendicular to the direction of travel of the conveyor belt.

By moving uniformly under the camera, an image of the entire object is built up from the individual line or area images using a connected computer.
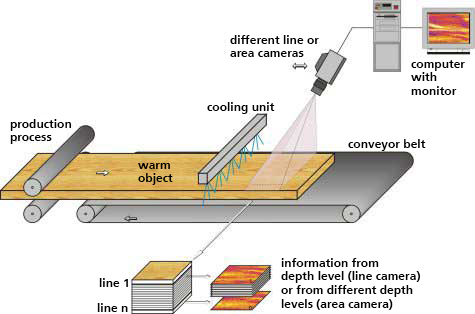
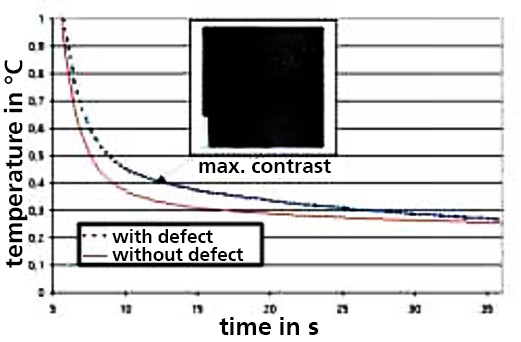
Depending on the depth at which a defect is located and how good the heat capacity or thermal conductivity of the material is, a defect will only appear after a certain time with optimal contrast. In the diagram (left picture) the cooling of a surface above and next to a material inhomogeneity is visible. Clearly, the best time to observe the defect can be determined from this curve. This point in time can be optimized with the help of the variably adjustable distance between camera and heat source and the belt speed.

If the material comes heated from production, defects in the material can be detected as so-called "hot or cold spots" (right image) due to the disturbed heat conduction. Thermographic measurements are already used for testing purposes in the automotive industry and its suppliers, for example, to detect larger air pockets/voids or pressure points in polyurethane (PU) foams.

When the materials come out of the mold heated by the chemical reaction of the PU foam, air pockets can be detected as cooler spots and pressure points as warmer spots due to the compression of the material.


Cooling surface
© Fraunhofer WKI
Cooling of a surface above and next to a material inhomogeneity
Cold Spot defective plate material
© Fraunhofer WKI
Cold spot on a defective plate material, right

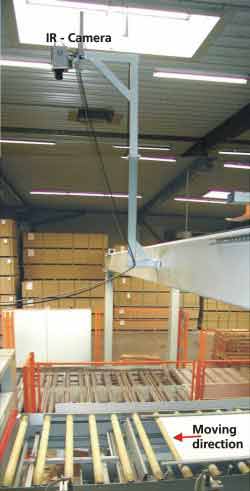
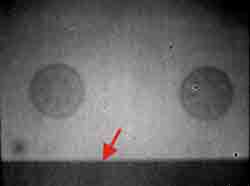
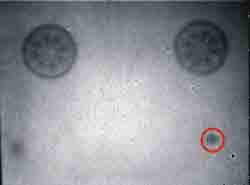
In the wood and wood-based materials industry, most panel-shaped materials are manufactured or processed at press temperatures above 100°C. The picture (left) shows a thermography setup behind a board press, where the camera is mounted 4 m above the examined boards. This makes it possible, for example, to clearly detect bonding defects between the coating and the particleboard ( picture on the right) or even missing or folded paper due to the changed thermal conductivity. Missing decorative paper (center image) can also be detected by the changed heat capacity and conductivity. In addition, conclusions about the condition of the press can be drawn from the observation and detection of recurring temperature patterns.

In this way, not only the quality of the product but also the manufacturing process can be assessed.


Construction of an online passive thermography
© Fraunhofer WKI, Braunschweig
Construction of an online passive thermography.
Thermal image missing decor paper (Online-Thermography)
© Fraunhofer WKI
Thermal image at the exit of a press for coating particleboard at a temperature of 160 °C. The round cooler areas caused by suction cups of the plate gripper can be clearly seen. Missing decor paper marked.
Thermal image adhesion defect, round cooler areas clearly recognizable (Online-Thermography)
© Fraunhofer WKI
Thermal image at the exit of a press for coating particleboard at a temperature of 160 °C. The round cooler areas caused by suction cups of the plate gripper can be clearly seen. Adhesion defects marked.