Trade Fair Control 2023

Quality assurance with image processing

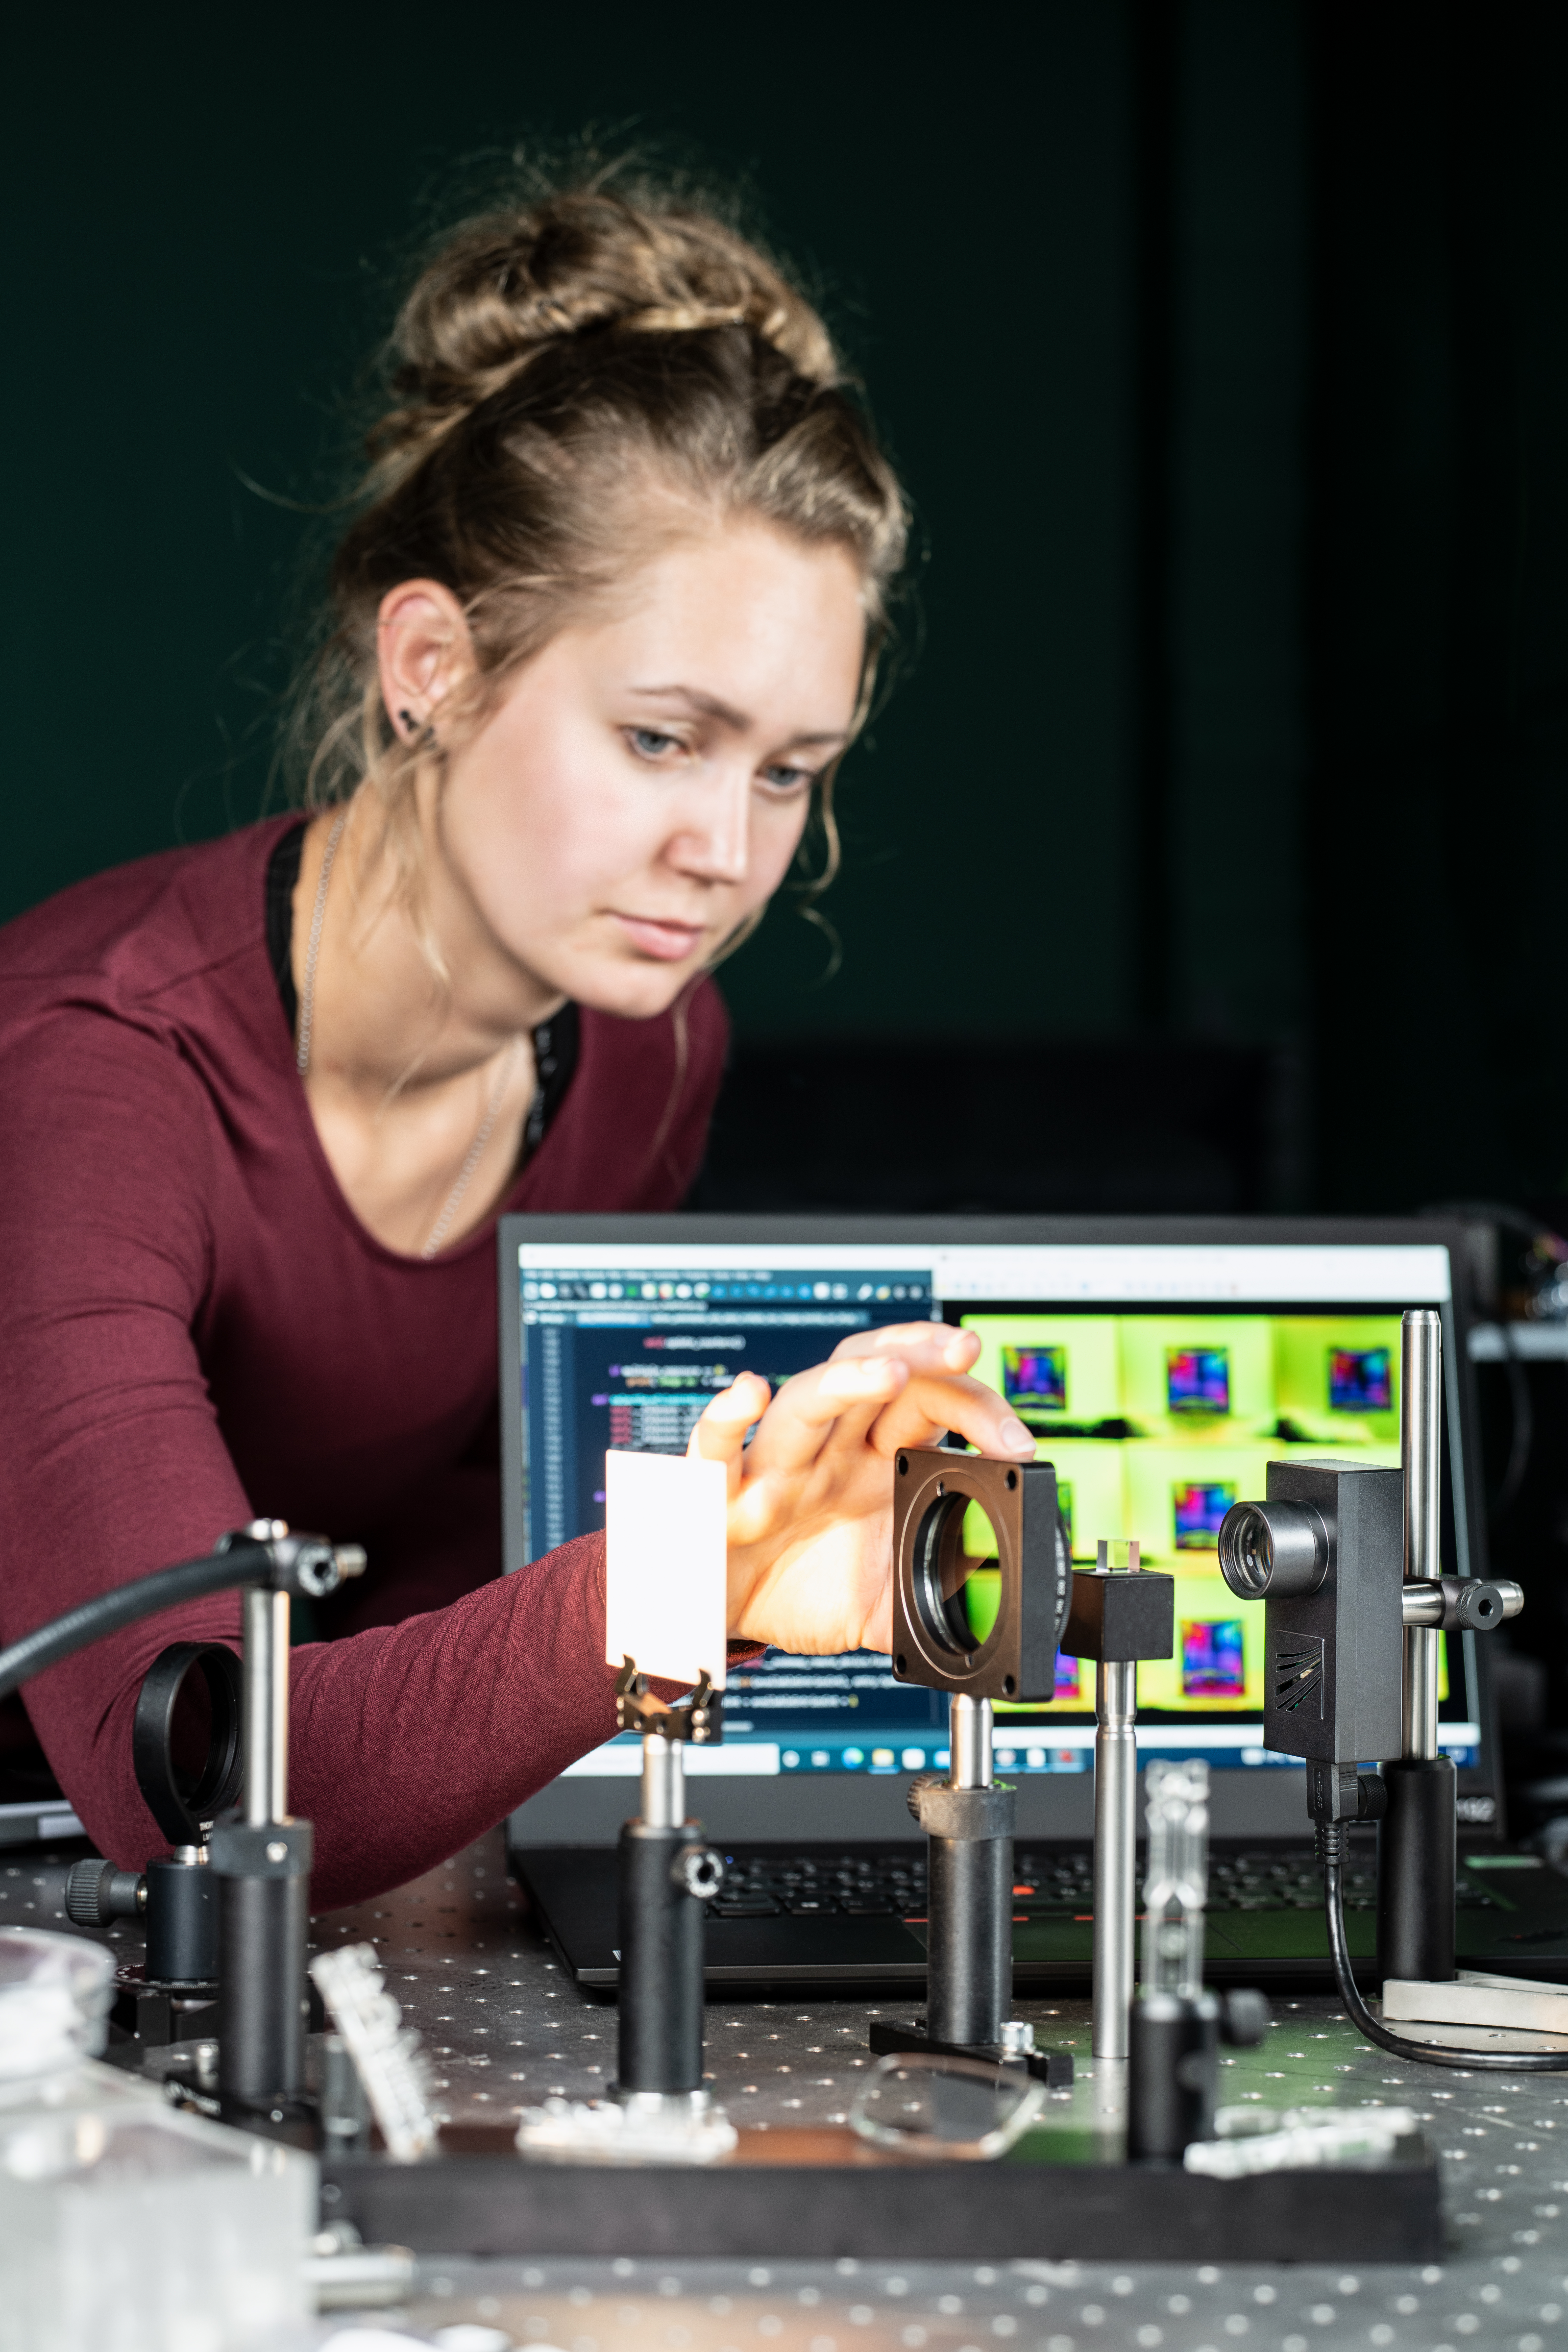
Numerous Fraunhofer institutes research and develop in the field of image processing and optical or acoustic testing for quality assurance. At the Control 2023 booth, which is coordinated by the Fraunhofer Vision Business Unit, current new developments from various fields will again be on display.

This year, we will present exhibits from the areas of inspection and characterization of surfaces, optical 3D measurement technology, inline measuring and testing and component identification, augmented reality and spectroscopy. In addition, new developments for inspecting components below the surface or inside the material using technologies such as X-ray, terahertz, ultrasound or high-frequency radar will also be on display.

Numerous exhibits work with artificial intelligence or machine learning methods, so you can also get an overview of current trends here.


Highlight: Demonstrating acoustic monitoring by playing air hockey


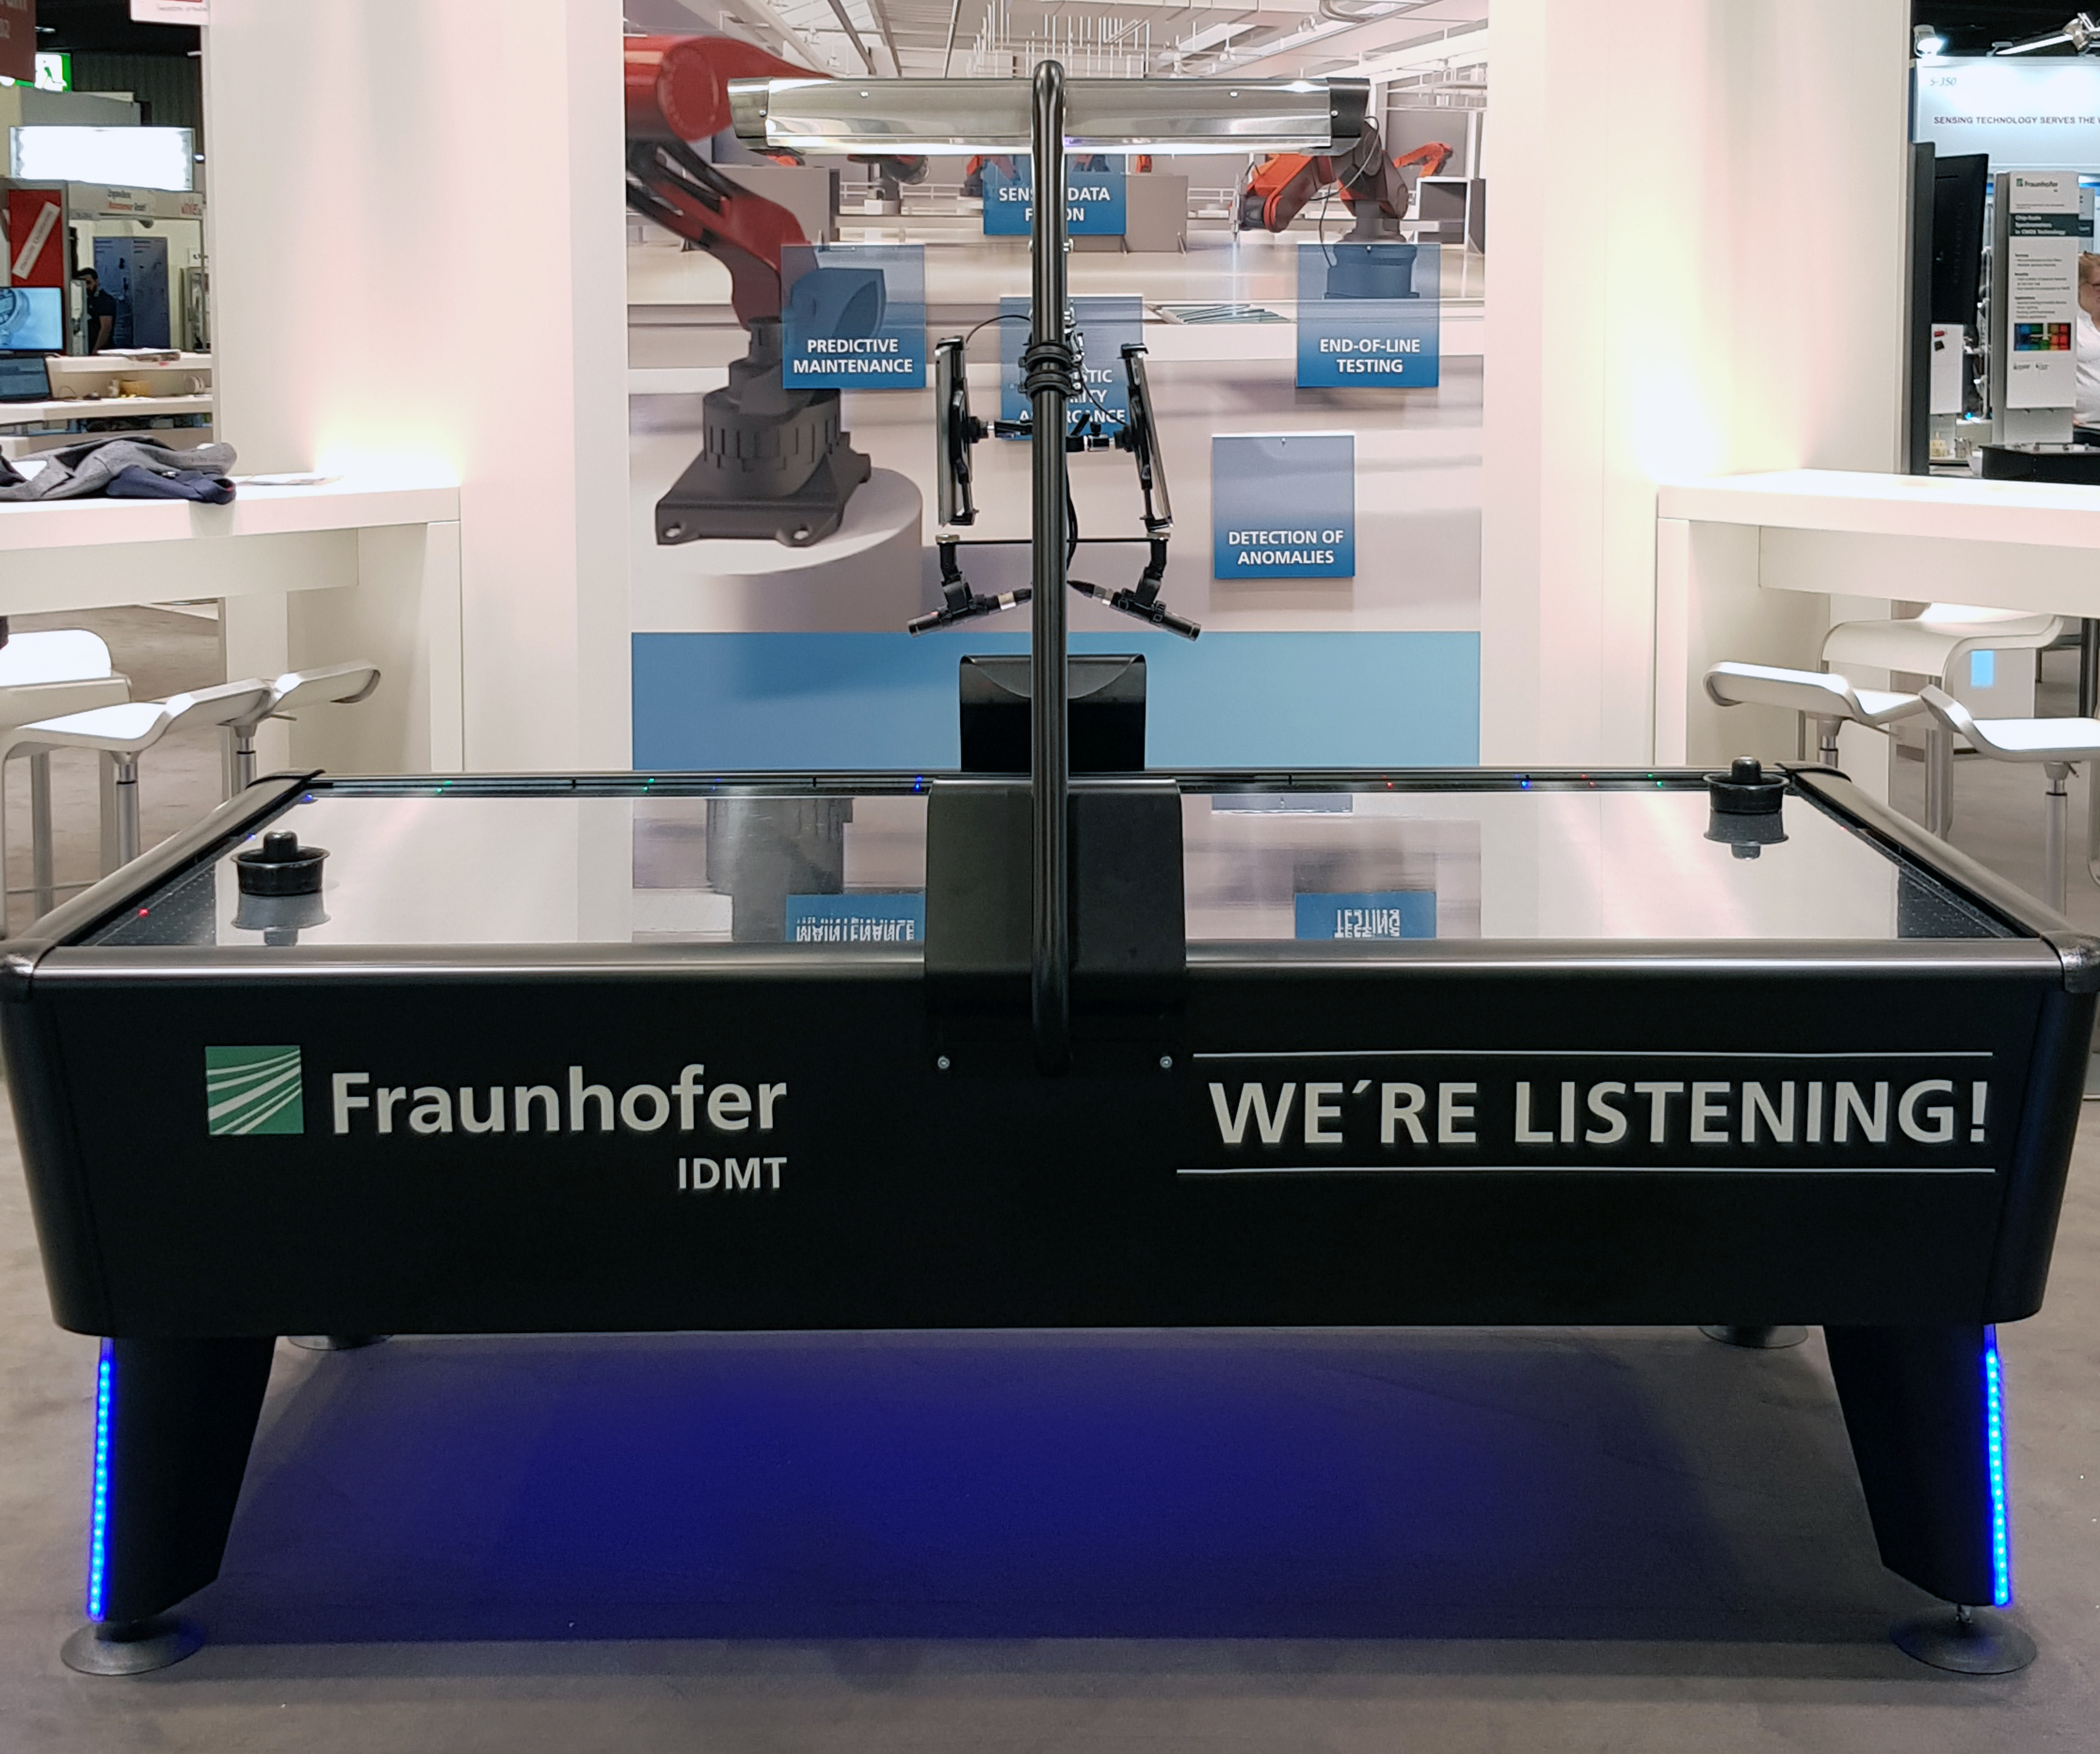
One highlight comes from the field of acoustic monitoring, which can also be used for quality assurance, often in addition to optical testing methods. An air hockey table will be presented for this purpose: in a game of air field hockey, visitors to the trade fair will be able to observe how pucks that apparently look the same and sound very similar can be reliably distinguished on the basis of their sounds and with the help of machine learning methods.
Analysis of acoustic signals of the field hockey table
© Fraunhofer IDMT
The acoustic events in the game occur irregularly, very quickly, with a short duration and a spatial distribution - ideal for analysis using machine learning methods.
Video impressions from Control 2023

Topics and exhibits at the Fraunhofer exhibition stand (in German)

Exhibits at Control 2023

Image processing technologies and surface inspection

Inline inspection of large surfaces with regard to cleanliness and coating

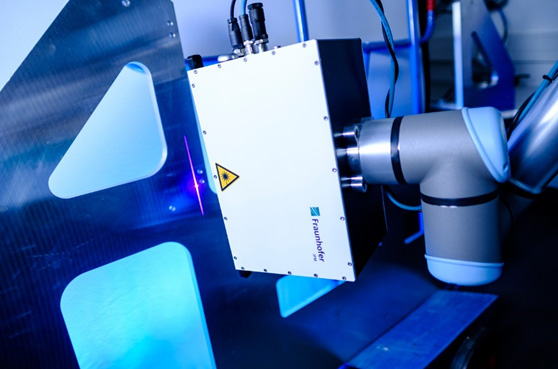
Fraunhofer IPM will present the fluorescence scanner F-Scanner 1Dmini: The system detects contamination on selected areas of large components quantitatively and with high spatial resolution in the production cycle. In addition to cleanliness testing, the F-Scanner 1Dmini is also suitable for layer thickness measurement, for example of (organic) CDP coatings, or for oil layer measurement in forming processes.

Exhibitor: Fraunhofer IPM, Freiburg

IPM F-Scanner
© Fraunhofer IPM
F-Scanner 1Dmini inspecting a sheet metal component.

Production-accompanying analysis of geometry, surface condition and contamination of components in free fall

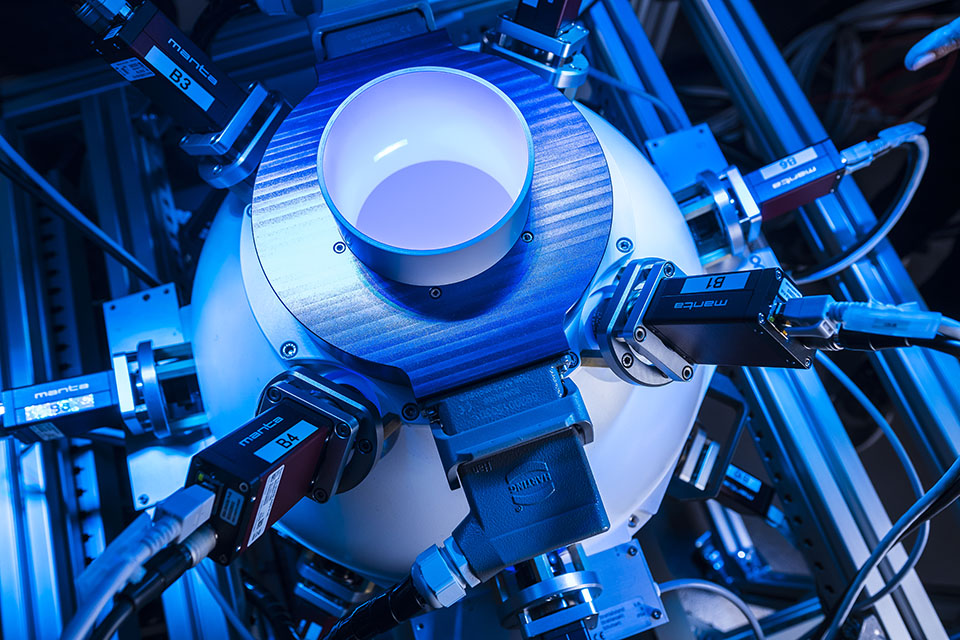
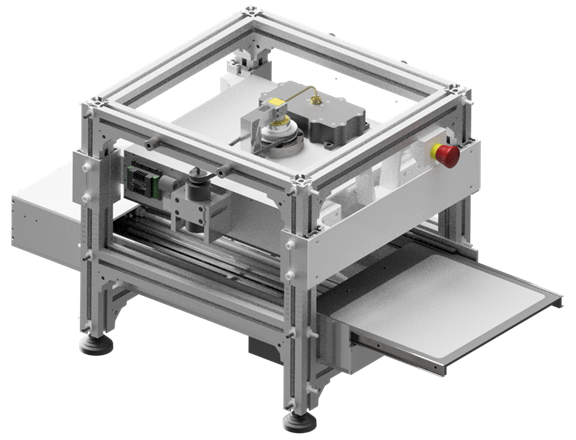
The inspection systems of the Inspect 360° series developed at Fraunhofer IPM analyze the geometry and surface condition of components in free fall during production, thus enabling a type-independent, complete optical inspection of mass-produced components for the first time. At Control 2023, the Inspect 360 HR (high resolution) will be presented, a system for the precise inspection of semi-finished products with regard to the properties geometry and surface defects down to a defect size of 30 µm. The components are conveyed individually into a hollow sphere via a simple feed system and inspected simultaneously from all directions in free fall with the aid of cameras. Metal components from forming, stamping, forging and casting processes or plastic parts as well as hybrid components made of composite materials can be inspected.

Exhibitor: Fraunhofer IPM, Freiburg

IPM free fall system
© Fraunhofer IPM
Free fall system from above.

Intelligent quality control of reflective surfaces

From car paintwork to smartphone displays: Before goods leave the production plant, their quality must be checked and ensured. But the inspection of reflective surfaces is challenging. Simple photographic processes cannot be used due to reflections, and manual quality checks are time-consuming and costly. Fraunhofer IAIS will therefore presenta patented system at Control that inspects shiny or diffusely reflective surfaces completely automatically.

Exhibitor: Fraunhofer IAIS, Sankt Augustin


IAIS reflective surface
© Fraunhofer IAIS
Reflective surface quality control system

High-speed microscope for 100 percent optical quality control

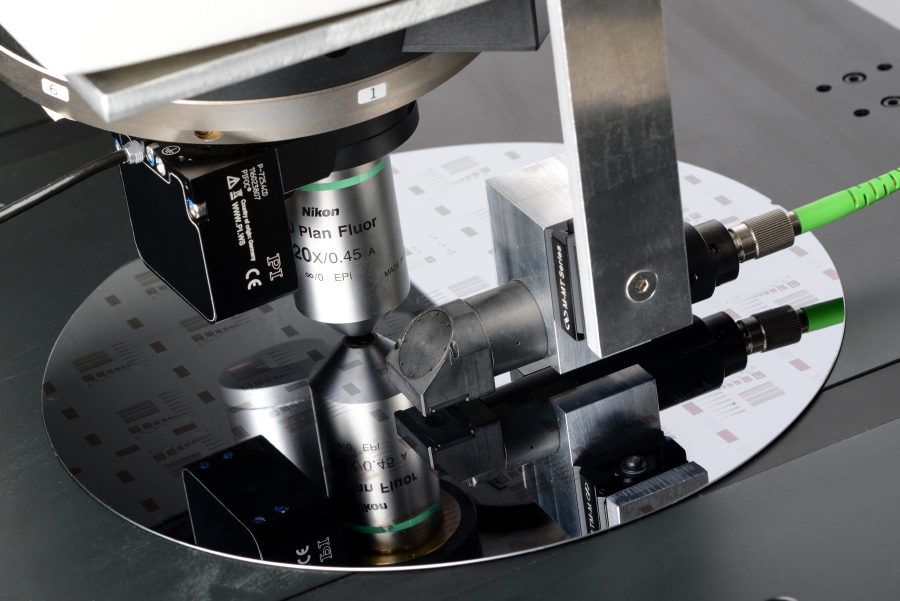
A high-speed microscope (HSM) developed at the Fraunhofer IPT, is used to examine microscopic structures over large areas in a short time as part of an optical 100 percent quality control process. The technique can be used on samples of a wide variety of types, from microelectronics to stem cells.

Exhibitor: Fraunhofer IPT, Aachen

High speed microscope
© Fraunhofer IPT
High-Speed-Microscope

Automating manual inspection - potentials of AI-based image processing

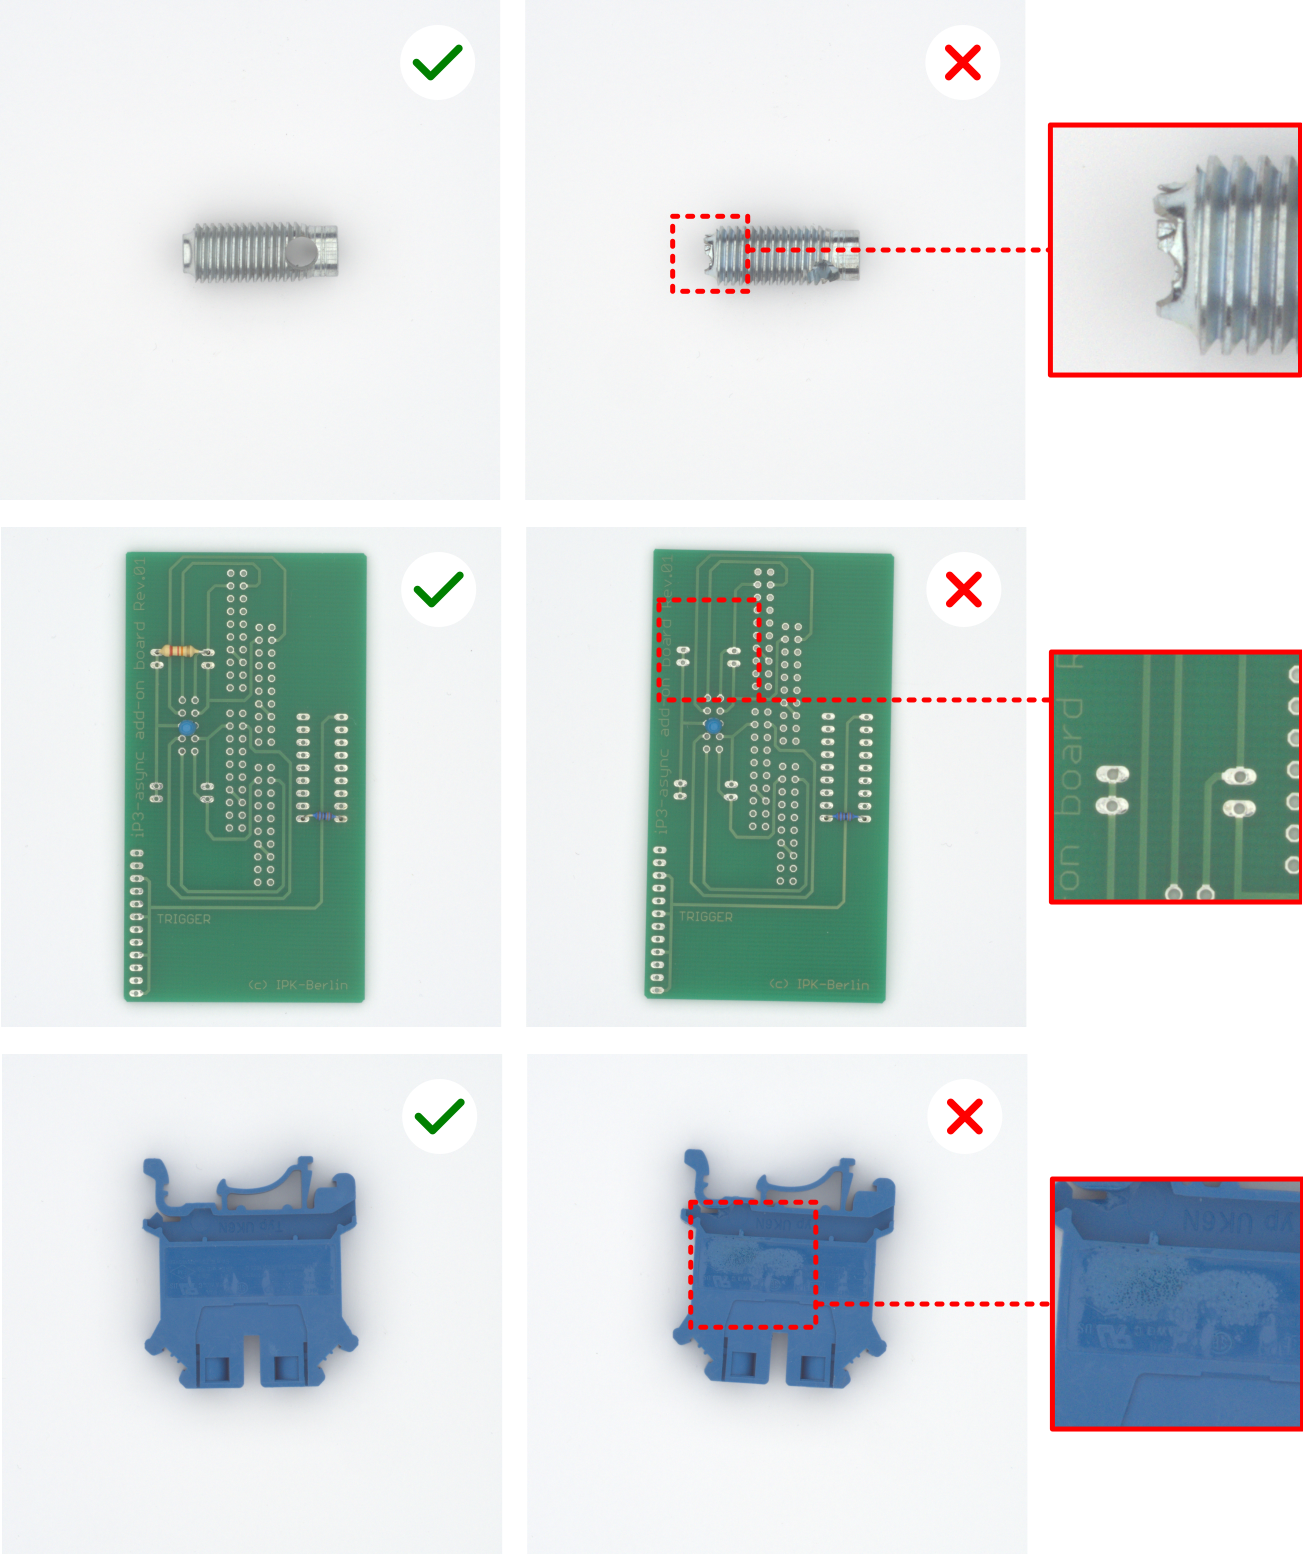
AI-based image processing has the potential to solve even very complex inspection tasks. However, it requires a large amount of labeled training data. Anomaly detection presents a lower barrier to entry due to significantly less training data. Fraunhofer IPK will interactively demonstrate the opportunities of anomaly detection for optical inspection at Control.

Exhibitor: Fraunhofer IPK, Berlin


IPK AI-based image processing
© Fraunhofer IPK
Example of anomaly detection.

Inline surface inspection systems

The Fraunhofer Institute for Industrial Mathematics ITWM, Kaiserslautern, presents a robot-based surface inspection system for the complete inspection of industrial components of turned and milled metal parts. The focus is on the objective and complete detection and evaluation of the surface, independent of the surface texture. Its special feature is that it has several interfaces for image acquisition, examines the component and performs the comparison with the CAD model as well as the visualization of this CAD model; moreover, it includes the algorithms for the automatic calculation of viewpoints. The visualization of the CAD model is successively modified depending on the viewpoint of the robot, so that the already inspected part regions are visibly marked. Complex metal objects can be inspected, while at the same time, even if not enough defect samples are available for machine learning training. The solution is based on photo-realistic image simulation with parametric modeling of defects and surface texture. In addition, the positioning of the robot for a complete surface inspection is ensured by using the virtual inspection planning software V-POI.

Exhibitor: Fraunhofer ITWM, Kaiserslautern


ITWM Surface inspection system
© Fraunhofer ITWM
View planning system for complex surface inspection.

Light Field Inspection - light field based light source for flexible use

With lightfield-based light sources, objects with complex geometries are illuminated by a specially adapted »light recipe« in such a way that relevant structures can be detected with maximum contrast. The optimal light field for this task is determined by an algorithm that intelligently adapts the lighting modalities to the individual object geometry. This approach shows the way for a future generation of inspection systems, as here image evaluation and lighting are optimized together for the most efficient inspection system possible.

Exhibitor: Fraunhofer IOSB, Karlsruhe

IOSB-Light field inspection
© Fraunhofer IOSB
System for testing transparent objects.

Inspection of specular surfaces with deflectometry

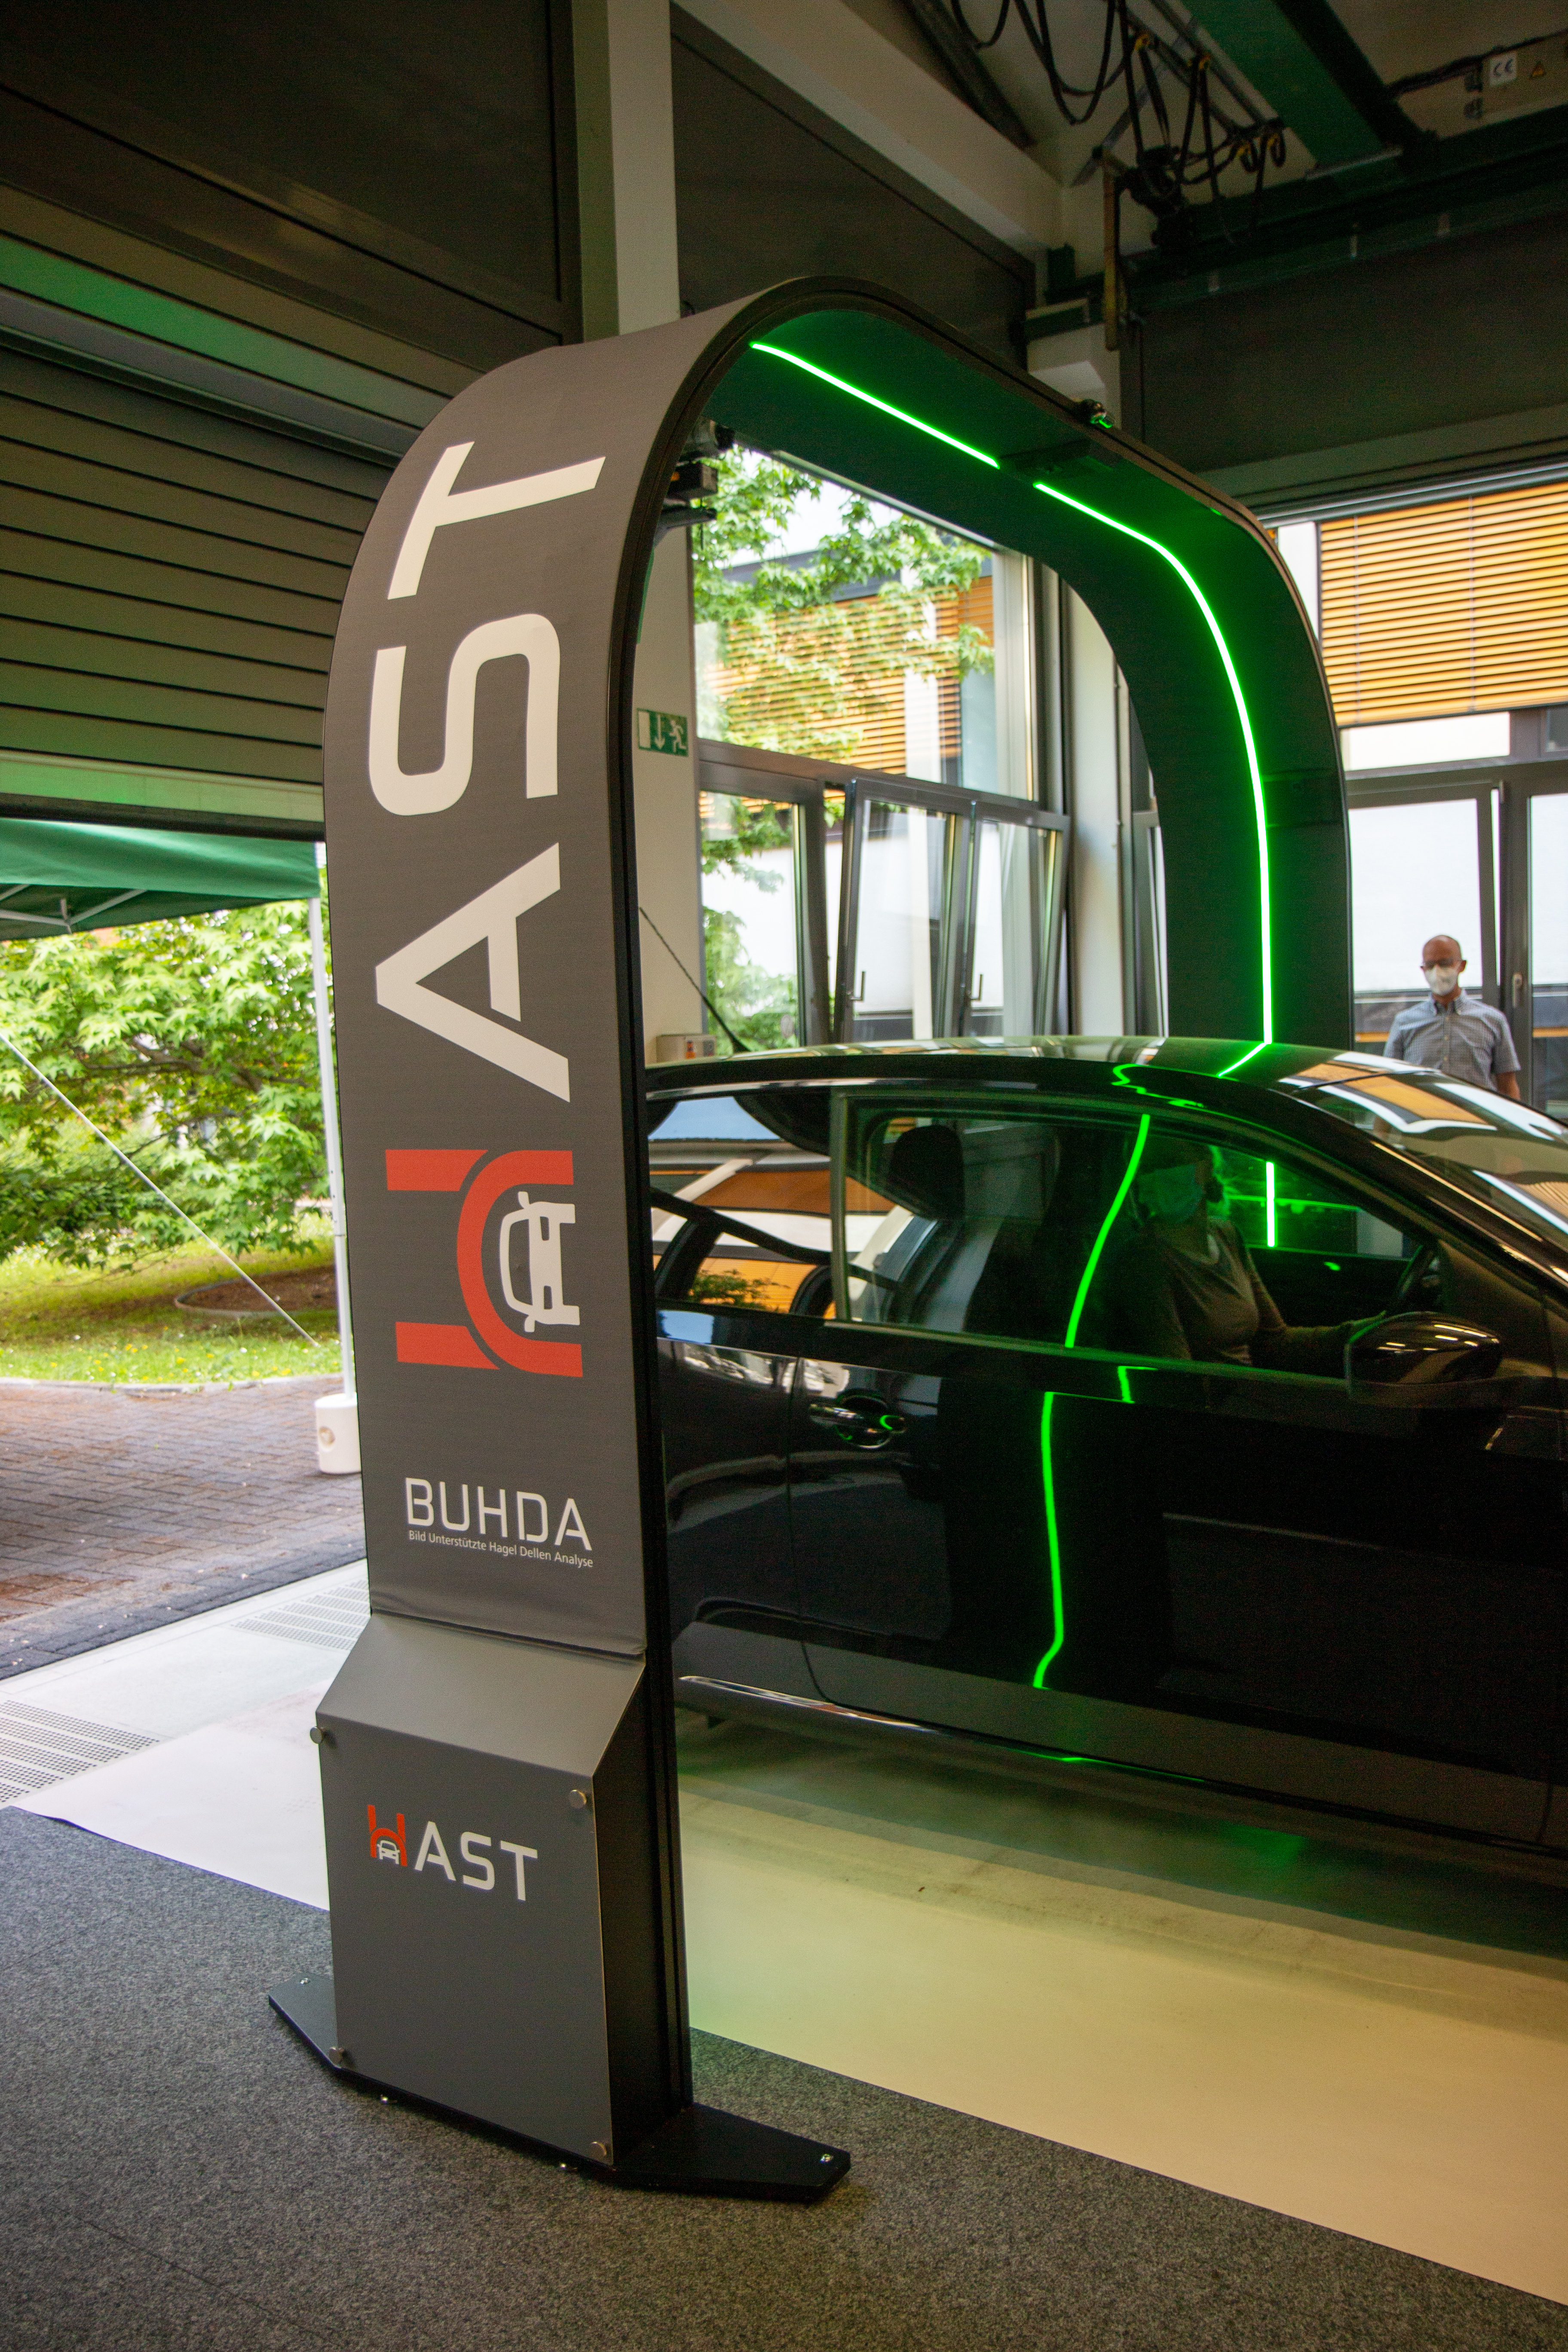
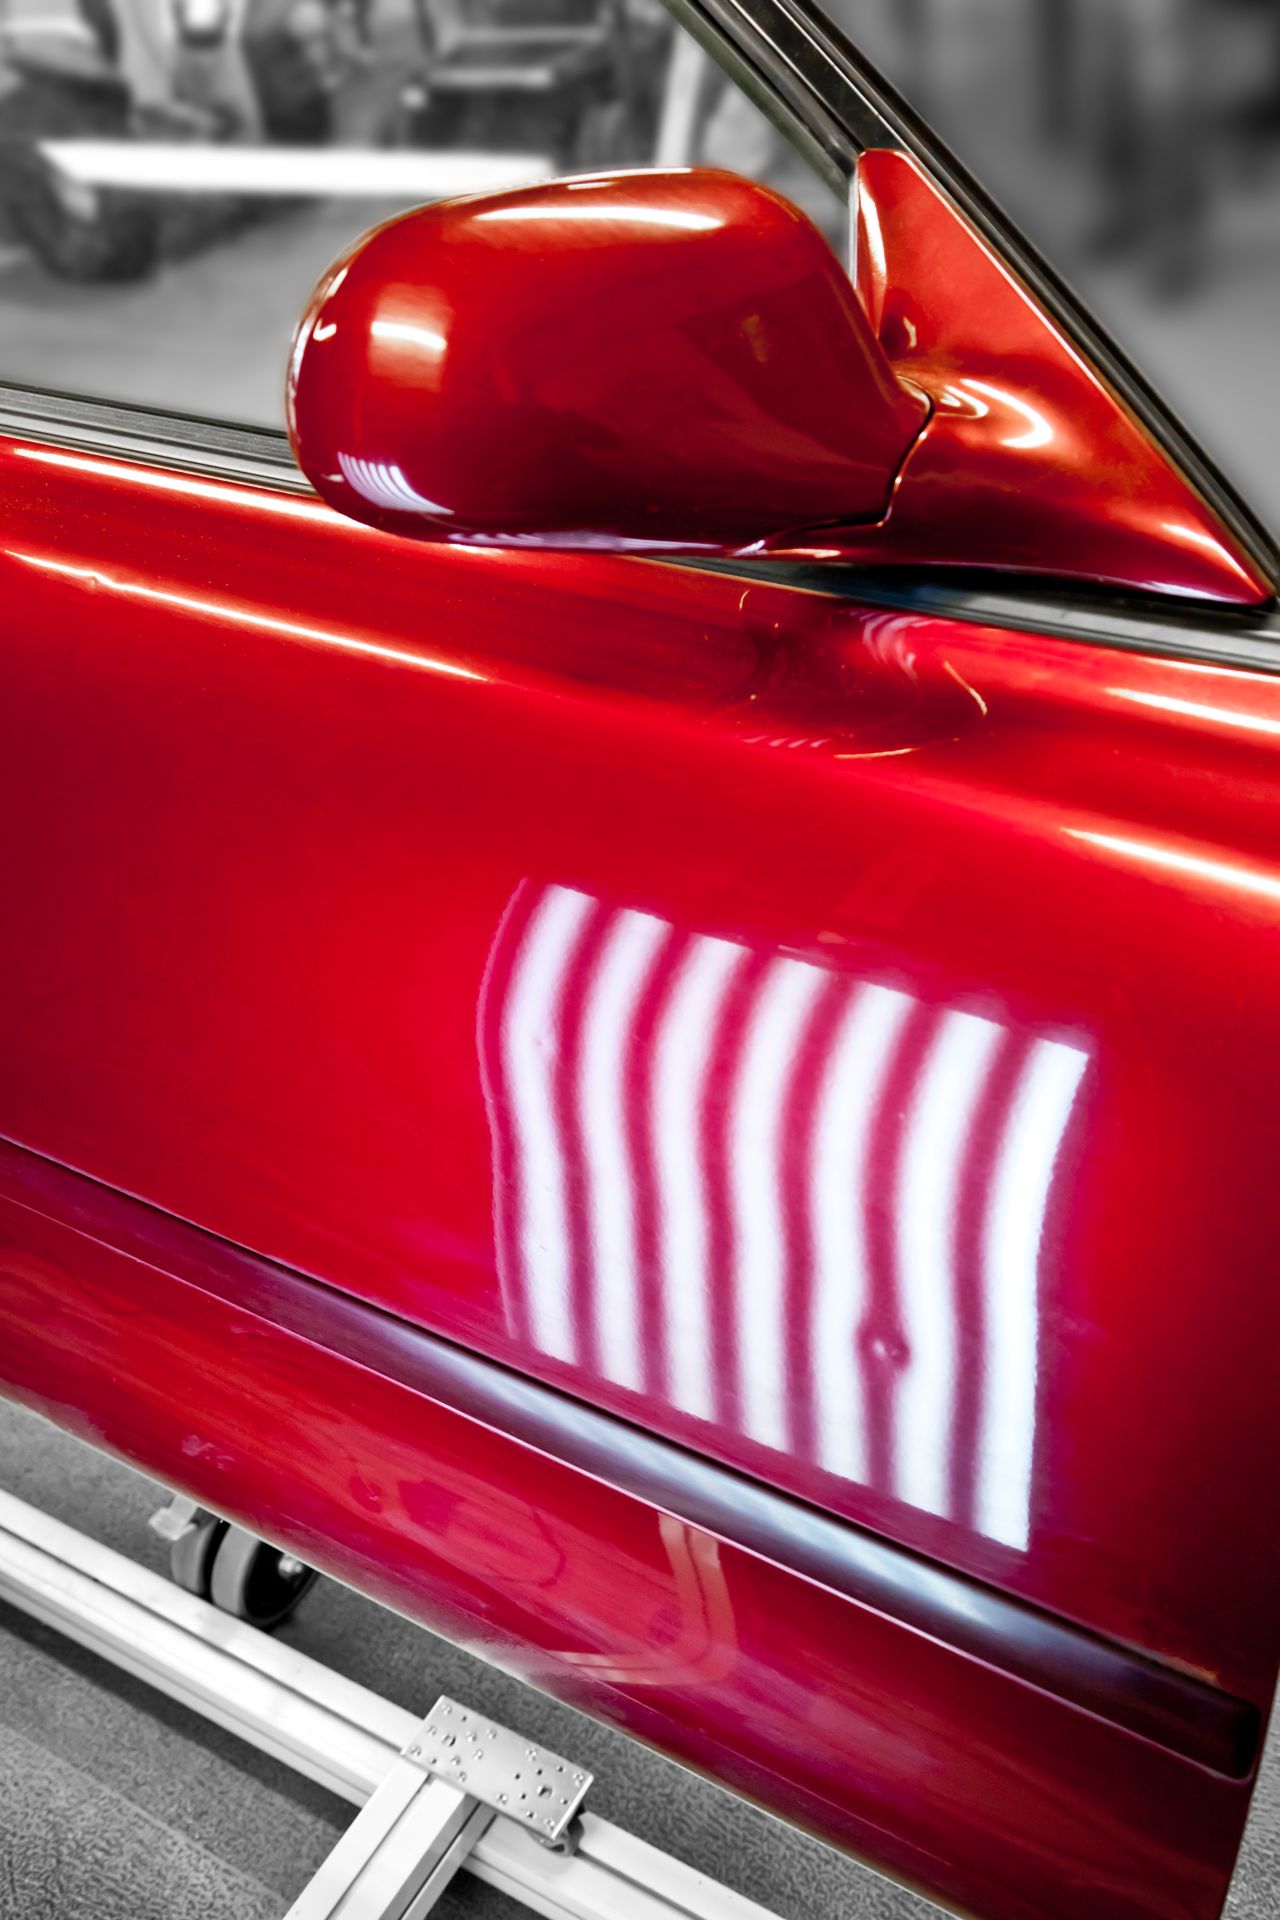
For the inspection of flat or curved reflective surfaces, Fraunhofer IOSB uses the deflectometry method. It can be used to examine embossed, polished, painted or glazed surfaces made of plastic, metal, glass and other materials. As a result, information is available on the location, size and type of functional or aesthetic defects and, if required, on the shape and waviness of the surface. Possible applications for the method can be found wherever defect-free surfaces of low roughness are required. A portable system for inspecting up to 30 x 10 cm² workpieces will be presented at the Control booth.

Exhibitor: Fraunhofer IOSB, Karlsruhe


deflectometry-car door
© Fraunhofer IOSB
Deflectometry for testing curved reflective surfaces - here using the example of a car door.

Fast, precise and non-destructive process monitoring with laser speckle photometry           

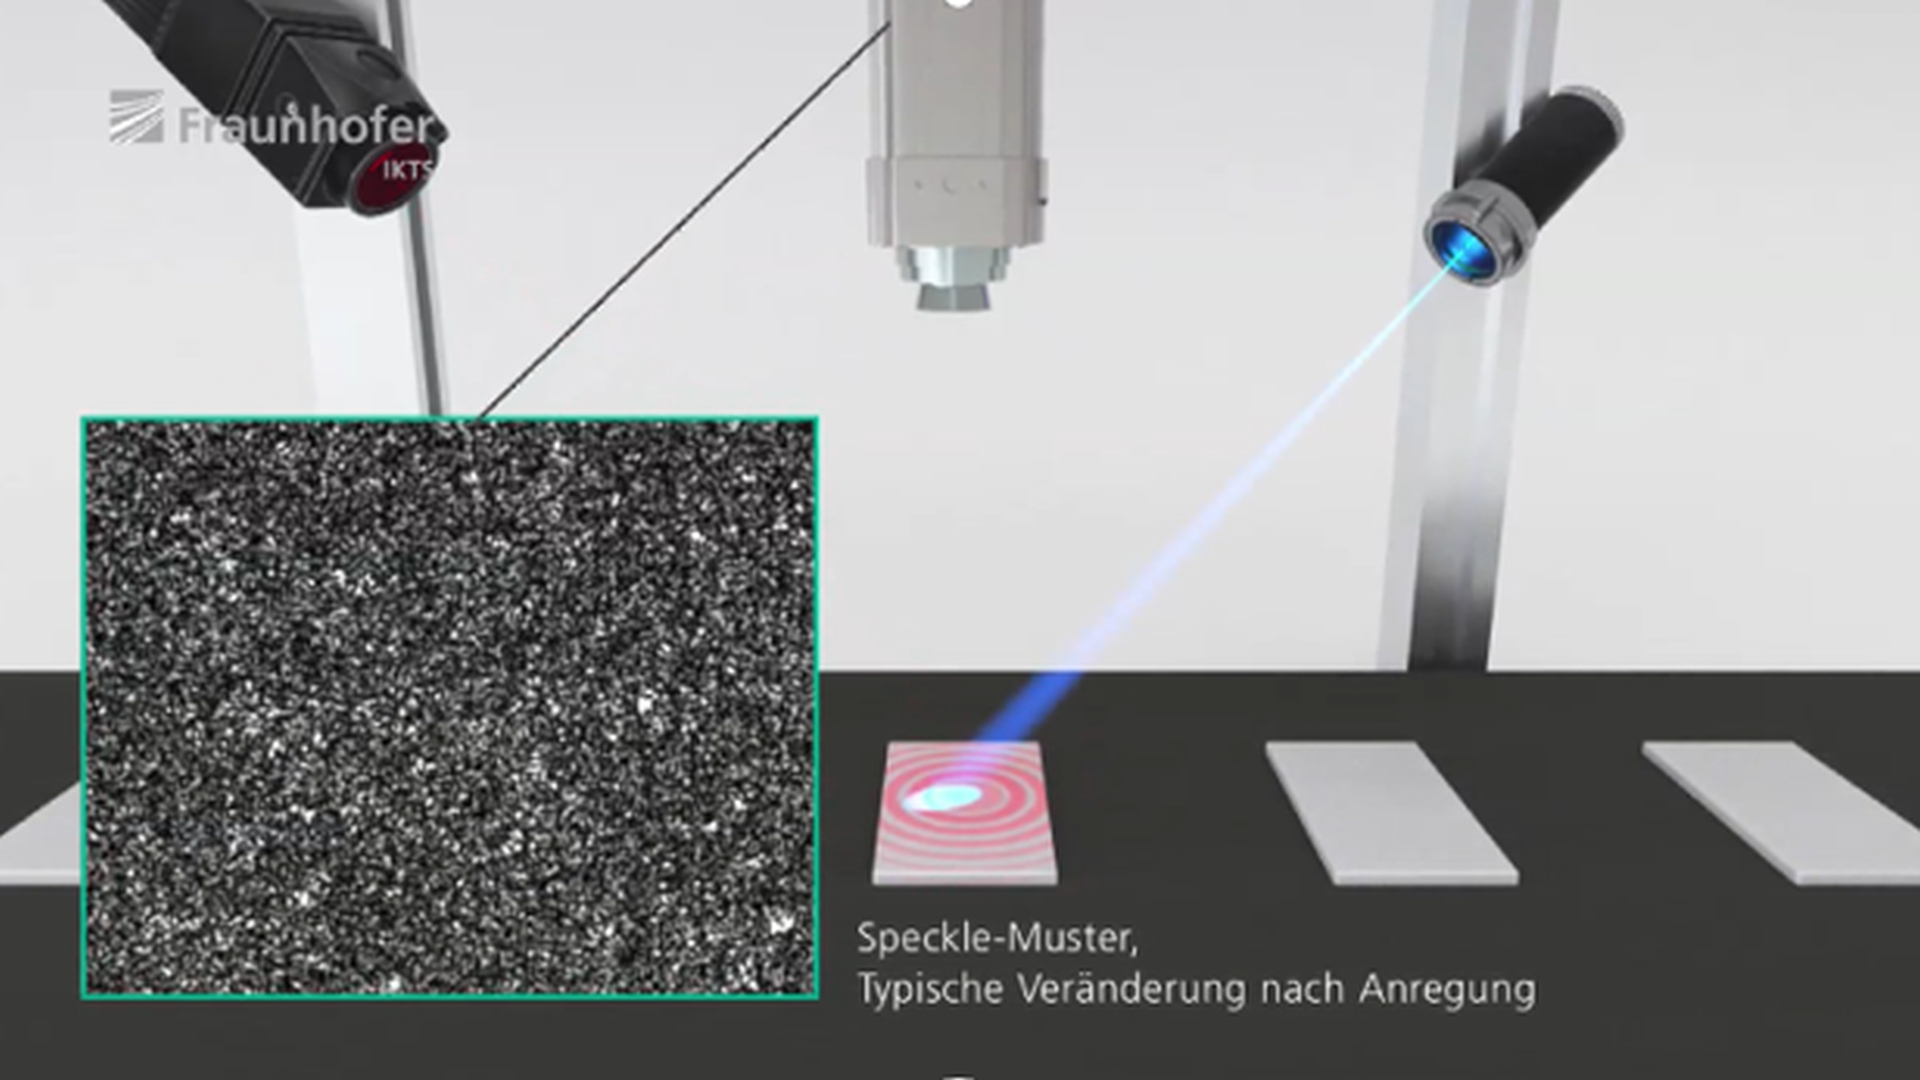
Laser speckle photometry (LSP) developed at Fraunhofer IKTS is a new method for inline monitoring of industrial processes. The robust and cost-effective system analyzes surface properties and draws conclusions about surface defects, porosity or thermal properties for almost all material classes.                                                          

Exhibitor: Fraunhofer IKTS, Dresden

Laser speckle photometry
© Fraunhofer IKTS
Laser speckle photometry can be used to non-destructively test almost all classes of materials for defects. The measurement setup consists of a laser diode (left), digital camera (center) and excitation source (right).

AR-supported assembly for bringing together complex product configurations

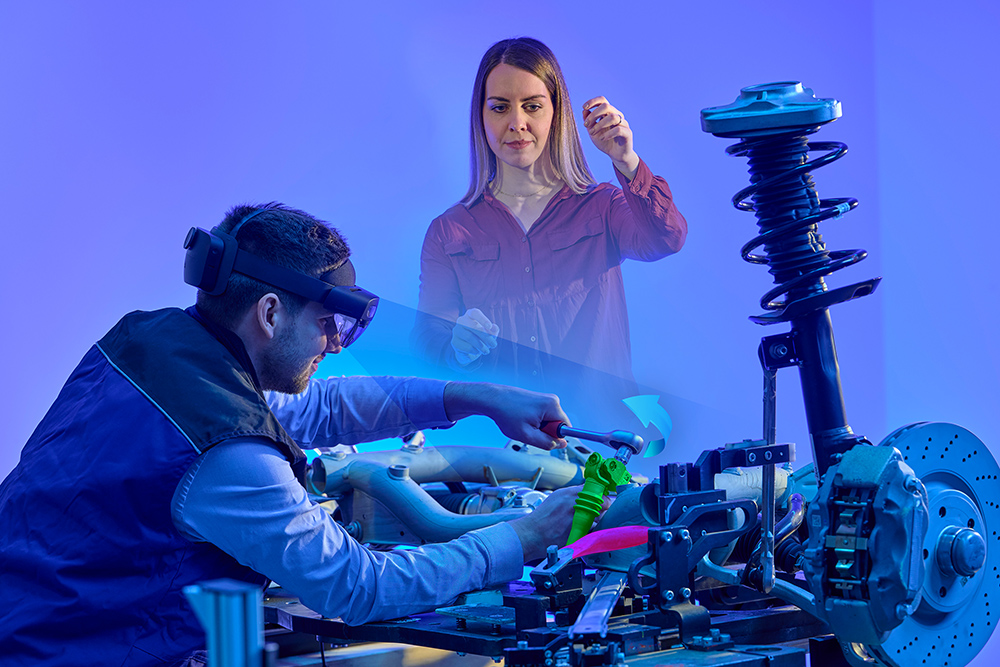
Fraunhofer IGD has combined augmented reality (AR) and artificial intelligence (AI) to help users meet the challenges of modern production. The solution consists of an AR-supported assembly workstation that guides employees through the assembly sequence while simultaneously facilitating quality control of components as well as remote support. In this way, manufacturers can reduce error rates and eliminate cost-intensive downtimes.

Press release Guided through the assembly process as if by magic

Exhibitor: Fraunhofer IGD, Darmstadt


AR-supported assembly workstation
© Fraunhofer IGD
The AR-supported assembly workstation of Fraunhofer IGD supports production processes and enables remote experts to be connected as telepresence - a core application of the "Industrial Metaverse".

Optical 3D measurement technology

Automatic fast allaround 3D-shape measurement of uncooperative objects goQUALITY3D

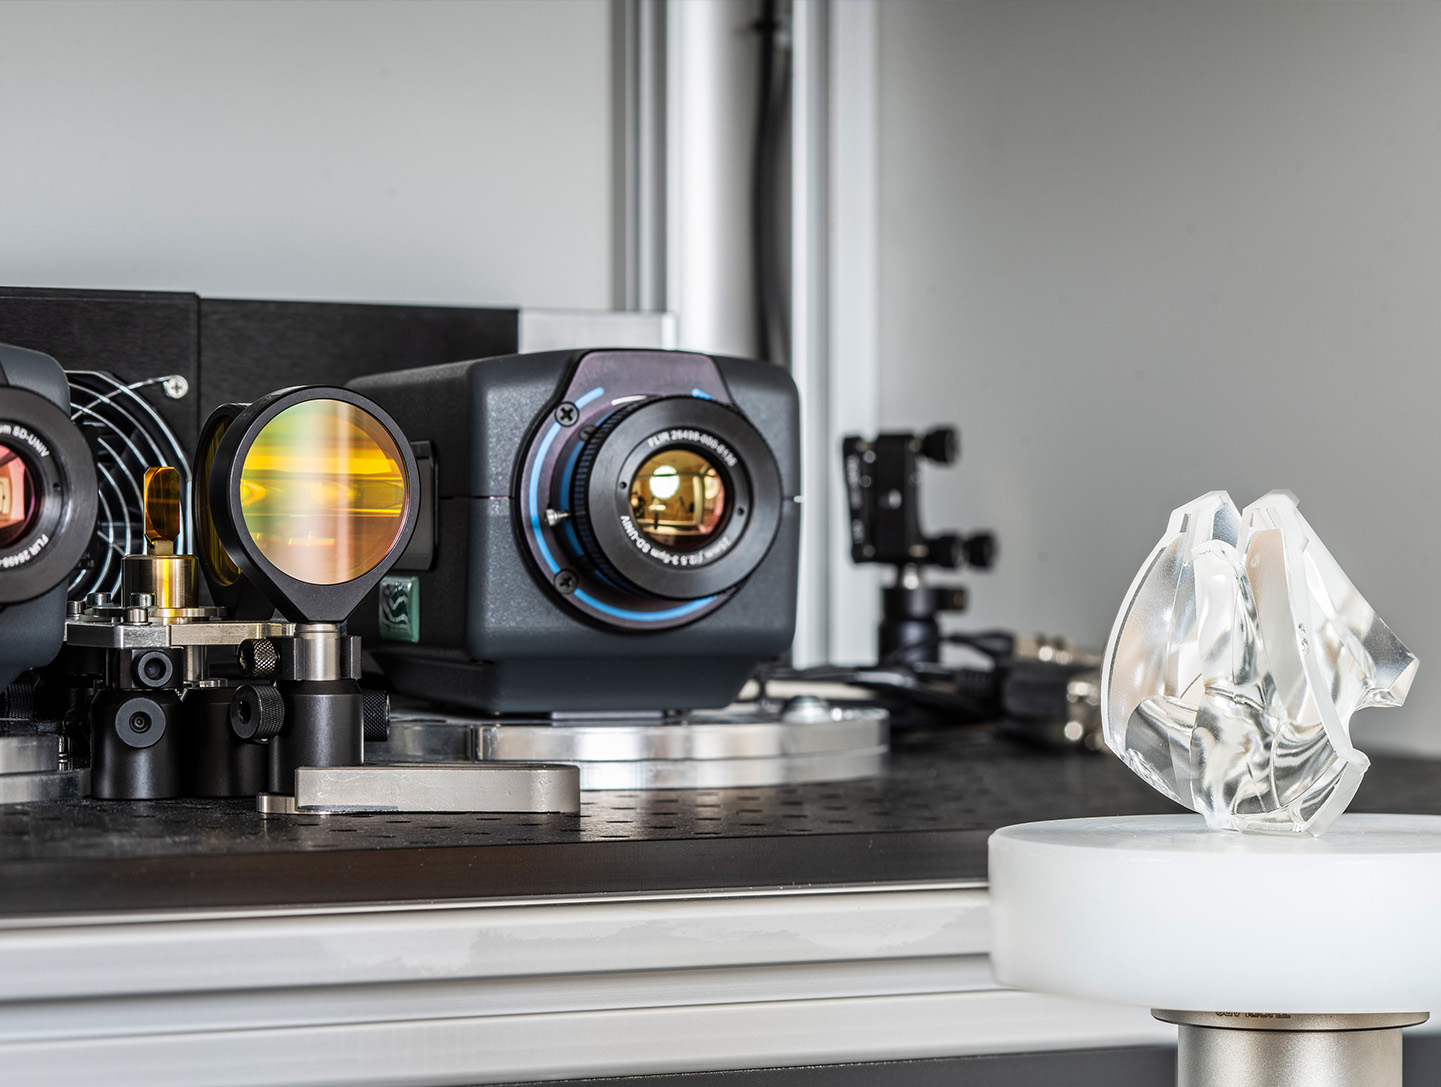
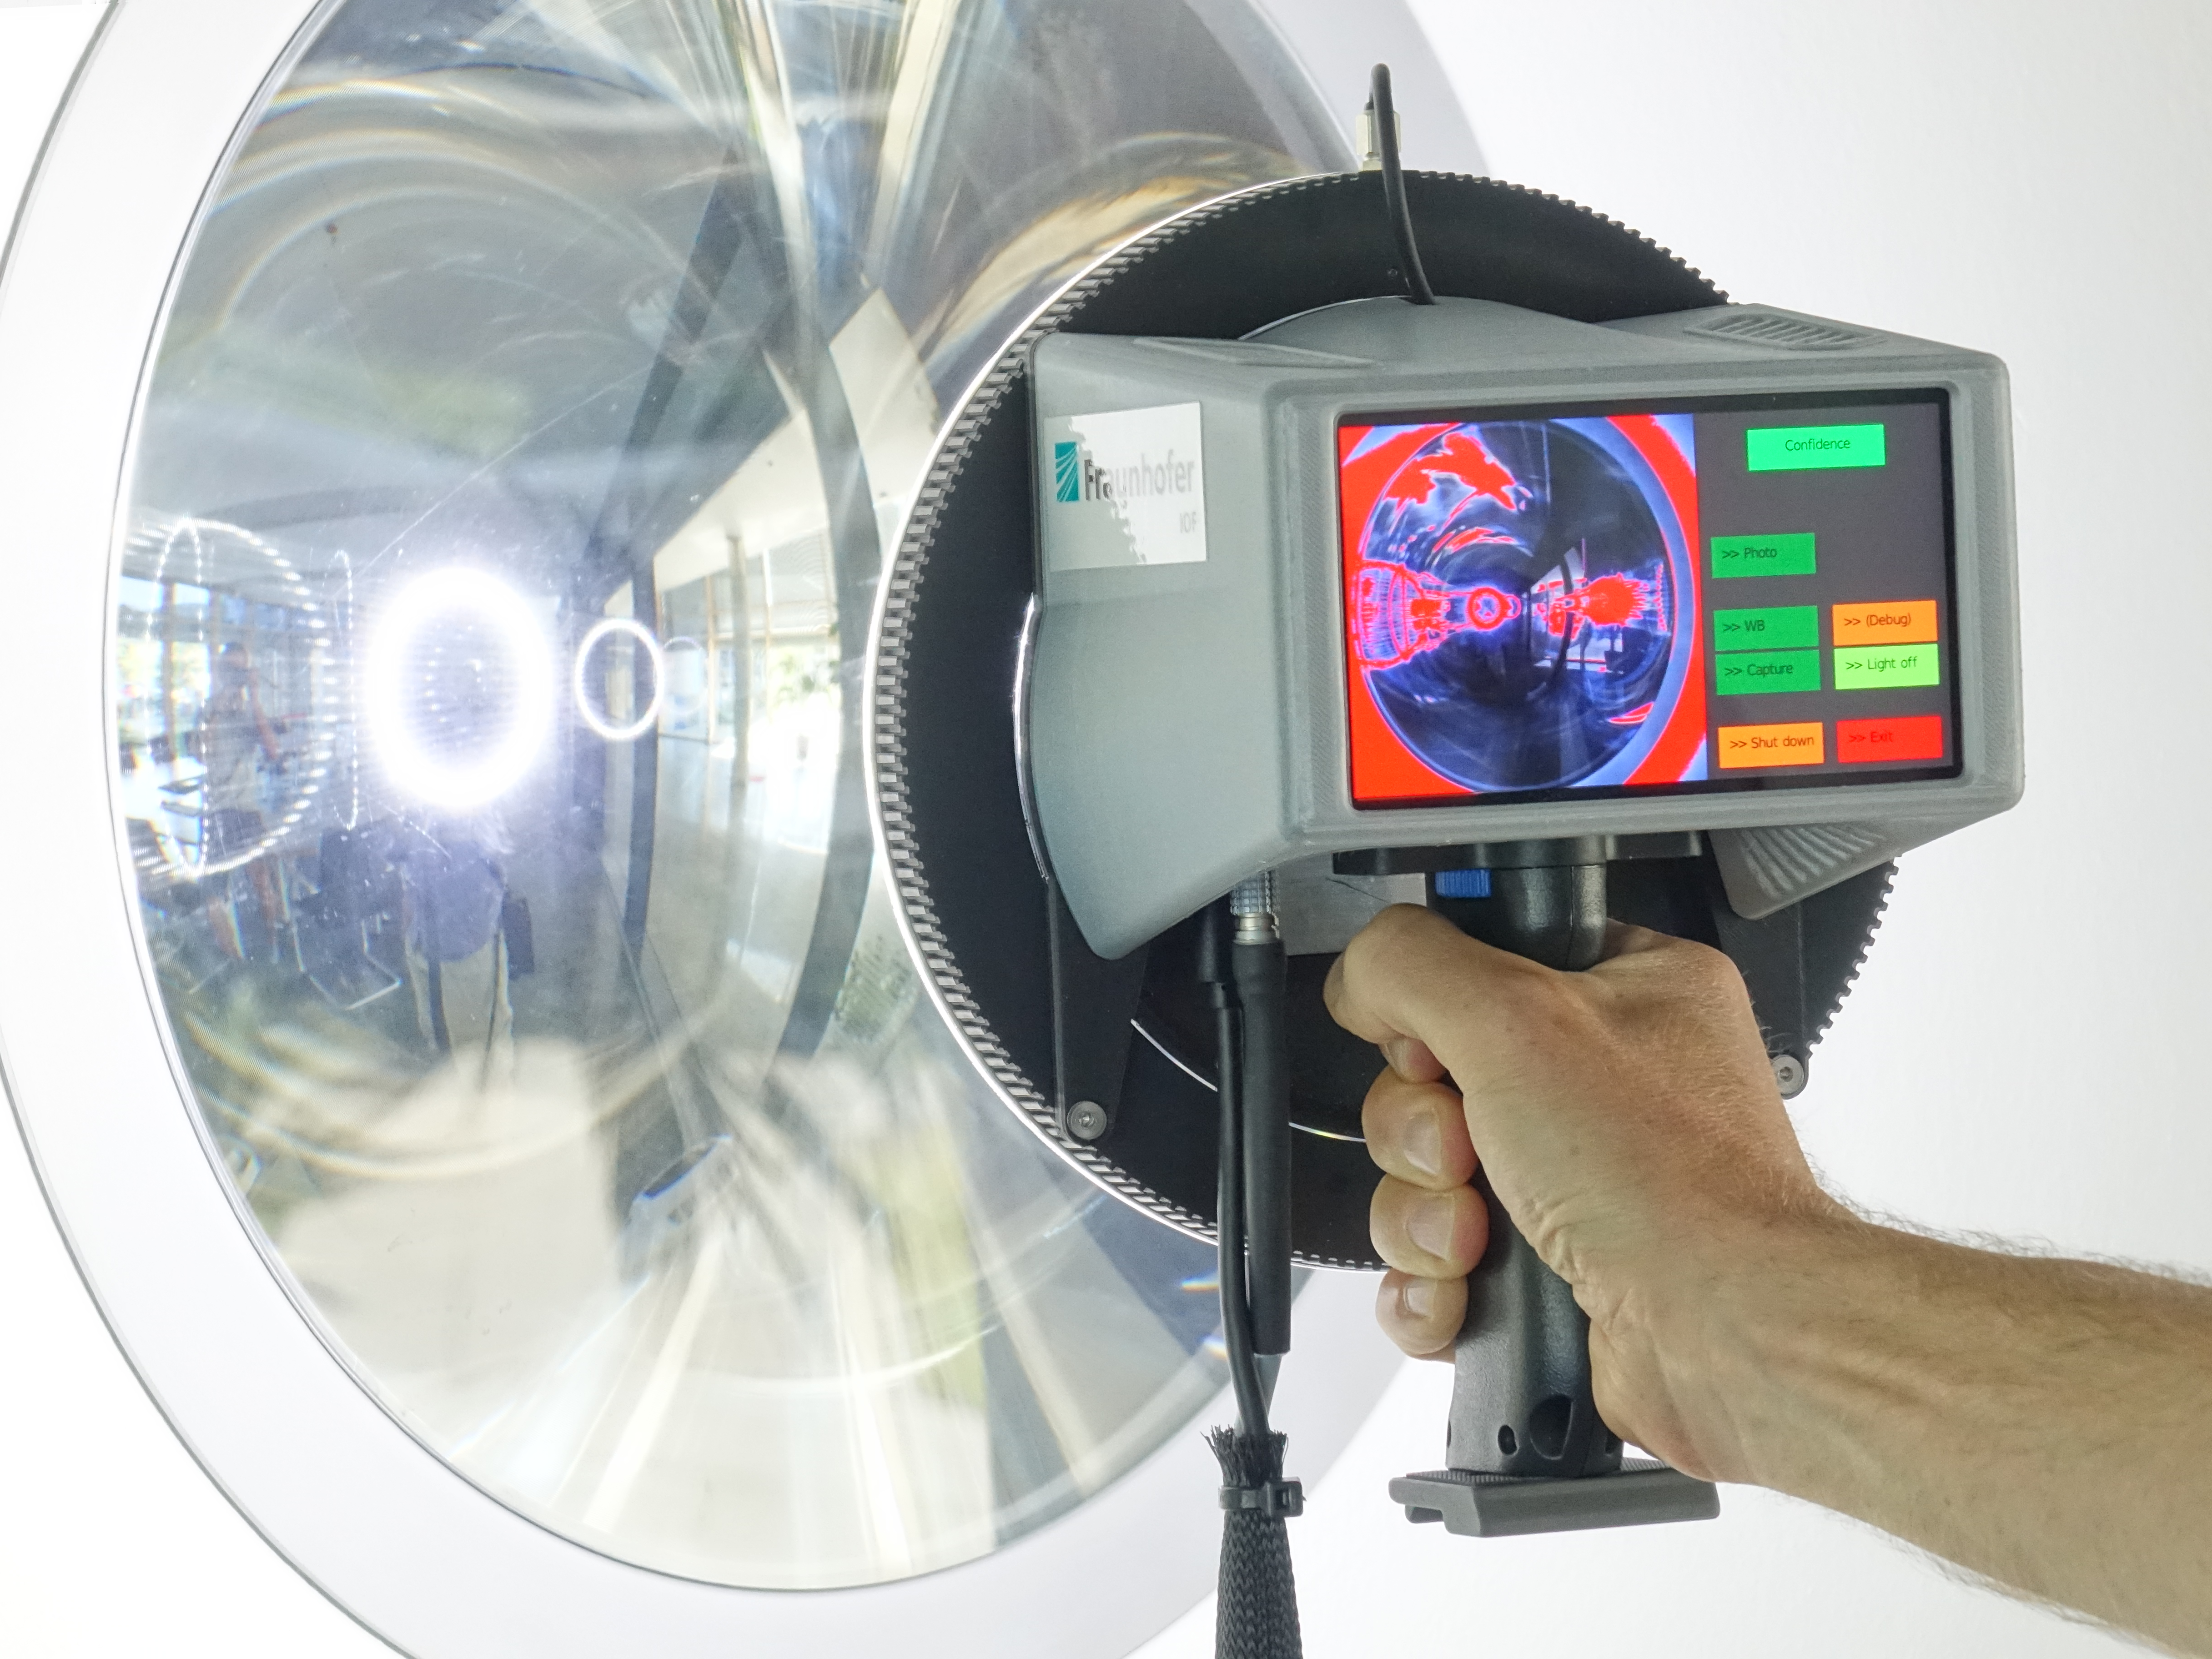
Contactless detection of the surface shape of transparent objects is a major technical challenge. With the sensor goQUALITY3D, researchers at Fraunhofer IOF in Jena have developed a sensor that can solve this task. The system combines the methods of infrared laser projection and thermography, enabling for the first time the contactless spatial detection of both transparent objects and components with reflective or light-absorbing surfaces. Applications are especially conceivable in large-scale industrial manufacturing processes such as in the semiconductor or automotive industries.

Exhibitor: Fraunhofer IOF, Jena

3D-measurement technology
© Fraunhofer IOF
goQUALITY3D works with infrared radiation for 3D detection of transparent objects.

Scanner goSCOUT3D for mobile and fully automated 3D measurement of objects

Virtual 3D models of real objects, so-called »digital twins«, offer numerous advantages, be it for digitization or in the quality control of industrial manufacturing. However, the more complex an object, the more difficult it is to measure its shape and transfer it to a 3D model. With goSCOUT3D, a wearable sensor has been developed at Fraunhofer IOF Jena that enables particularly flexible 3D acquisition of objects.

Exhibitor: Fraunhofer IOF, Jena

live preview and feedback on image quality
© Fraunhofer IOF
A display connected to the sensor enables live preview and provides feedback on the expected image quality.

System for fast inline measurement of 3D surfaces with sub-µ accuracy HoloTop

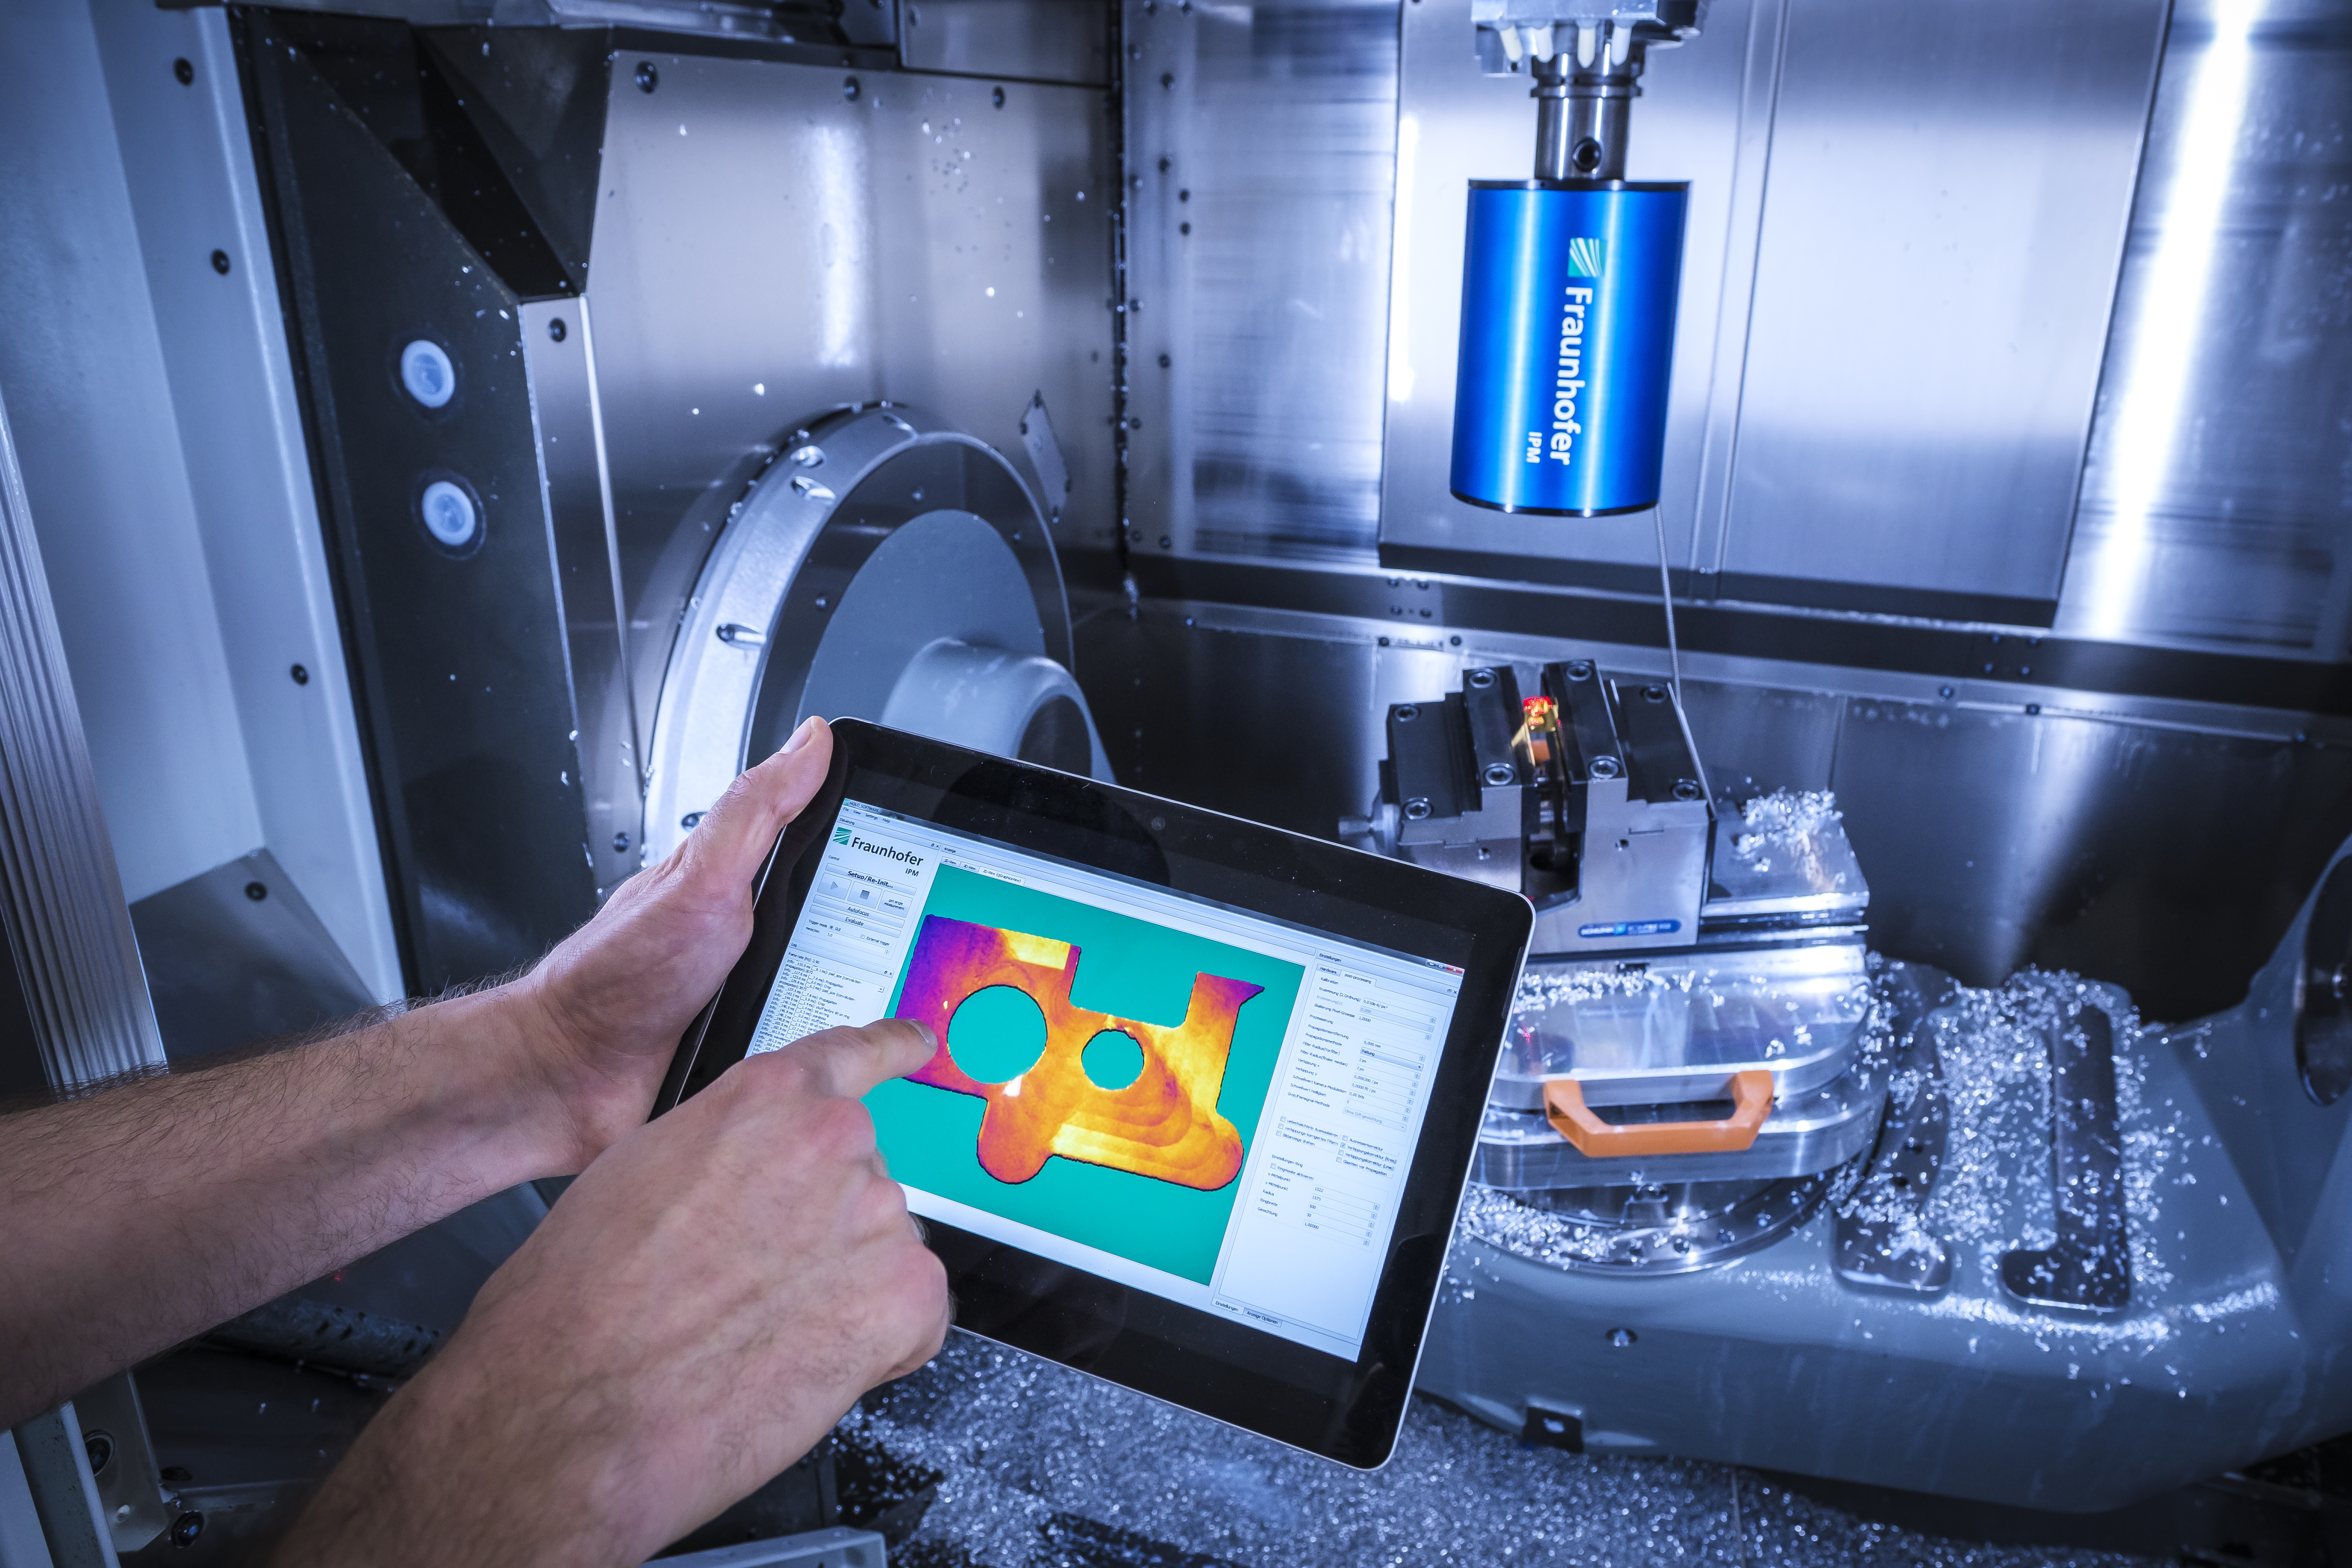
Systems of the HoloTop sensor family from Fraunhofer IPM enable fast and highly accurate 3D measurement of component surfaces directly in the production line. Systems are currently available for detecting surfaces between 15 × 15 mm² and 200 × 150 mm² with lateral resolutions between 3 and 30 µm and accuracies down to less than 0.2 µm (3σ). HoloTop systems are used, for example, in the quality control of precision metallic surfaces (especially sealing surfaces) or electronic components (microbump structures or high-current circuit boards). At the Control booth, a ready-to-use HoloTop 9M18 system will be presented, which enables the measurement of an area of 18 × 18 mm² with 9 million 3D points in less than 60 ms. Single point repeatabilities of less than 1 µm (3σ) are achieved under production conditions. The quality of the measurement data will be illustrated using various sample specimens, but there will also be the opportunity to measure your own specimens live.

Exhibitor: Fraunhofer IPM, Freiburg

Holography HoloTopNX-Tablet
© Fraunhofer IPM
Use in machine tool and wireless measurement result transmission and display on tablet for the employee.

Inline 3D production metrology and assembly inspection: system solutions and software modules

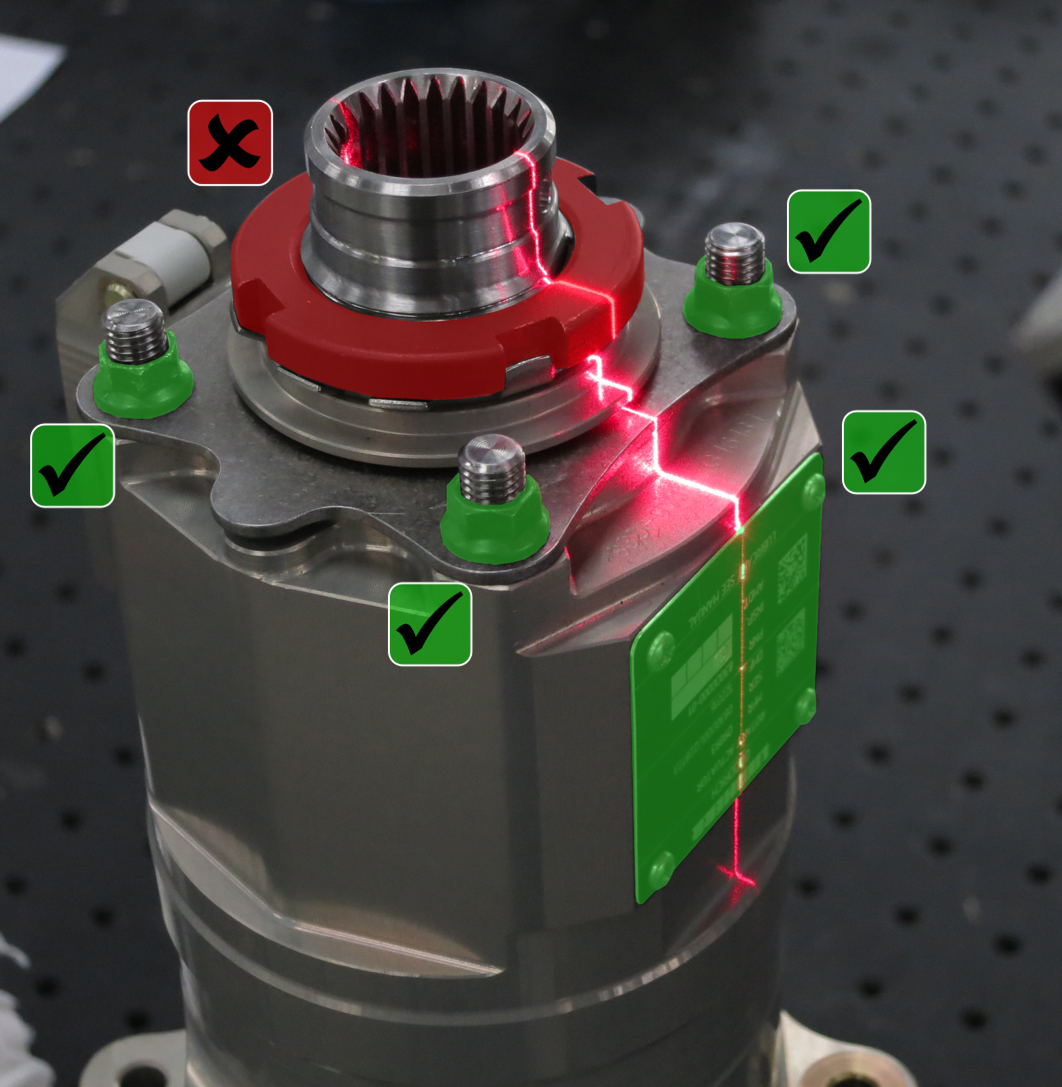
In the manufacturing of individualized products with a high number of variants, more flexible and adaptive optical measurement and inspection systems are increasingly needed for inline quality inspection. The Fraunhofer IFF develops such customized and flexible 3D measuring systems for dimensional and form inspection as well as for assembly and completeness inspection. Individual functional modules are also available as software libraries, such as geometric evaluation of 3D point clouds, simulation of optical sensors to generate synthetic target data, flexible CAD-supported view and inspection planning in 2D and 3D or calibration and calibration of optical sensors. The objective are economic and automated solutions despite individual products and small batch sizes.

Exhibitor: Fraunhofer IFF, Magdeburg

3D-measurement technology
© Fraunhofer IFF
Model-based inspection of an assembled component for completeness and correctness.

Non-destructive testing


Detection of foreign bodies and quality deviations in materials

The SAMMI 3.0 (Stand Alone Millimeter Wave Imaging) millimeter wave scanner generates three-dimensional images of a wide variety of materials, making their internal structures visible. The system is based on a millimeter wave radar and operates in the 70 GHz to 80 GHz range. A typical application is the inspection of 3D-printed plastic objects, but other products such as packaged food can also be examined.

Exhibitor: Fraunhofer FHR, Wachtberg


Measurement of quality deviations on production lines
© Fraunhofer FHR
Measurement of quality deviations on production lines.

BM18: A world-unique beamline for multiresolution tomography of large objects

In 2020, the ESRF (European Synchrotron Radiation Facility) in Grenoble, France, launched a brand-new, first-of-a-kind synchrotron, the Extremely Brilliant Source (EBS), providing the global scientific community with high-energy X-ray beams with unprecedented brightness and coherence to study the structure of matter in all its complexity down to the nanoscale.
At the Control 2023, Fraunhofer EZRT, one of the cooperation partners of ESRF, will present Beamline 18 with its new technical possibilities for research and development, resulting from the availability of high-resolution xray images of aeroplane or car parts, batteries or composite materials.

more on beamline for multiresolution tomography of large objects

Exhibitor: Fraunhofer EZRT, Fürth

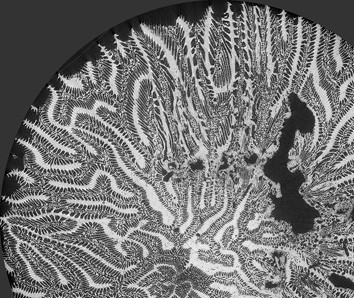
X-ray image of a coral
© European Synchrotron Radiation Facility (ESRF)
X-ray image of a coral.

Layer thickness measurement with terahertz

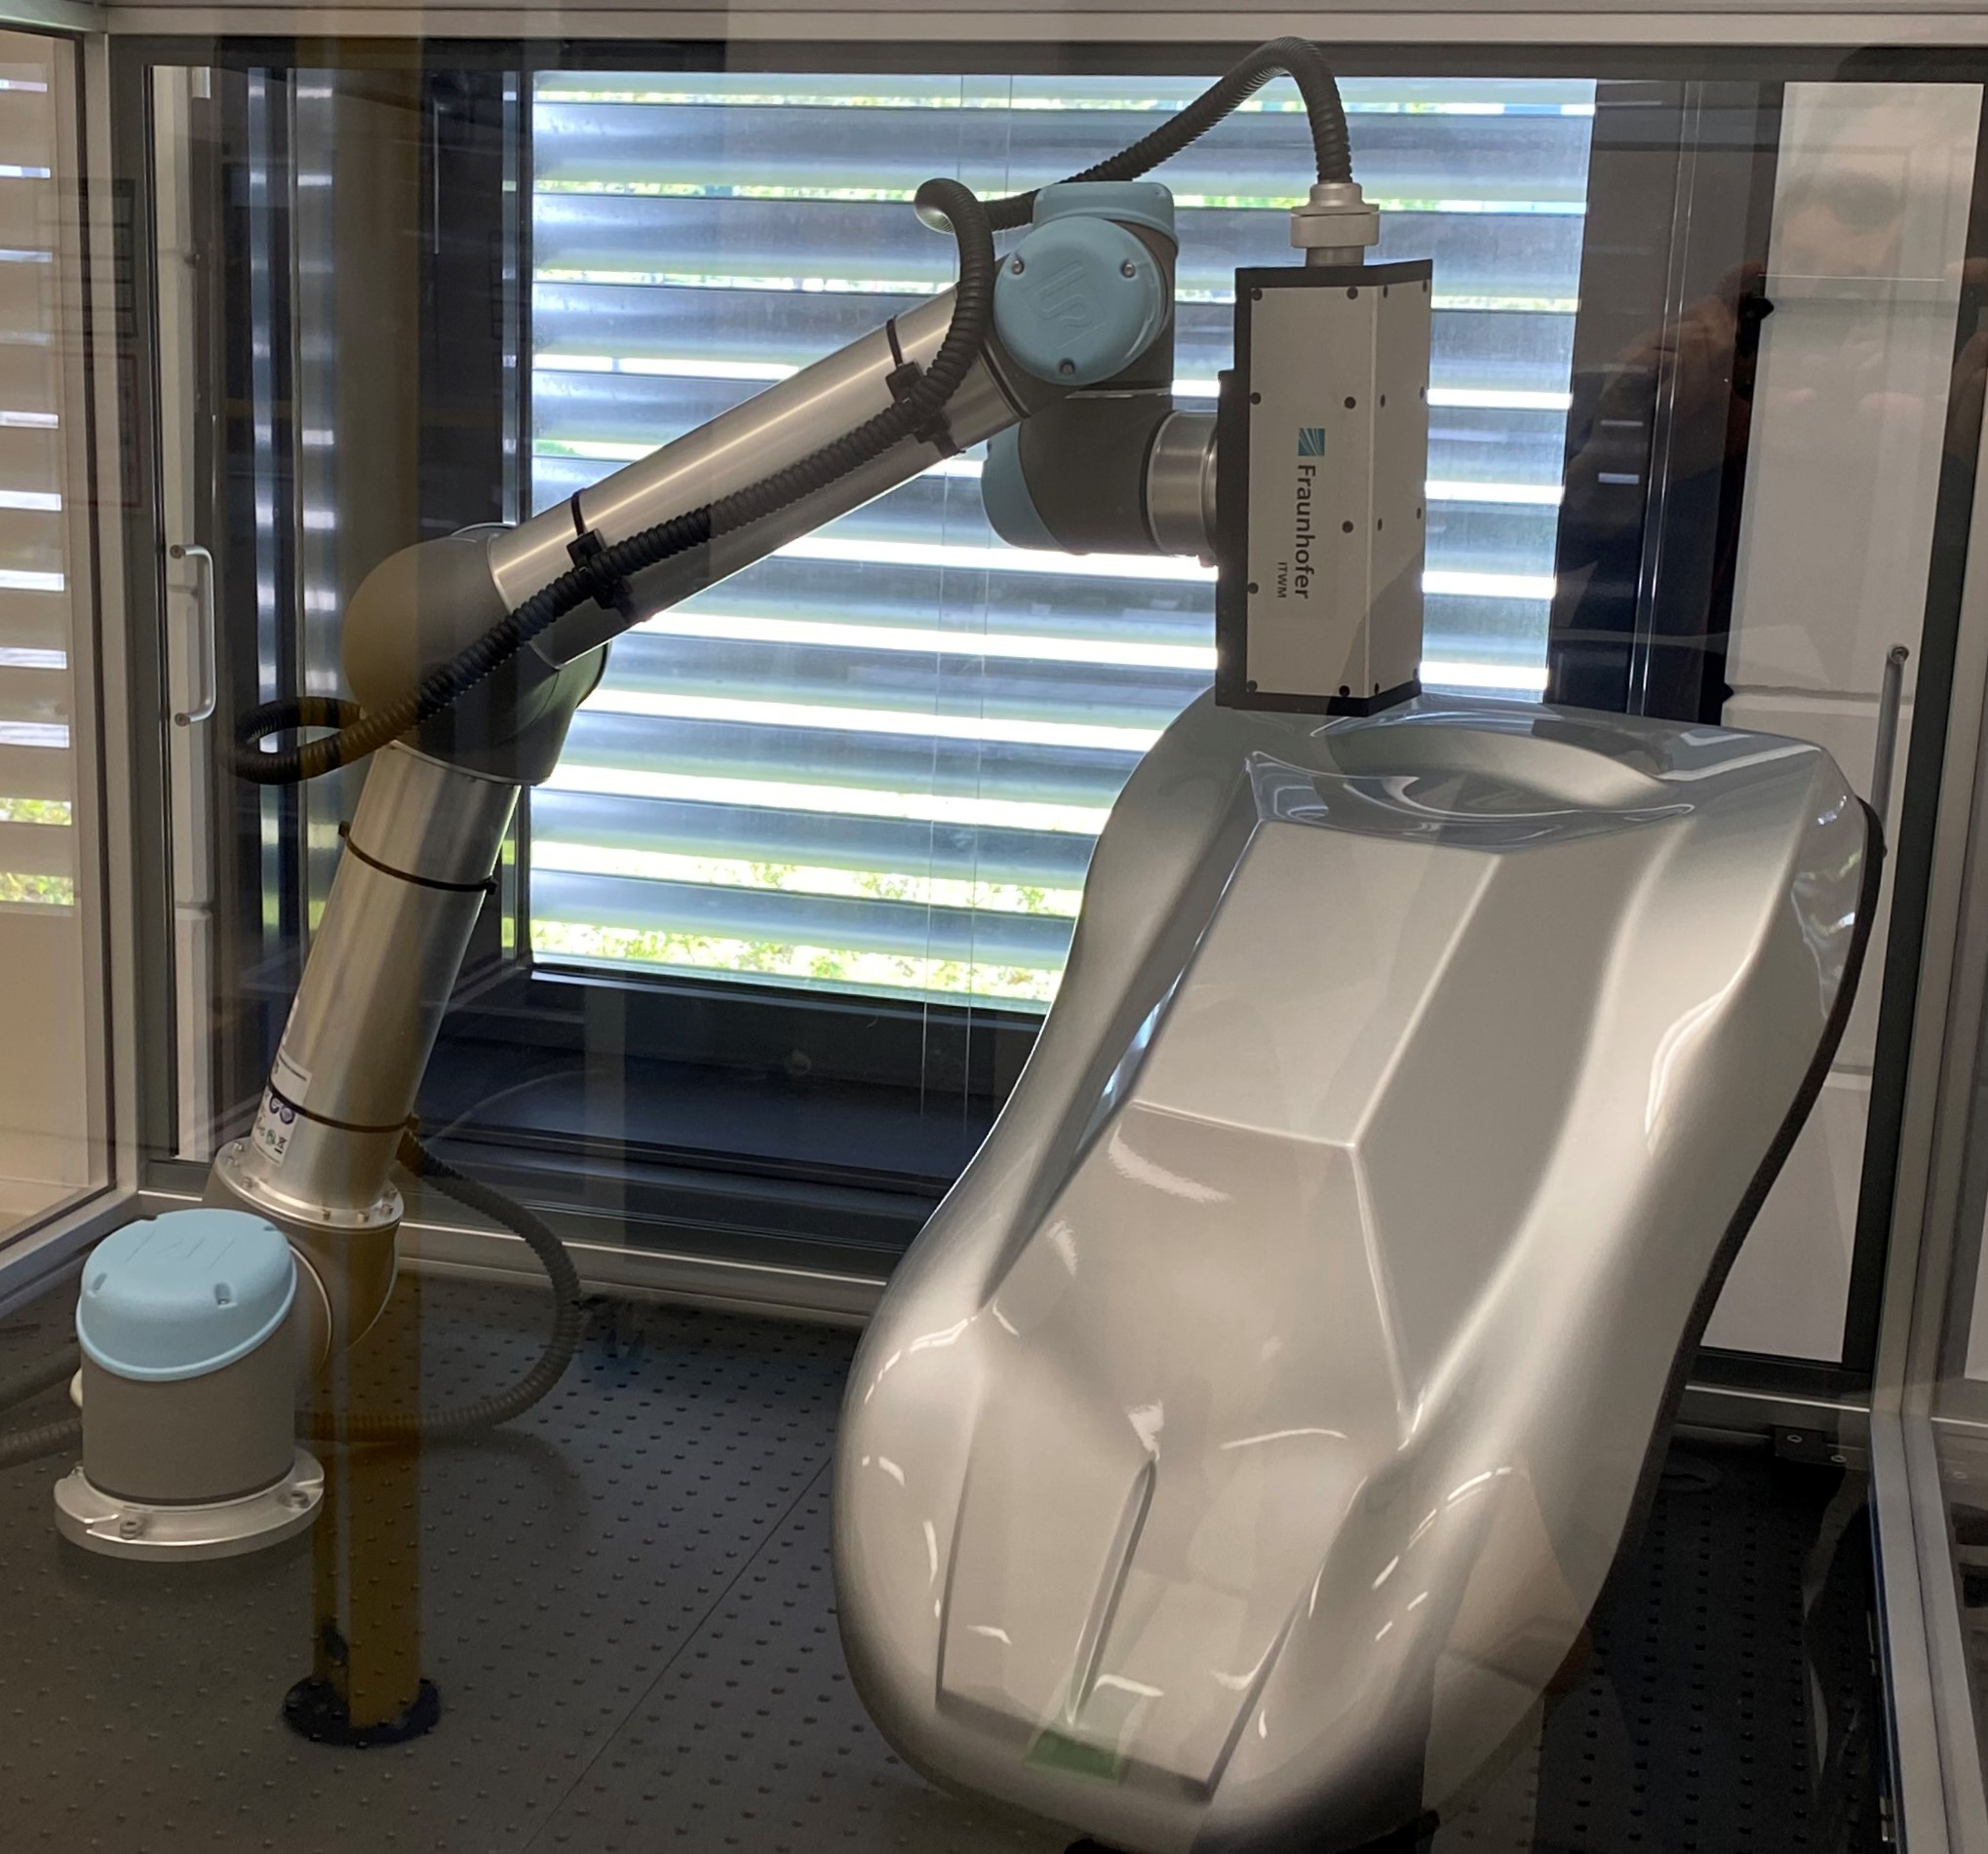
At the Fraunhofer ITWM in Kaiserslautern, terahertz measurement systems are developed which can be used, among other things, to measure layer thicknesses in industrial environments. As the latest version of the terahertz layer thickness measurement system, a robot-assisted variant is now available, i.e., a collaborative robot, or »cobot« for short, is used for simplified integration into the working environment. The Fraunhofer ITWM system is particularly suitable for the thickness measurement of individual layers within a multilayer system, where the coating can be applied to any material. In addition, moist, sticky, and soft coatings and layers on curved surfaces can also be measured.

Exhibitor: Fraunhofer ITWM, Kaiserslautern

Cobot-mounted terahertz measurement system
© Fraunhofer ITWM
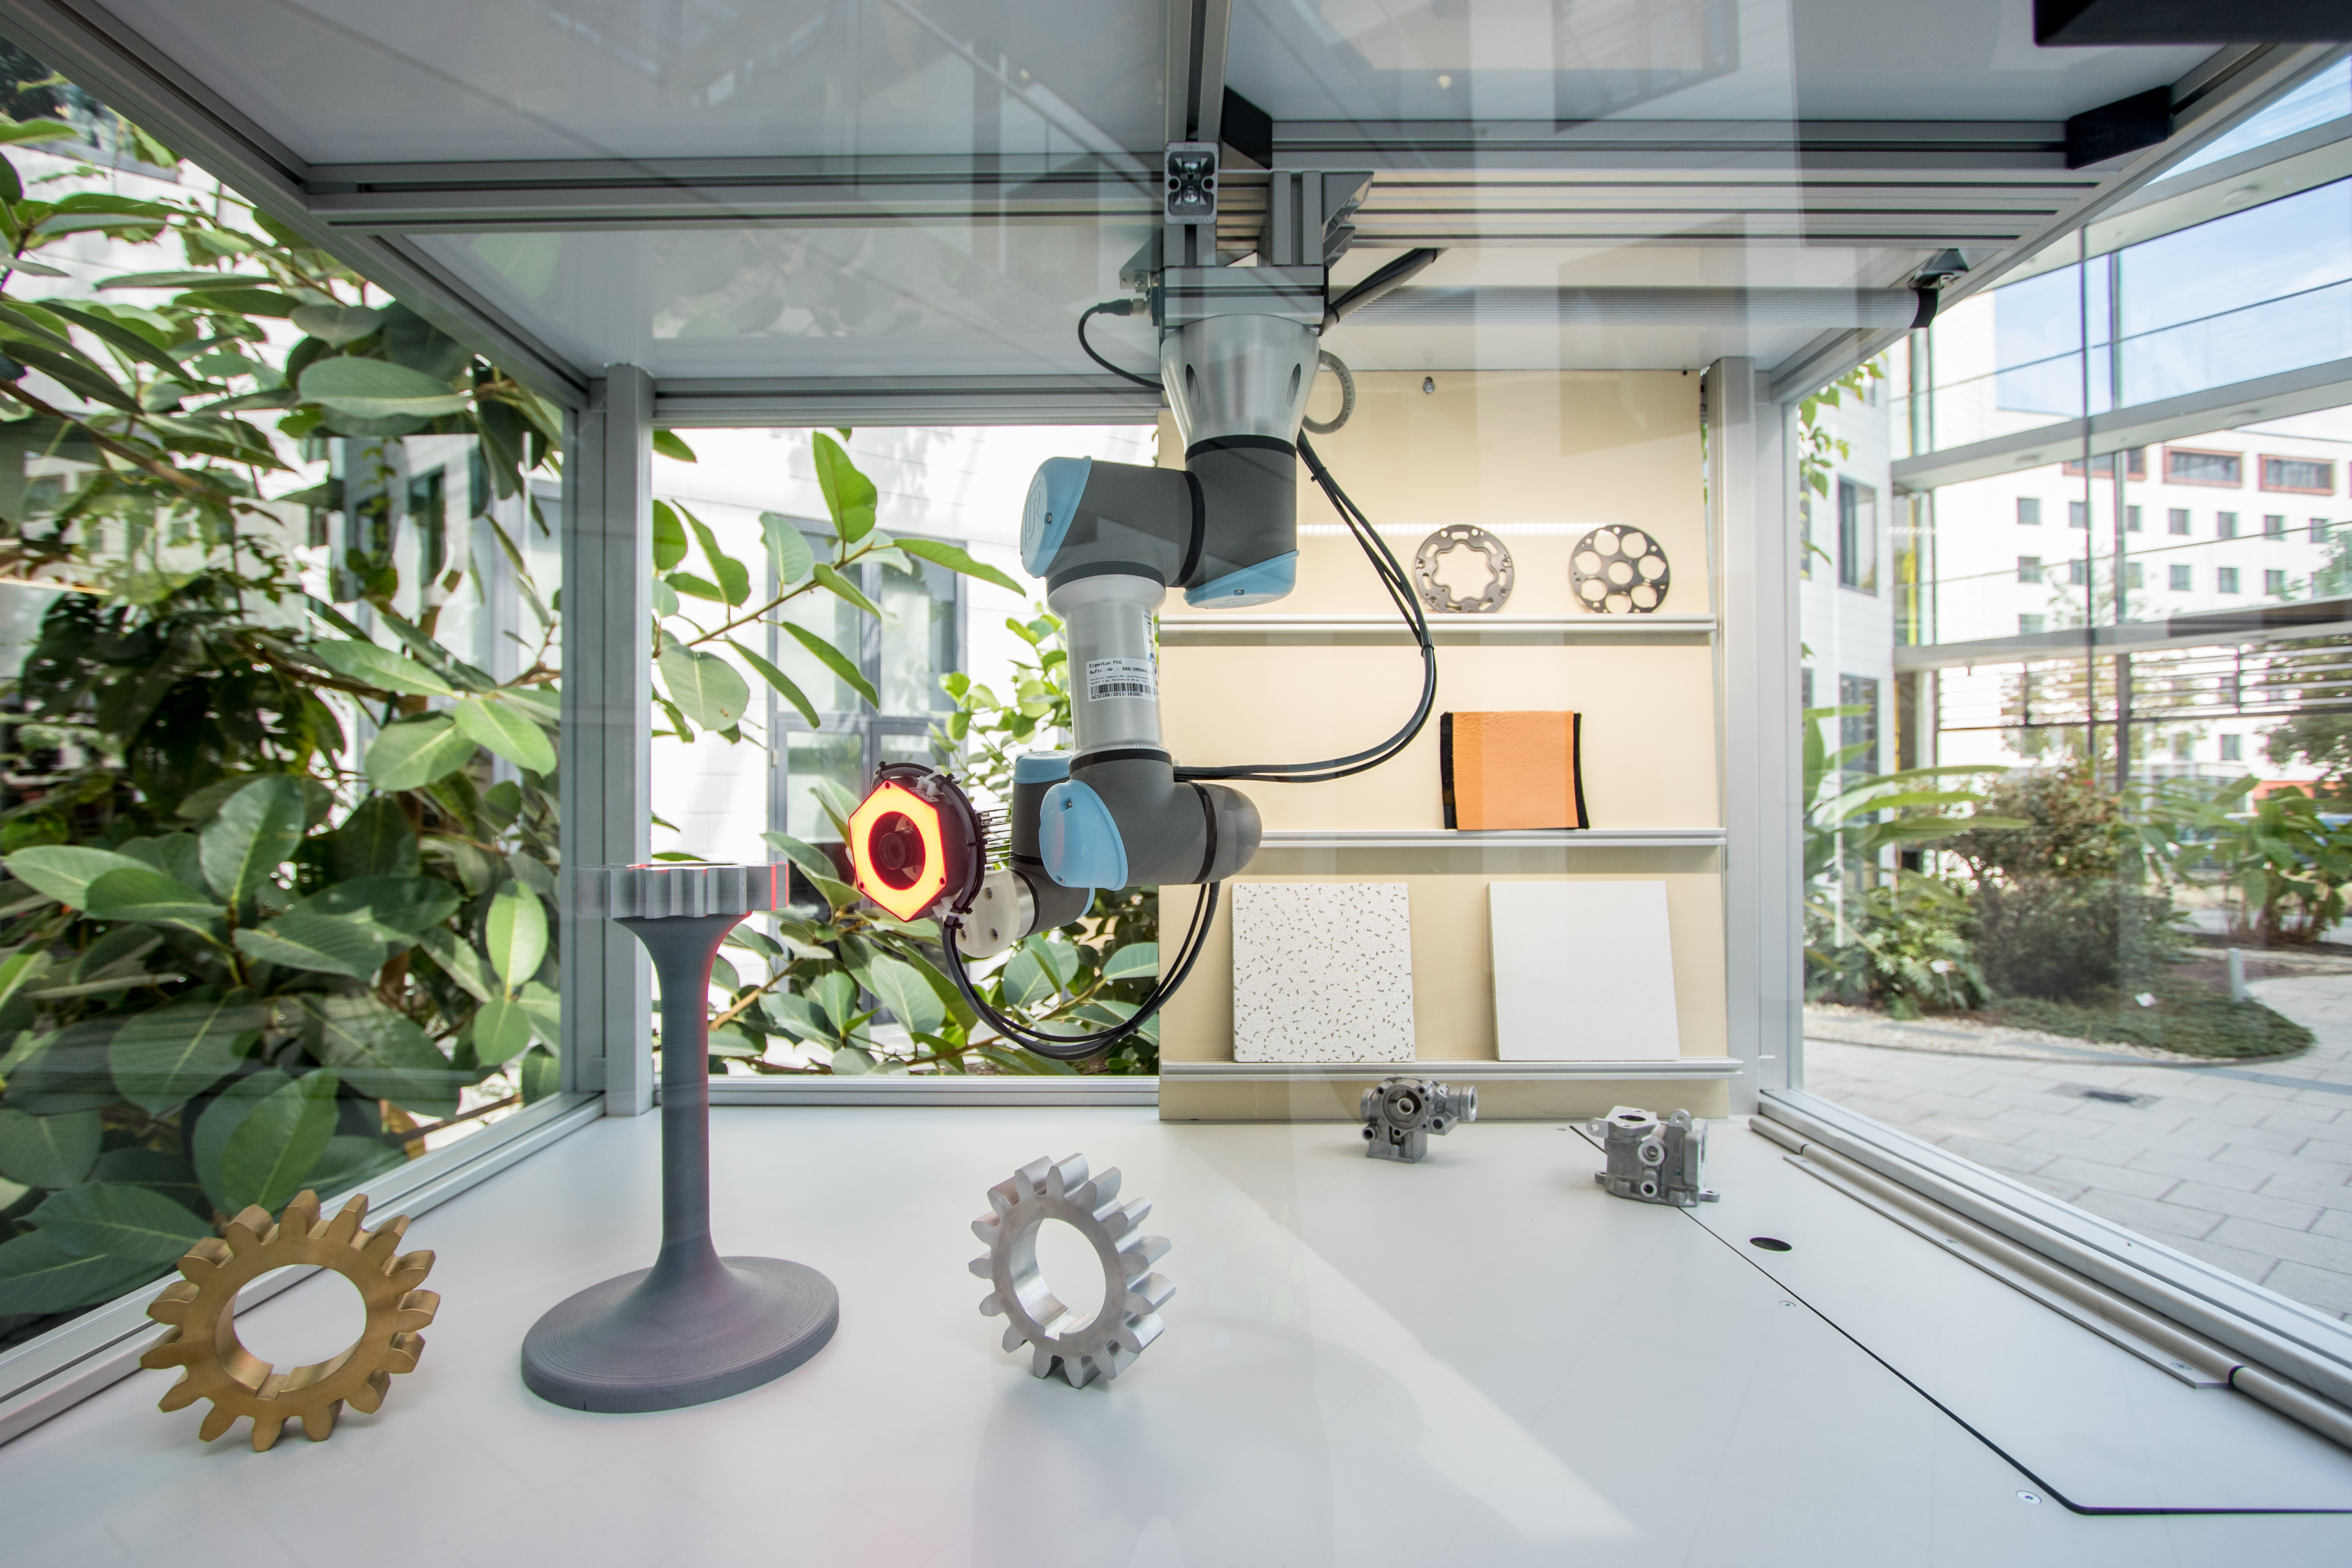
Cobot-mounted terahertz measurement system for inline inspection of paint finishes

Intelligent assistance system with interactive visualization for laboratory and service tasks in non-destructive testing

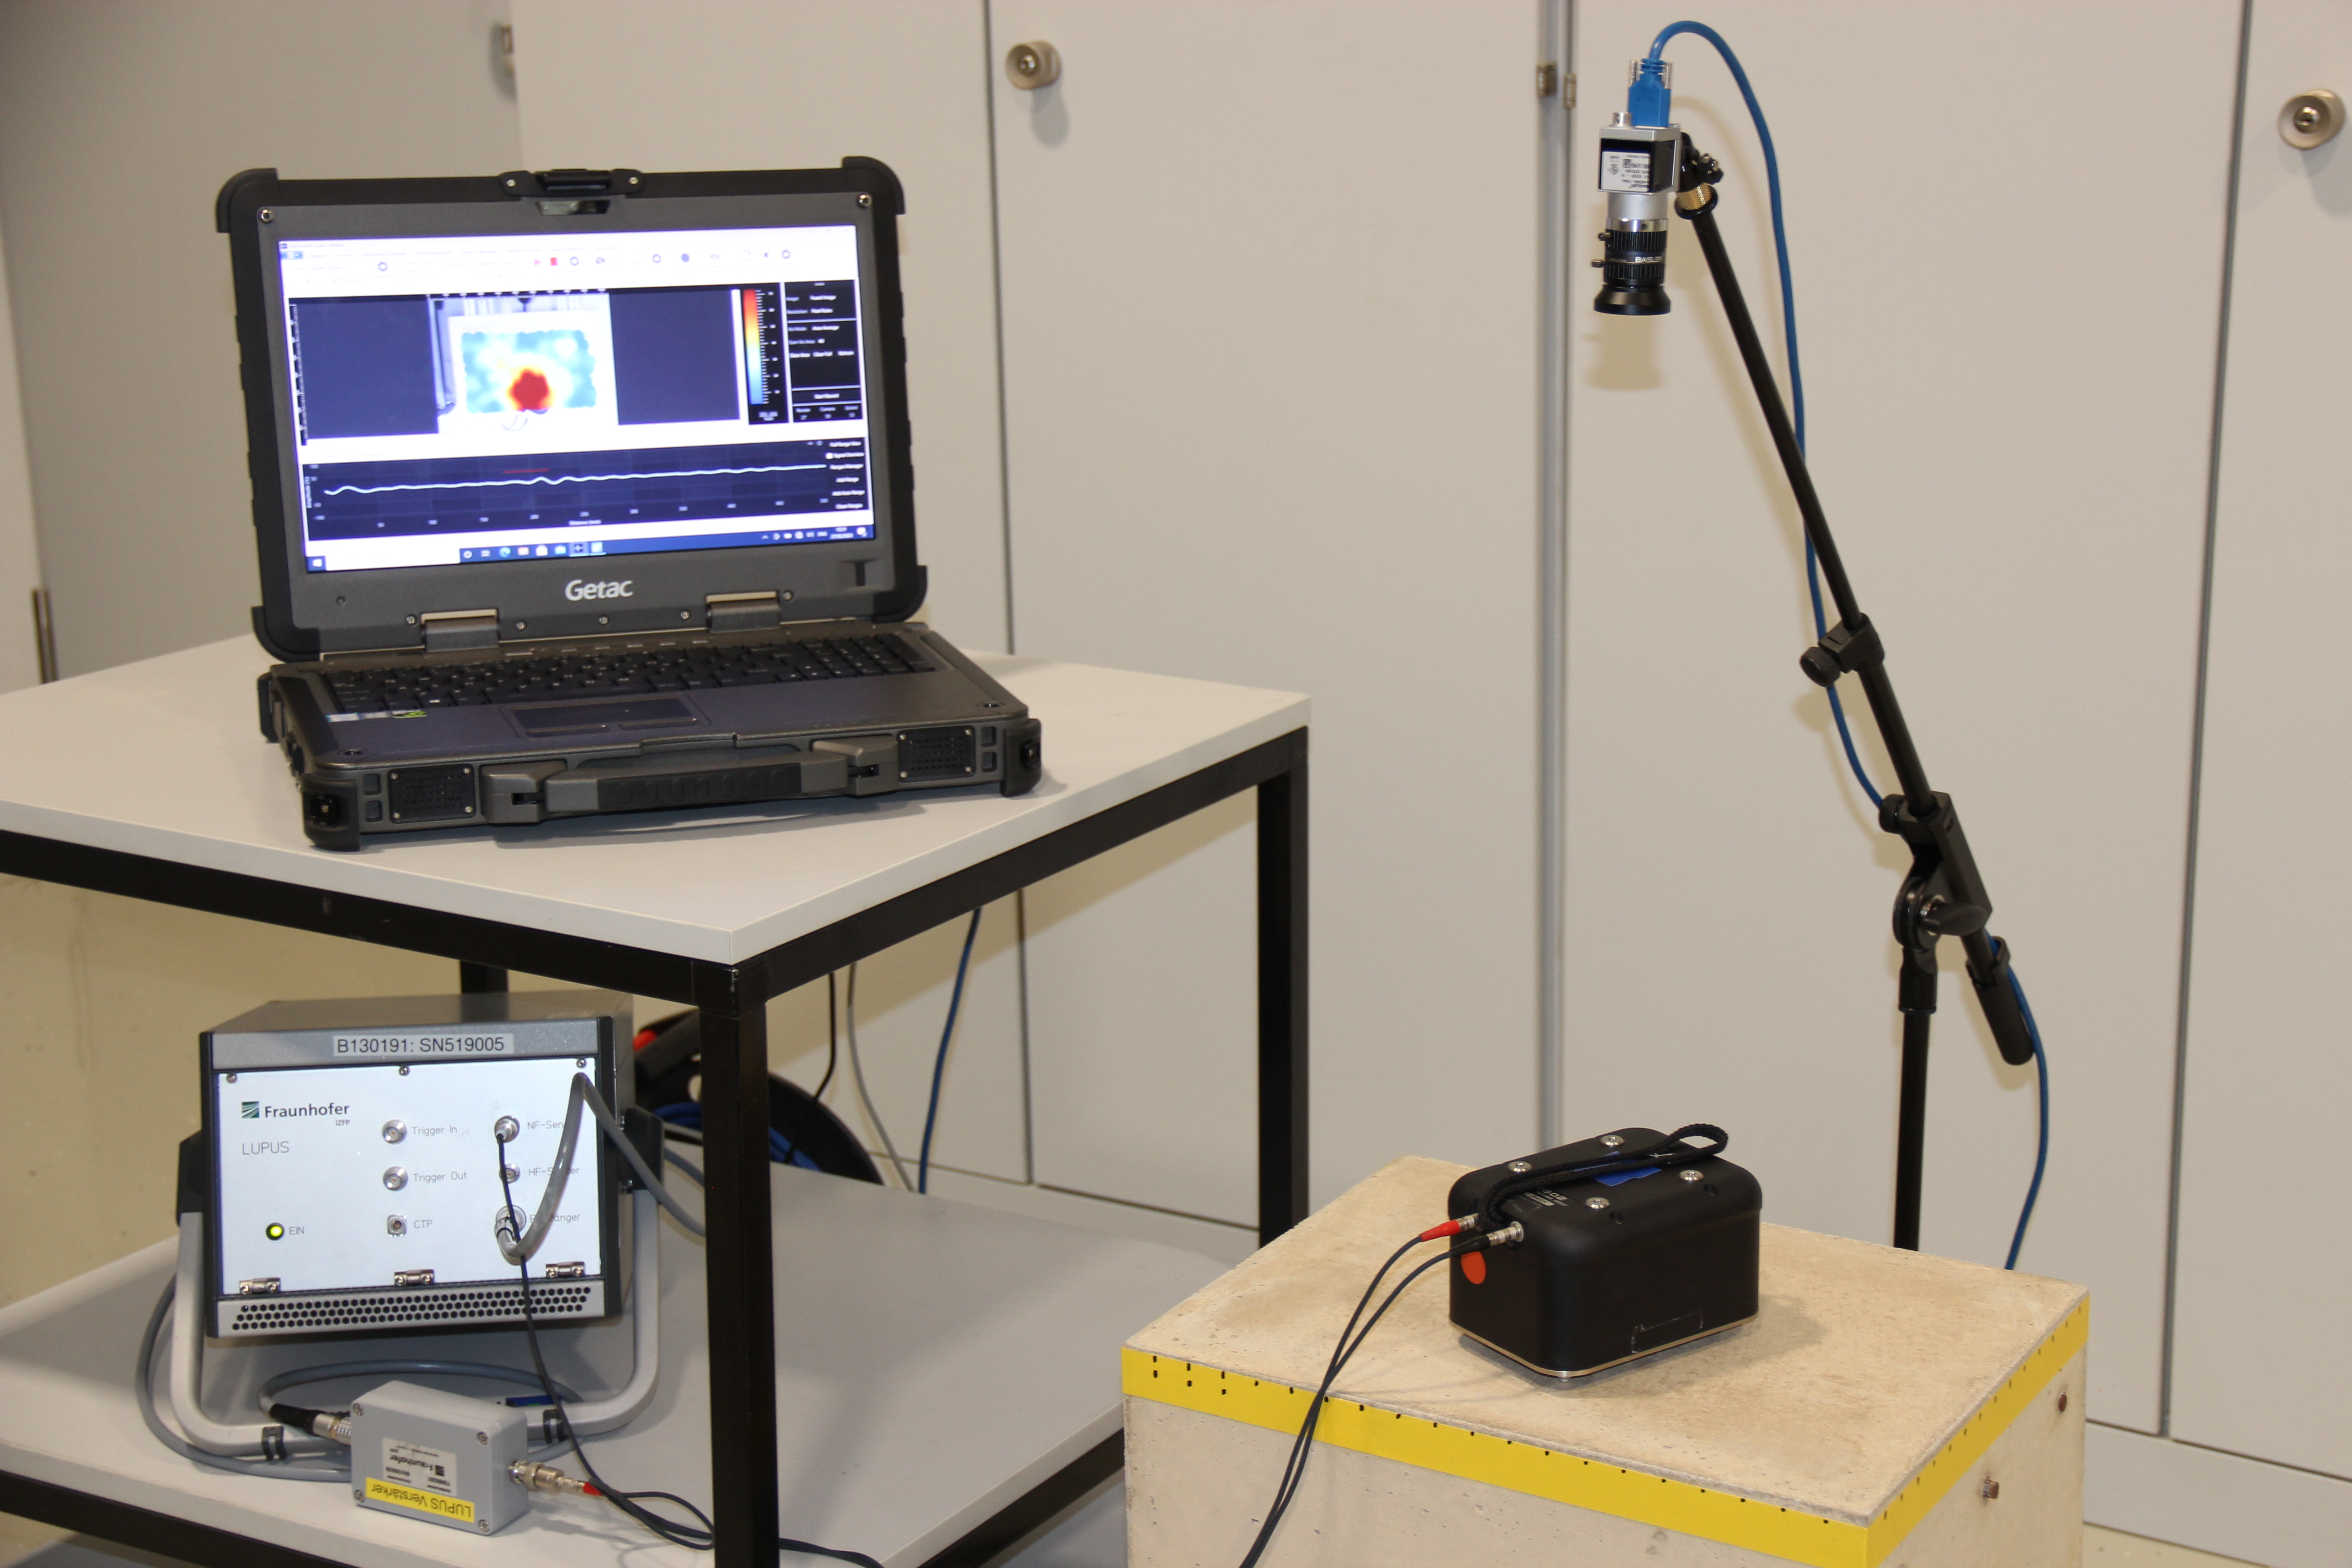
A planned service life of components and structures can only be achieved if quality-assured designs and the maintenance measures during the service life phase are coordinated. Therefore, it is often necessary to record component-specific characteristic values non-invasively with a high accuracy of the measured value and location."3D-SmartInspect" from Fraunhofer IZFP is an intelligent assistance system for digital hand-guided inspection. The system consists of a low-cost webcam, a computer with special software and can optionally be combined with a Hololens. After a quick set-up process, the tracking module records the movement of the probe and fuses inspection positions and measurement signals. In this way, testing tasks especially in the field are facilitated such as examination of safety-relevant industrial components or infrastructure. Assisted ultrasonic inspection with subsequent data reconstruction will be demonstrated. The result can be transferred to DICONDE (Digital Imaging and Communications for Non-Destructive Evaluation) in the form of a digital component file. The assistance system thus provides the potential to feed digital twins in different industrial application areas such as construction, transport, aerospace or other with in-situ quality data.

more on intelligent assistance system with interactive visualization for laboratory and service tasks in non-destructive testing

Exhibitor: Fraunhofer IZFP, Saarbrücken

IZFP Ultrasonic testing
© Fraunhofer IZFP
Ultrasonic testing of concrete with 3D SmartInspect.

Acoustic monitoring in production

Fraunhofer IDMT presents a method for acoustic quality assurance based on sound analysis and artificial intelligence, which can provide a profitable supplement to optical testing methods when they reach their limits. Possible areas for the use of acoustic methods include the monitoring of welding or machining processes. At the booth at Control 2023, the method will be demonstrated using an air field hockey table on which three visually indistinguishable pucks made of different materials can  be distinguished by the mere sound when they hit the board.

more on acoustic monitoring in production

Exhibitor: Fraunhofer IDMT, Ilmenau


IDMT Acoustic monitoring
© Fraunhofer IDMT
The acoustic events in the game occur irregularly, very quickly, with a short duration and a spatial distribution - ideal for analysis using machine learning methods.
»One-Stop-Shop« for ultrasonics – measuring, simulating, testing

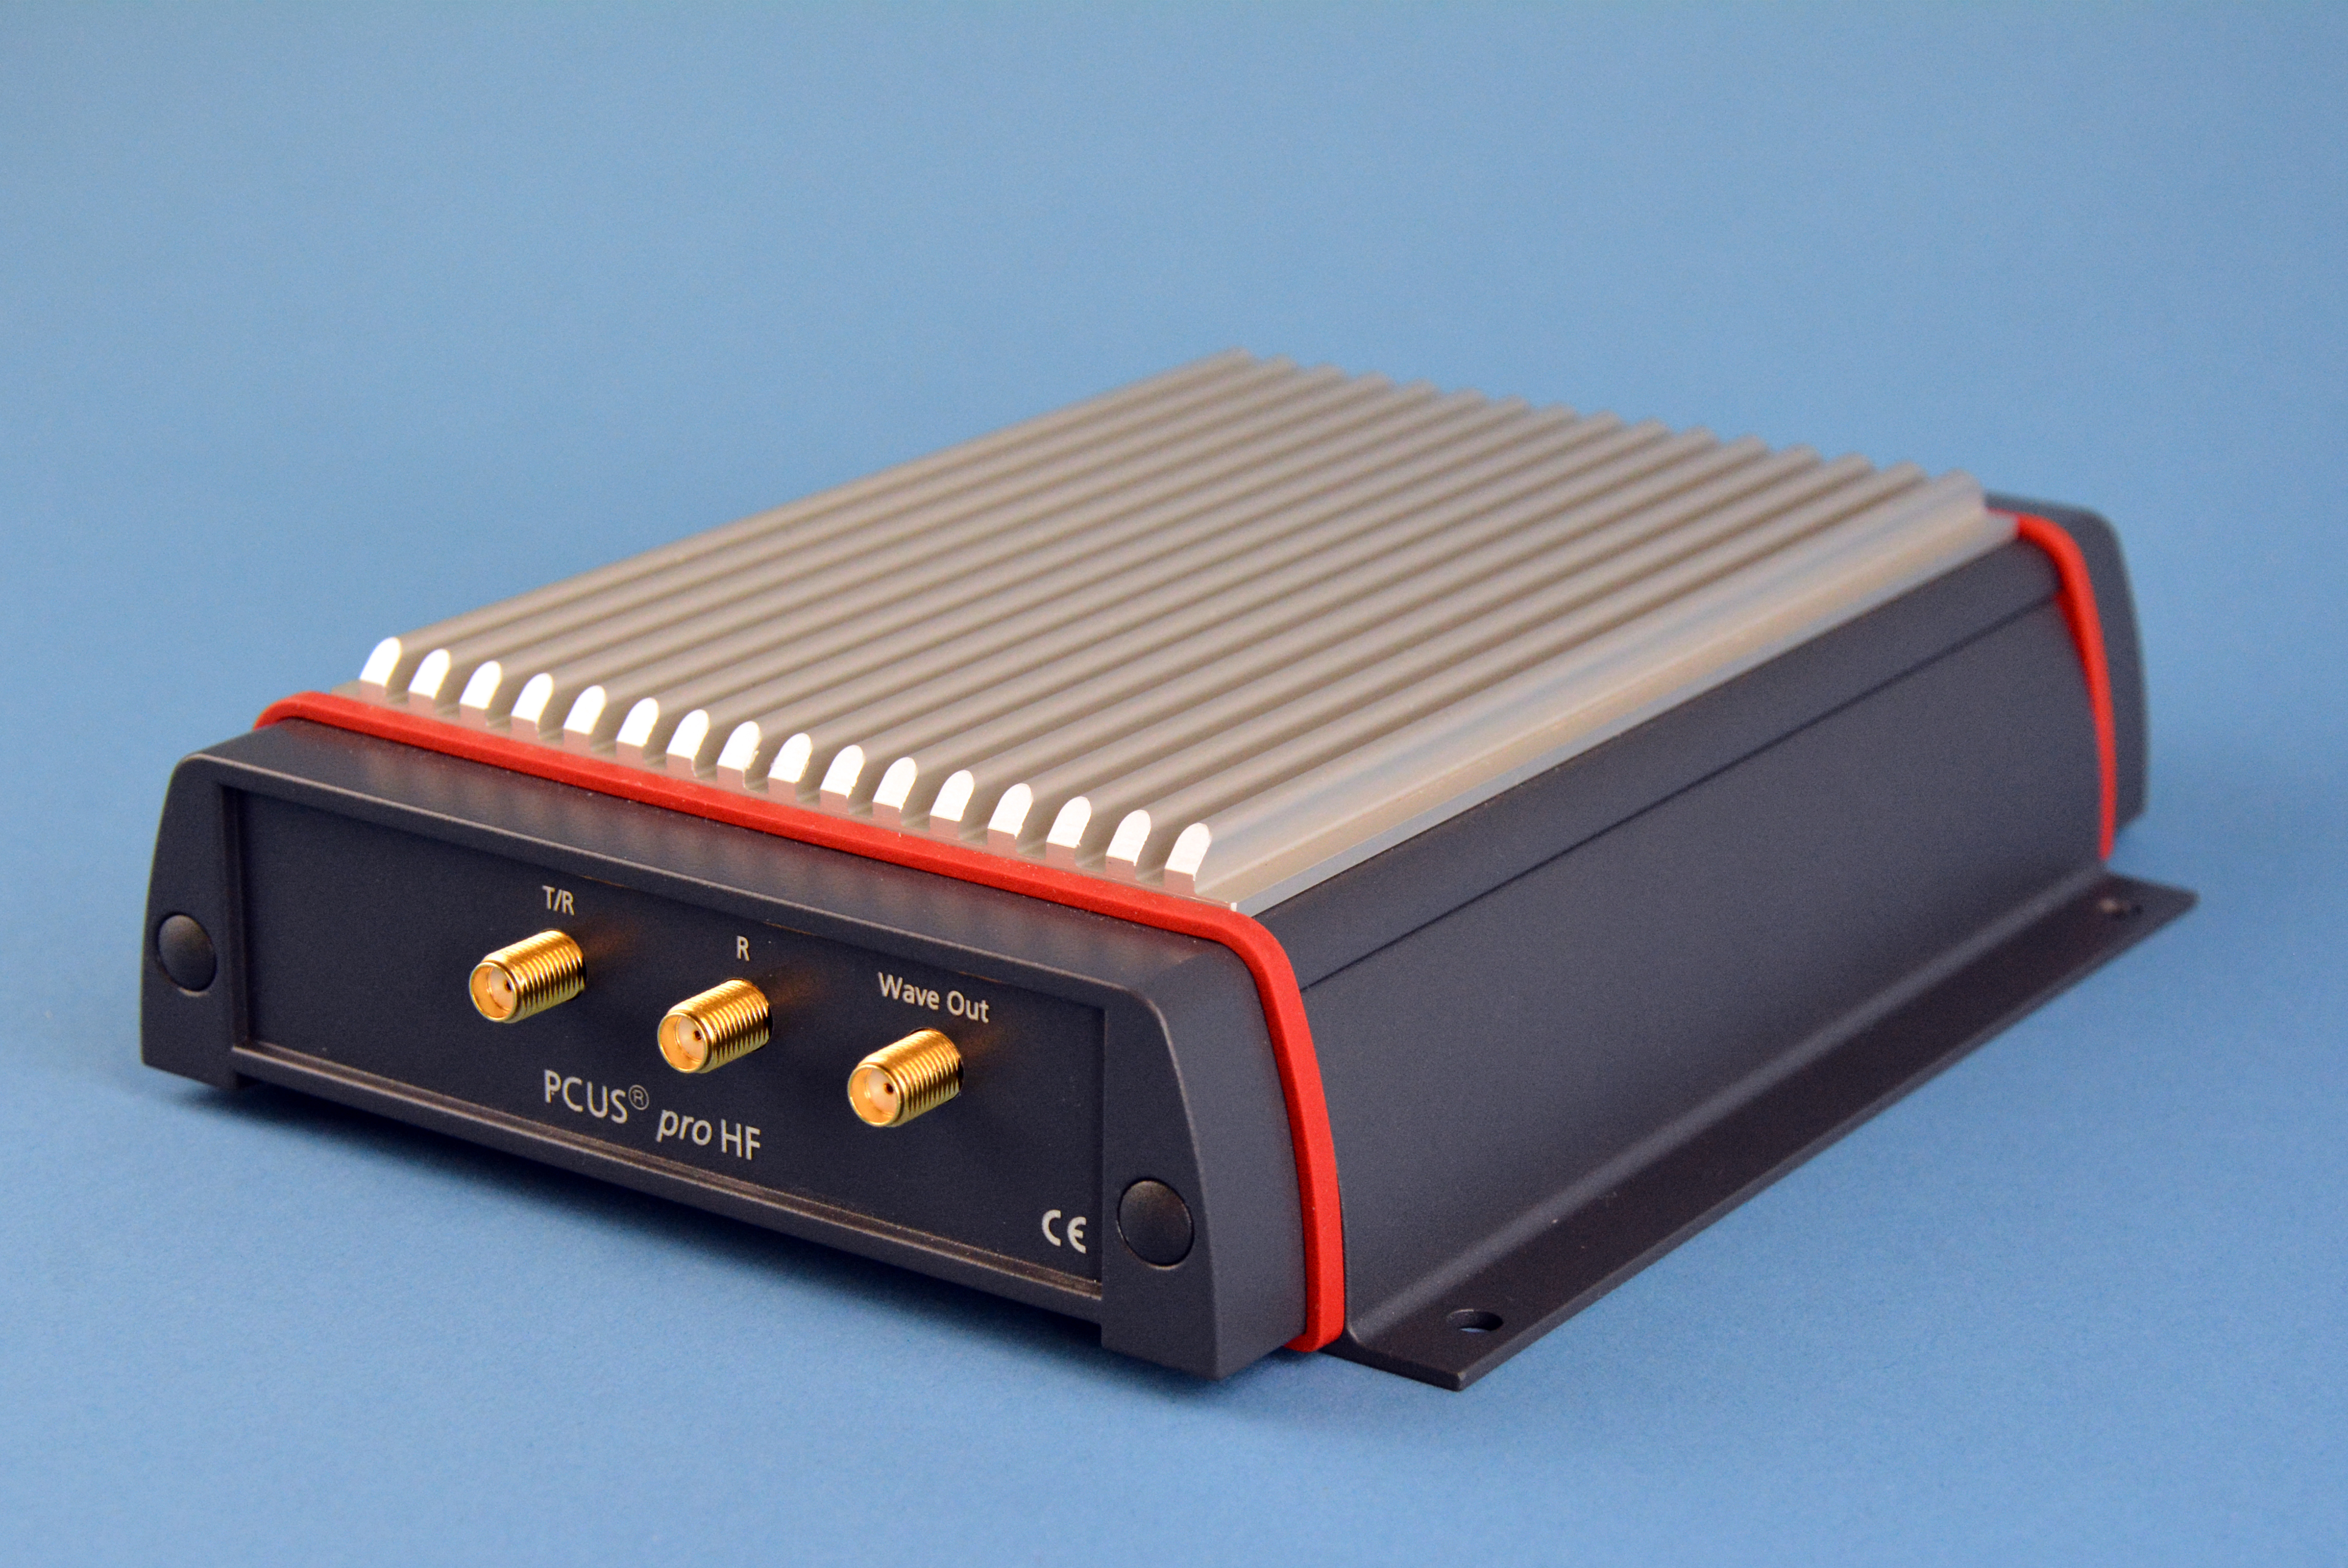
Fraunhofer IKTS develops customized ultrasonic testing systems, components and algorithms, validates ultrasonic methods and offers testing services. At the Control, Fraunhofer IKTS will present the new developments of the PCUS® pro device family, which is optimized for fast automated and, if required, robot-assisted testing in metal processing as well as in the areas of rail and automotive construction, power plant or even wind power technology.

Exhibitor: Fraunhofer IKTS, Dresden

PCUS® pro HF ultrasonic front end tests
© Fraunhofer IKTS
The compact PCUS® pro HF ultrasonic front end tests at high test frequencies up to 100 MHz.

Hyperspectral imaging

Ultra-compact multimodal camera

The use of contactless inspection systems is steadily increasing in the industrial environment. Multimodal cameras are also increasingly in demand. They should be able to simultaneously capture classic 2D image information, but also 3D, spectral or polarization information in real time. Against this background, researchers at the Fraunhofer IOF in Jena have developed a particularly compact and polarization-sensitive multimodal camera. In the future, this will enable effective quality control and predictive maintenance in Industry 4.0, among other things. Further applications are conceivable in environmental and agricultural monitoring as well as in biomedicine.

Exhibitor: Fraunhofer IOF, Jena


System multimodal camera
© Fraunhofer IOF
System setup multimodal camera.

Inline-capable spectroscopic 100 percent inspection for industrial quality assurance and process control

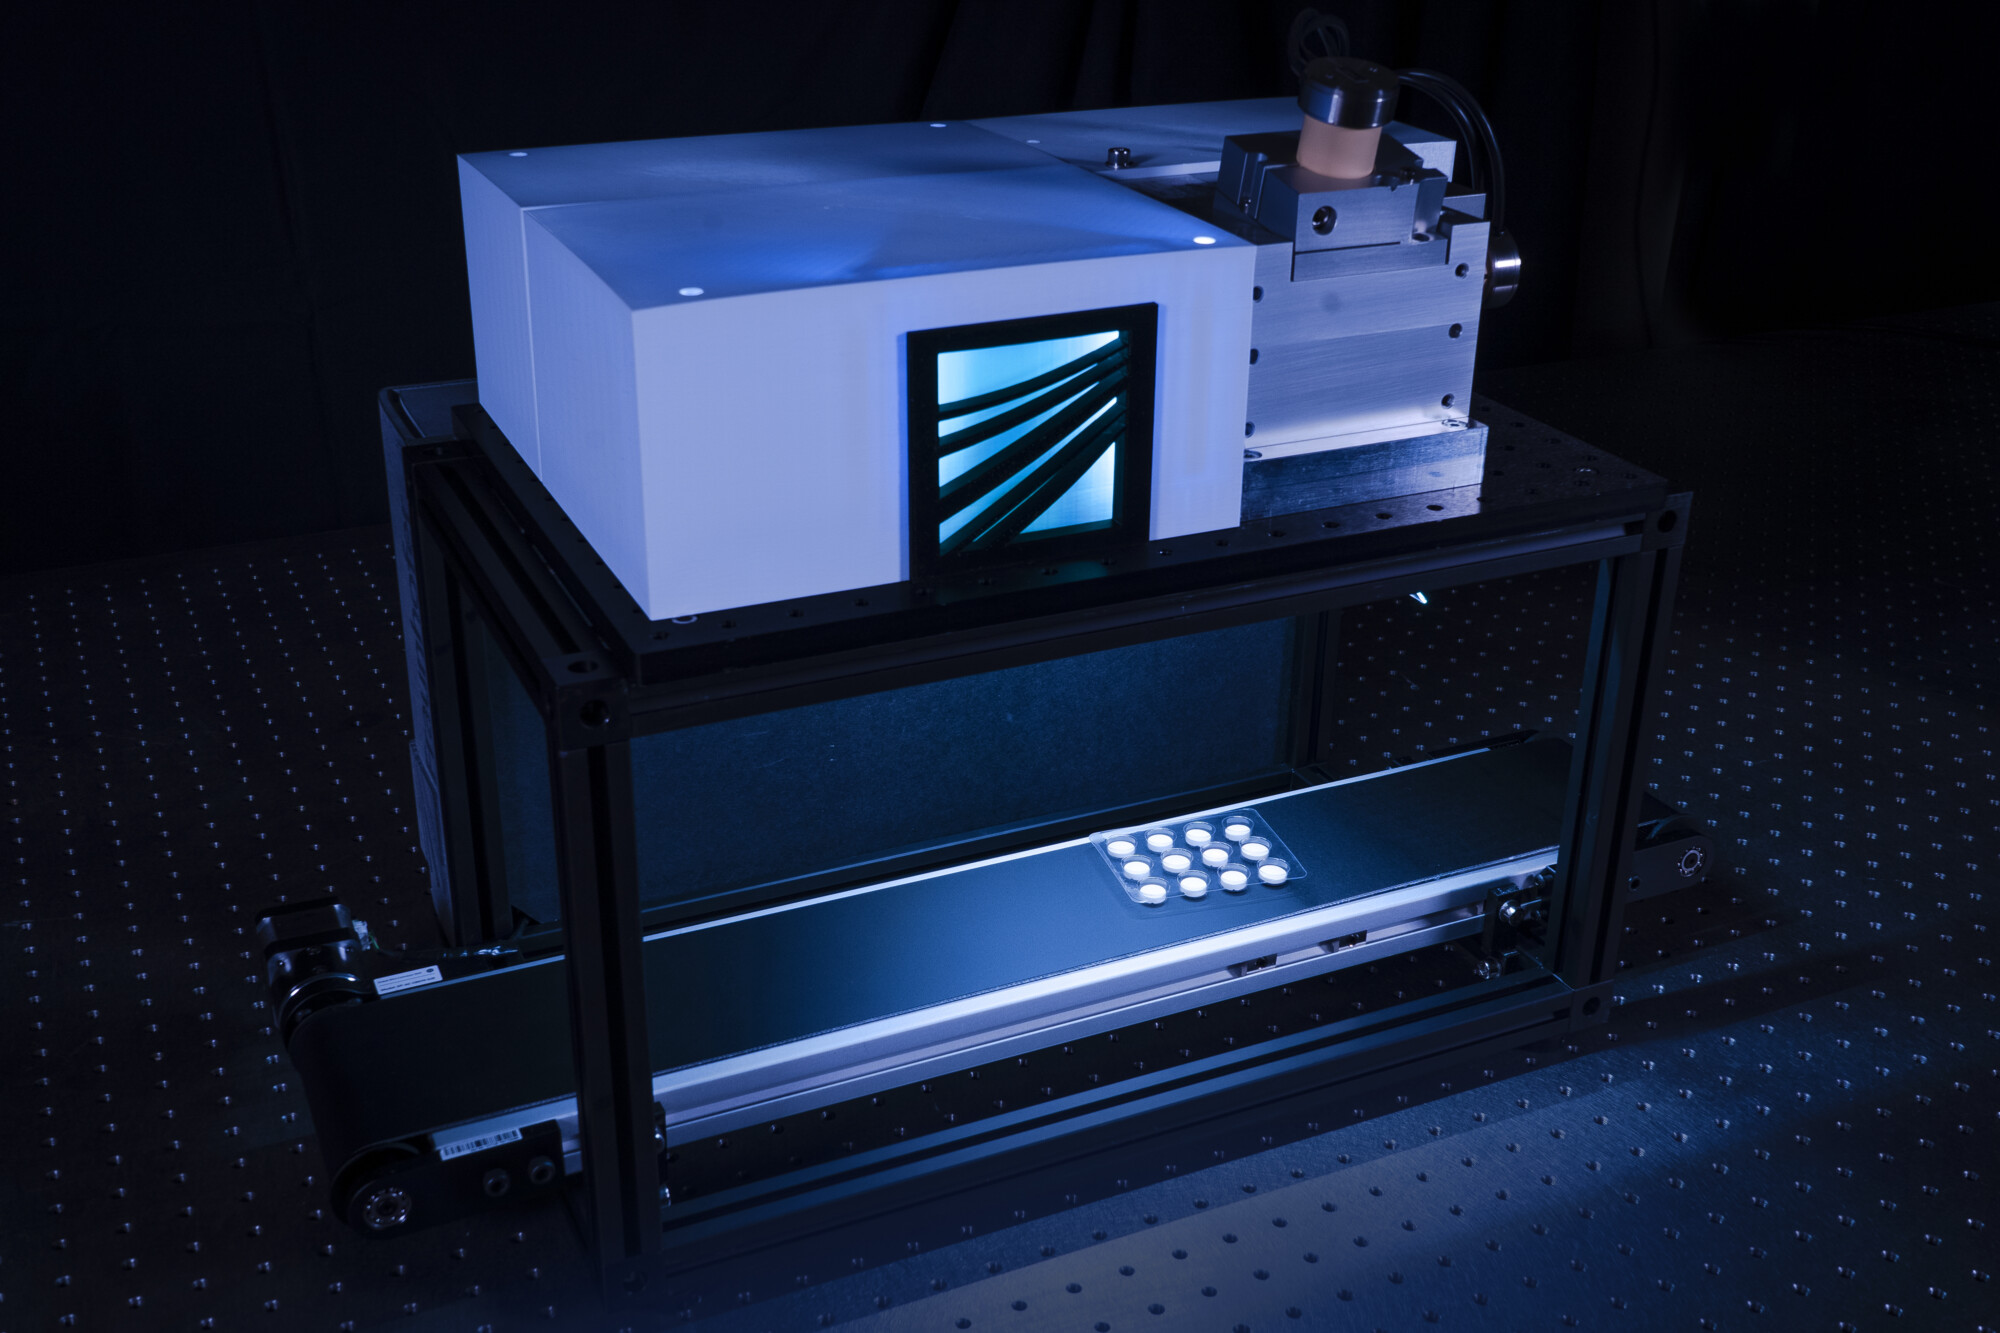
The Fraunhofer IAF has developed in cooperation with Fraunhofer CAP an inline-capable laser-based infrared spectroscopy measurement system which uses machine vision to specifically detect samples (i.e. tablet blisters) and verify them contactless within a few milliseconds, in order to sort out contaminated or defectively loaded specimens. Main fields of application of the new measurement system are the pharmaceutical, chemical and food industry.

more on Inline-capable spectroscopic 100 percent inspection for industrial quality assurance and process control

Exhibitor: Fraunhofer IAF, Freiburg


 Inline-capable spectroscopy
© Fraunhofer IAF
Demonstrator of an inline-capable infrared spectroscopy measurement system from Fraunhofer IAF for applications in the pharmaceutical, chemical and food industries.