Systems and technologies for quality assurance at Control Virtual 2021

Optical and acoustic quality assurance and image processing

The Fraunhofer institutes cooperating on the topic of image processing and non-contact measurement and inspection technology in the Vision business unit, among others, and pool their competencies, will present numerous new and further developments at Control Virtual.

Despite the cancellation of Control for 2021, the new developments of Fraunhofer Vision remain relevant and we would like to invite you to get an overview on the planned systems on the following web pages.


New exhibits at the Control Virtual 2021

Optical 3D measurement and sensor technology

All-around 3D shape measurement of transparent objects with thermal fringe projection

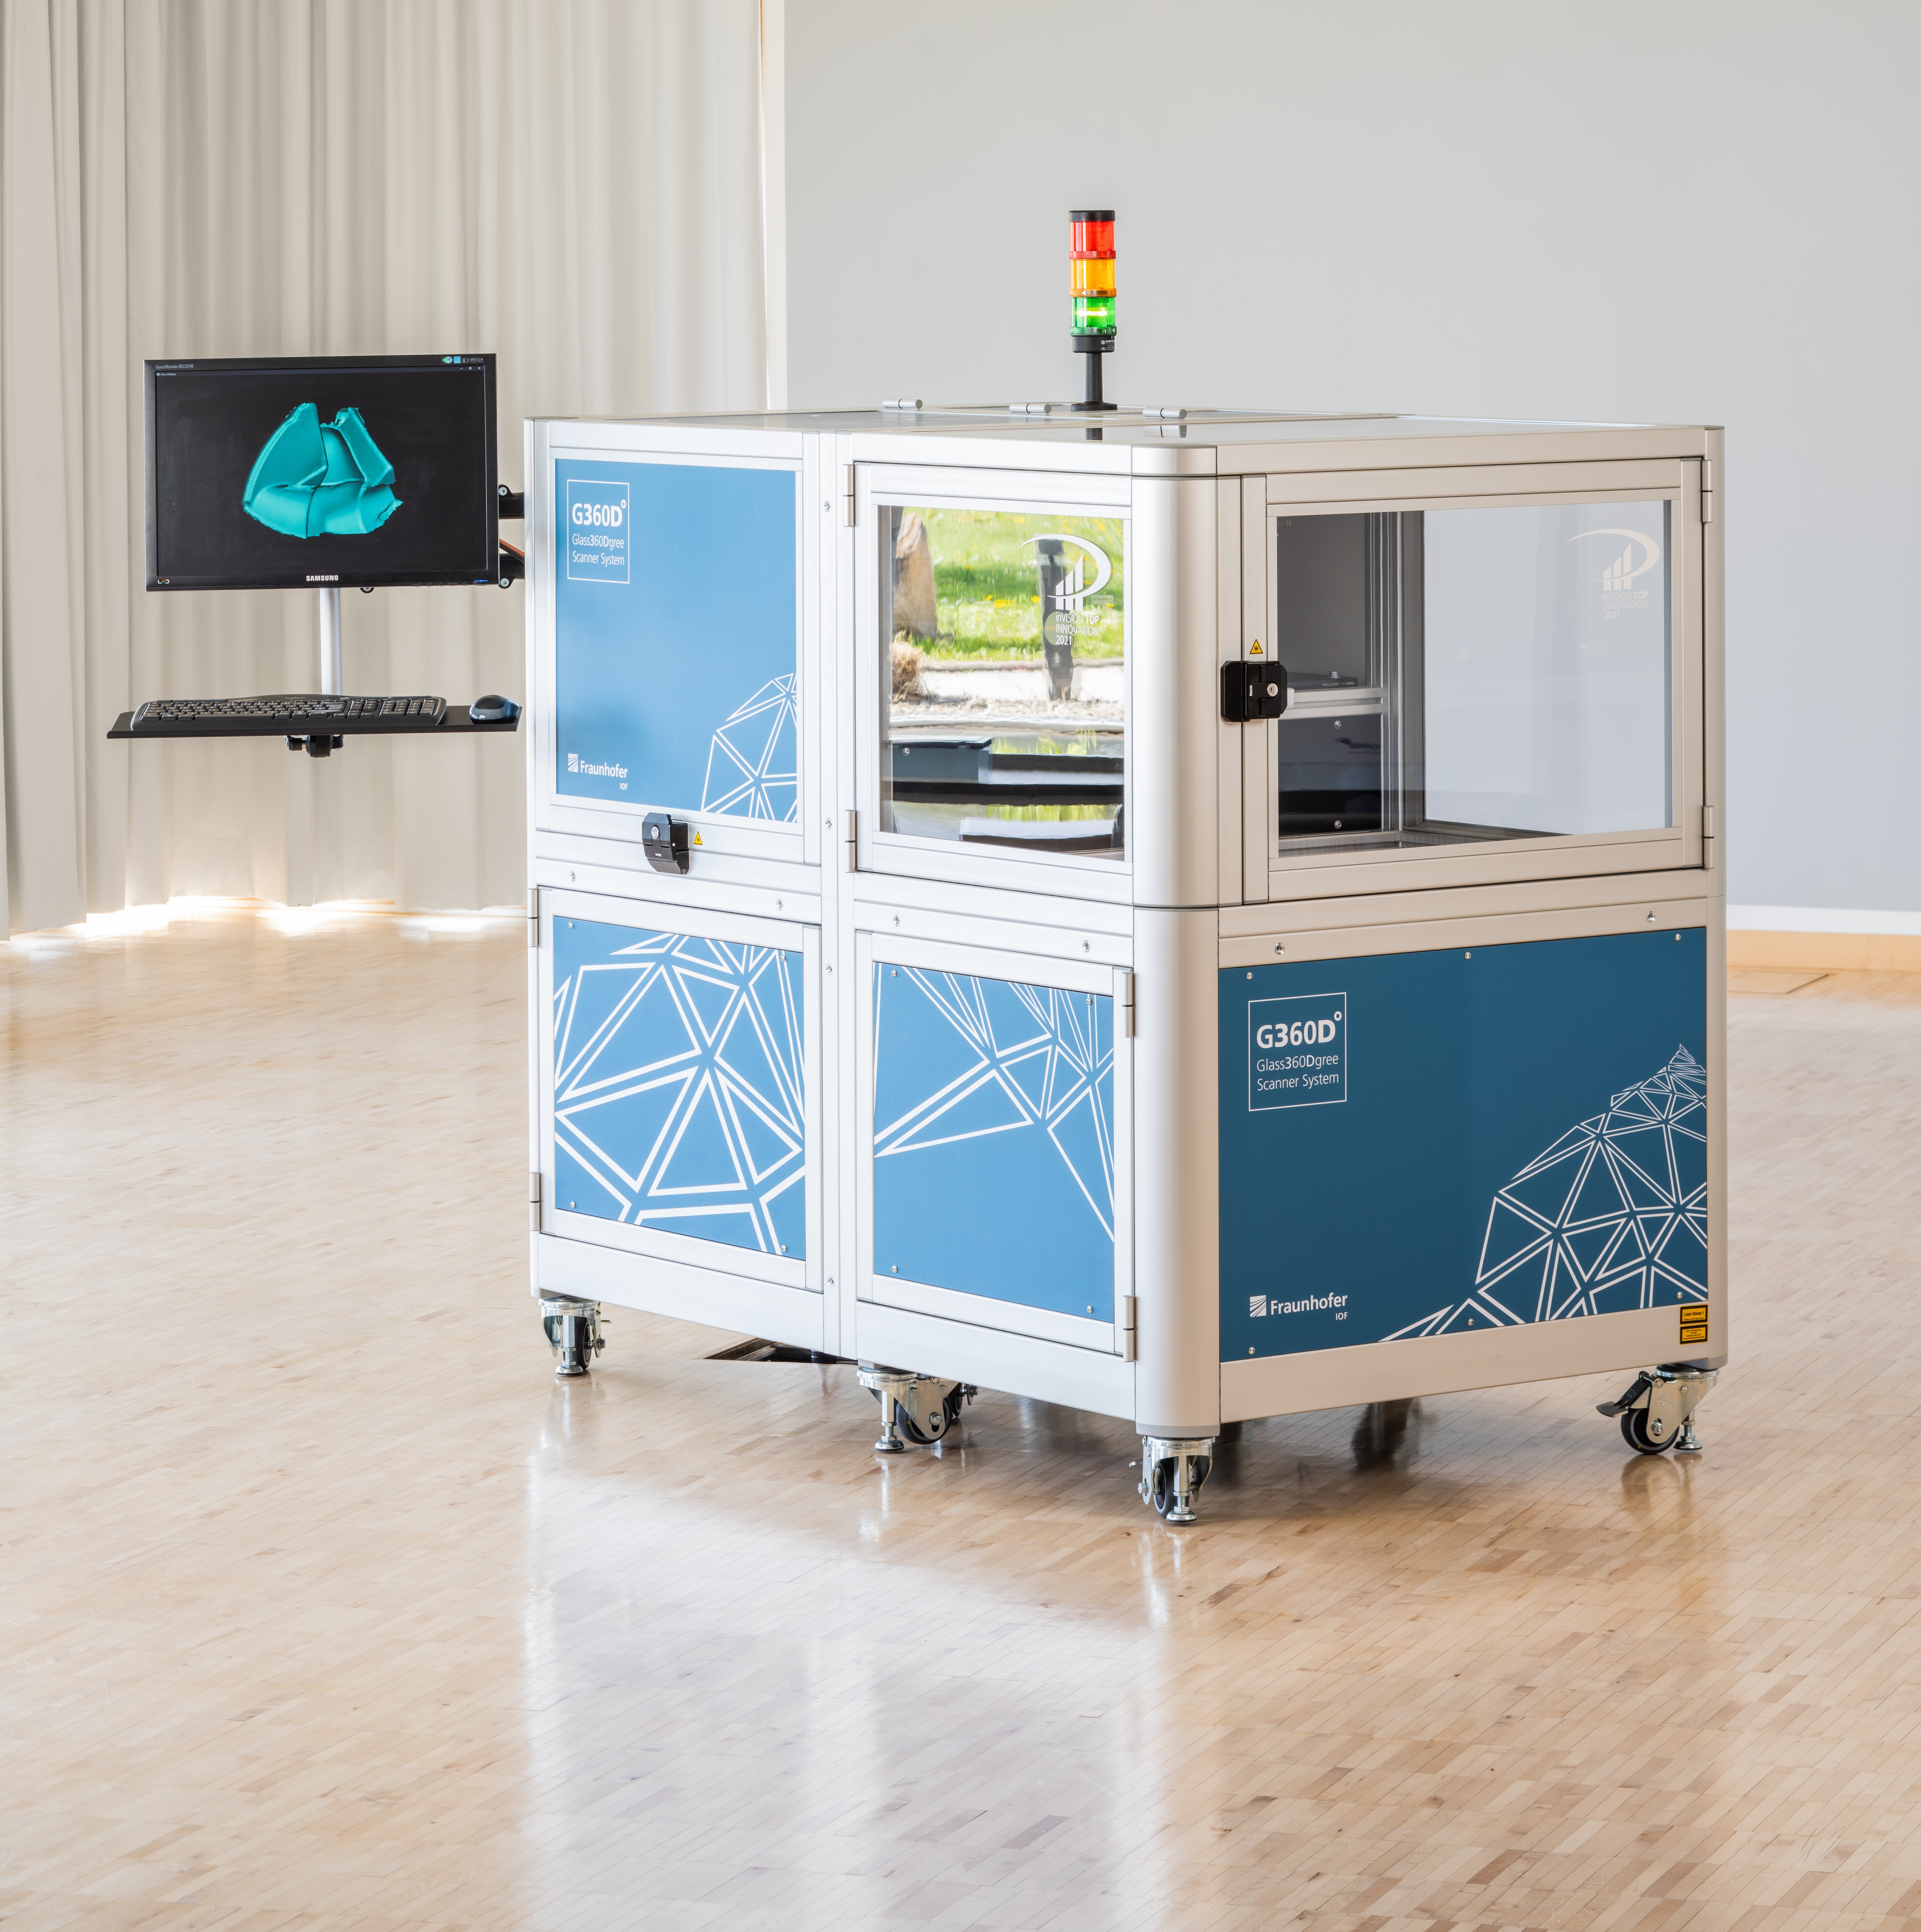
In many industrial manufacturing processes, there is a need to measure on optically »uncooperative« surfaces. These transparent, reflective or jet-black surfaces are difficult or impossible to detect with conventional sensor technology. A novel 3D measurement technique, awarded as »inVISION Top Innovation 2021«, offers a solution to these limitations. Surfaces are detected via the radiated heat and not via the reflected light. With the »Glass360Dgree« system, Fraunhofer IOF demonstrates for the first time the automatic fast all-around 3D shape measurement of uncooperative objects without surface treatment.

Exhibitor: Fraunhofer IOF, Jena
Measurement system »Glass360Dgree«
© Fraunhofer IOF
Measuring system »Glass360Dgree«

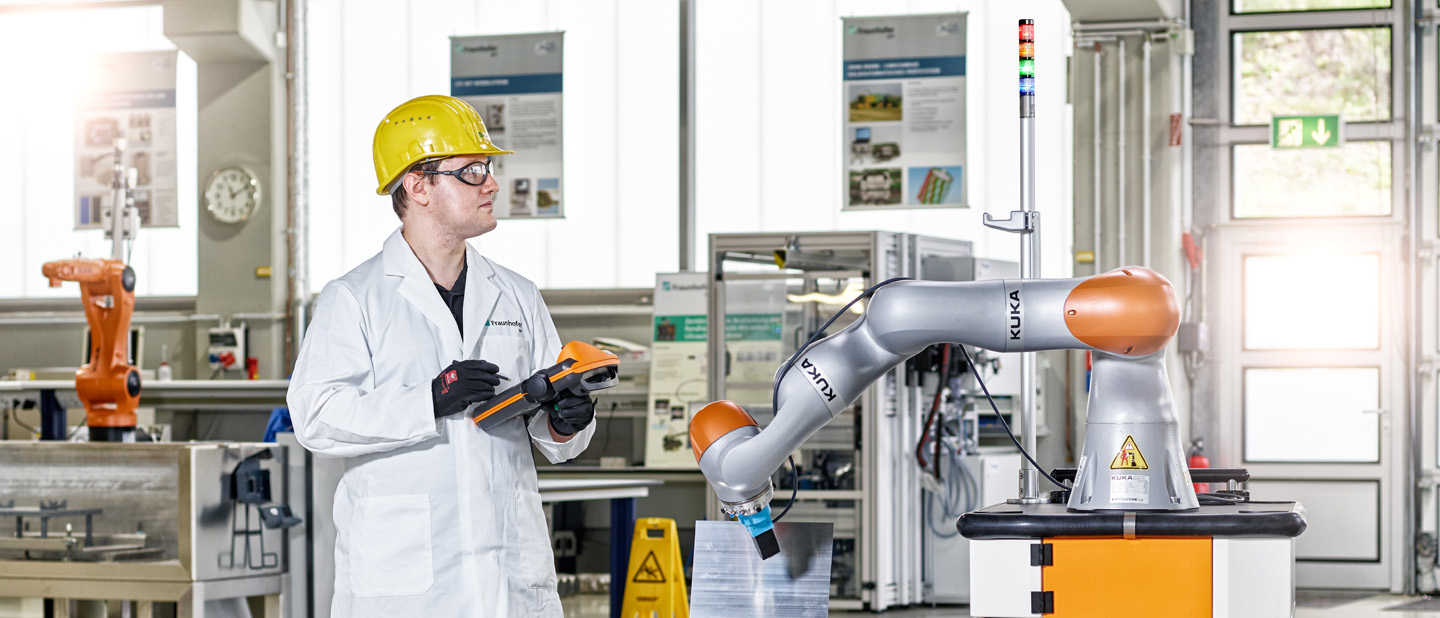
Interactive, robot-guided 3D sensor technology for rapid inspection of large and complex workpieces

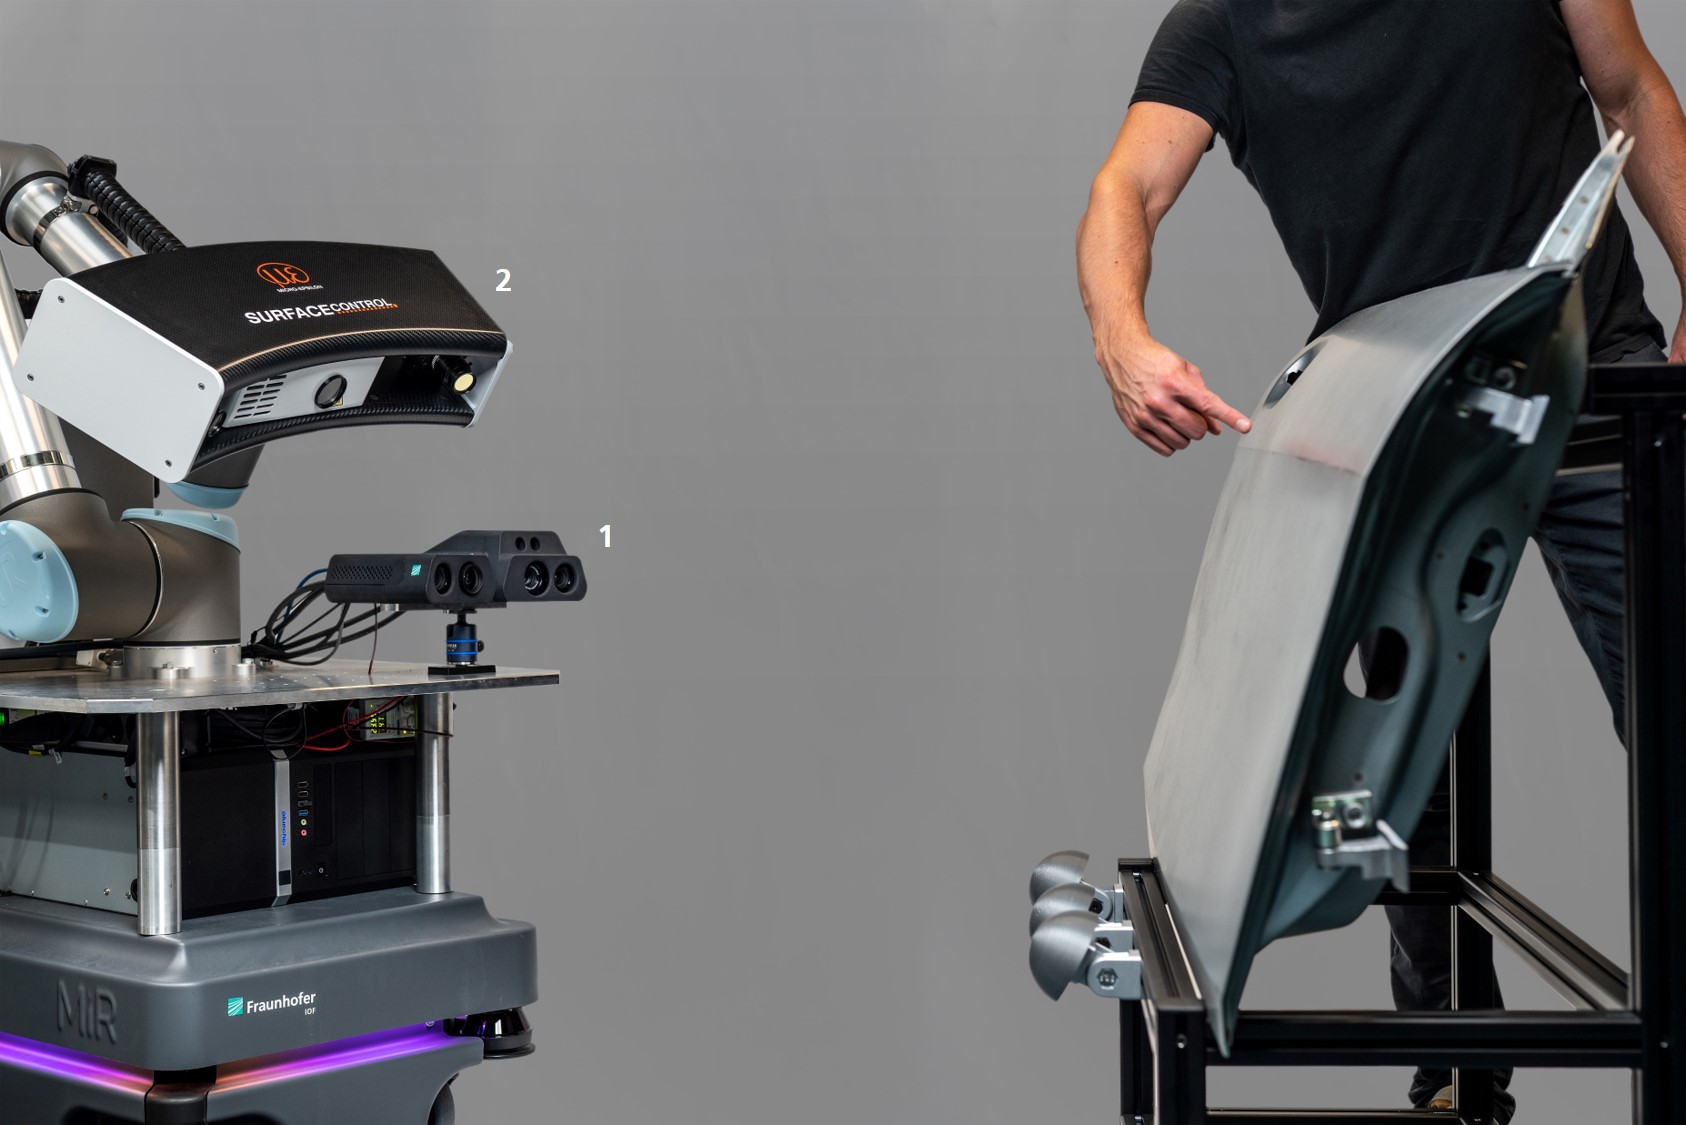
In order to automatically scan large and complex shaped workpieces, such as car body or cast parts, sensors are integrated into robot arms during the inspection processes. Each automated measuring sequence must be specifically planned for each workpiece. This teach-in is complex and time-consuming and can therefore only be carried out for a few workpieces. For this reason, a robot-guided sensor system was developed at Fraunhofer IOF that can be interactively controlled by simple gestures of the operator. The gestures are recognized by a 3D interaction sensor and automatically translated into commands for the collaborative robot system. Without having any specialized knowledge, the operator can thus instruct measurement tasks in real time. This new type of human-robot interaction allows human skills and sensor technology to complement each other in quality assurance processes.

more on the exhibit Interactive, robot-guided 3D sensor technology for rapid inspection of large and complex workpieces

Exhibitor: Fraunhofer IOF, Jena

Interactive, robot-guided 3D sensor technology for rapid inspection of large and complex workpieces
© Fraunhofer IOF
The 3D interaction sensor detects the displayed measurement position for the robot-guided inspection sensor.

Monocular 3D cameras

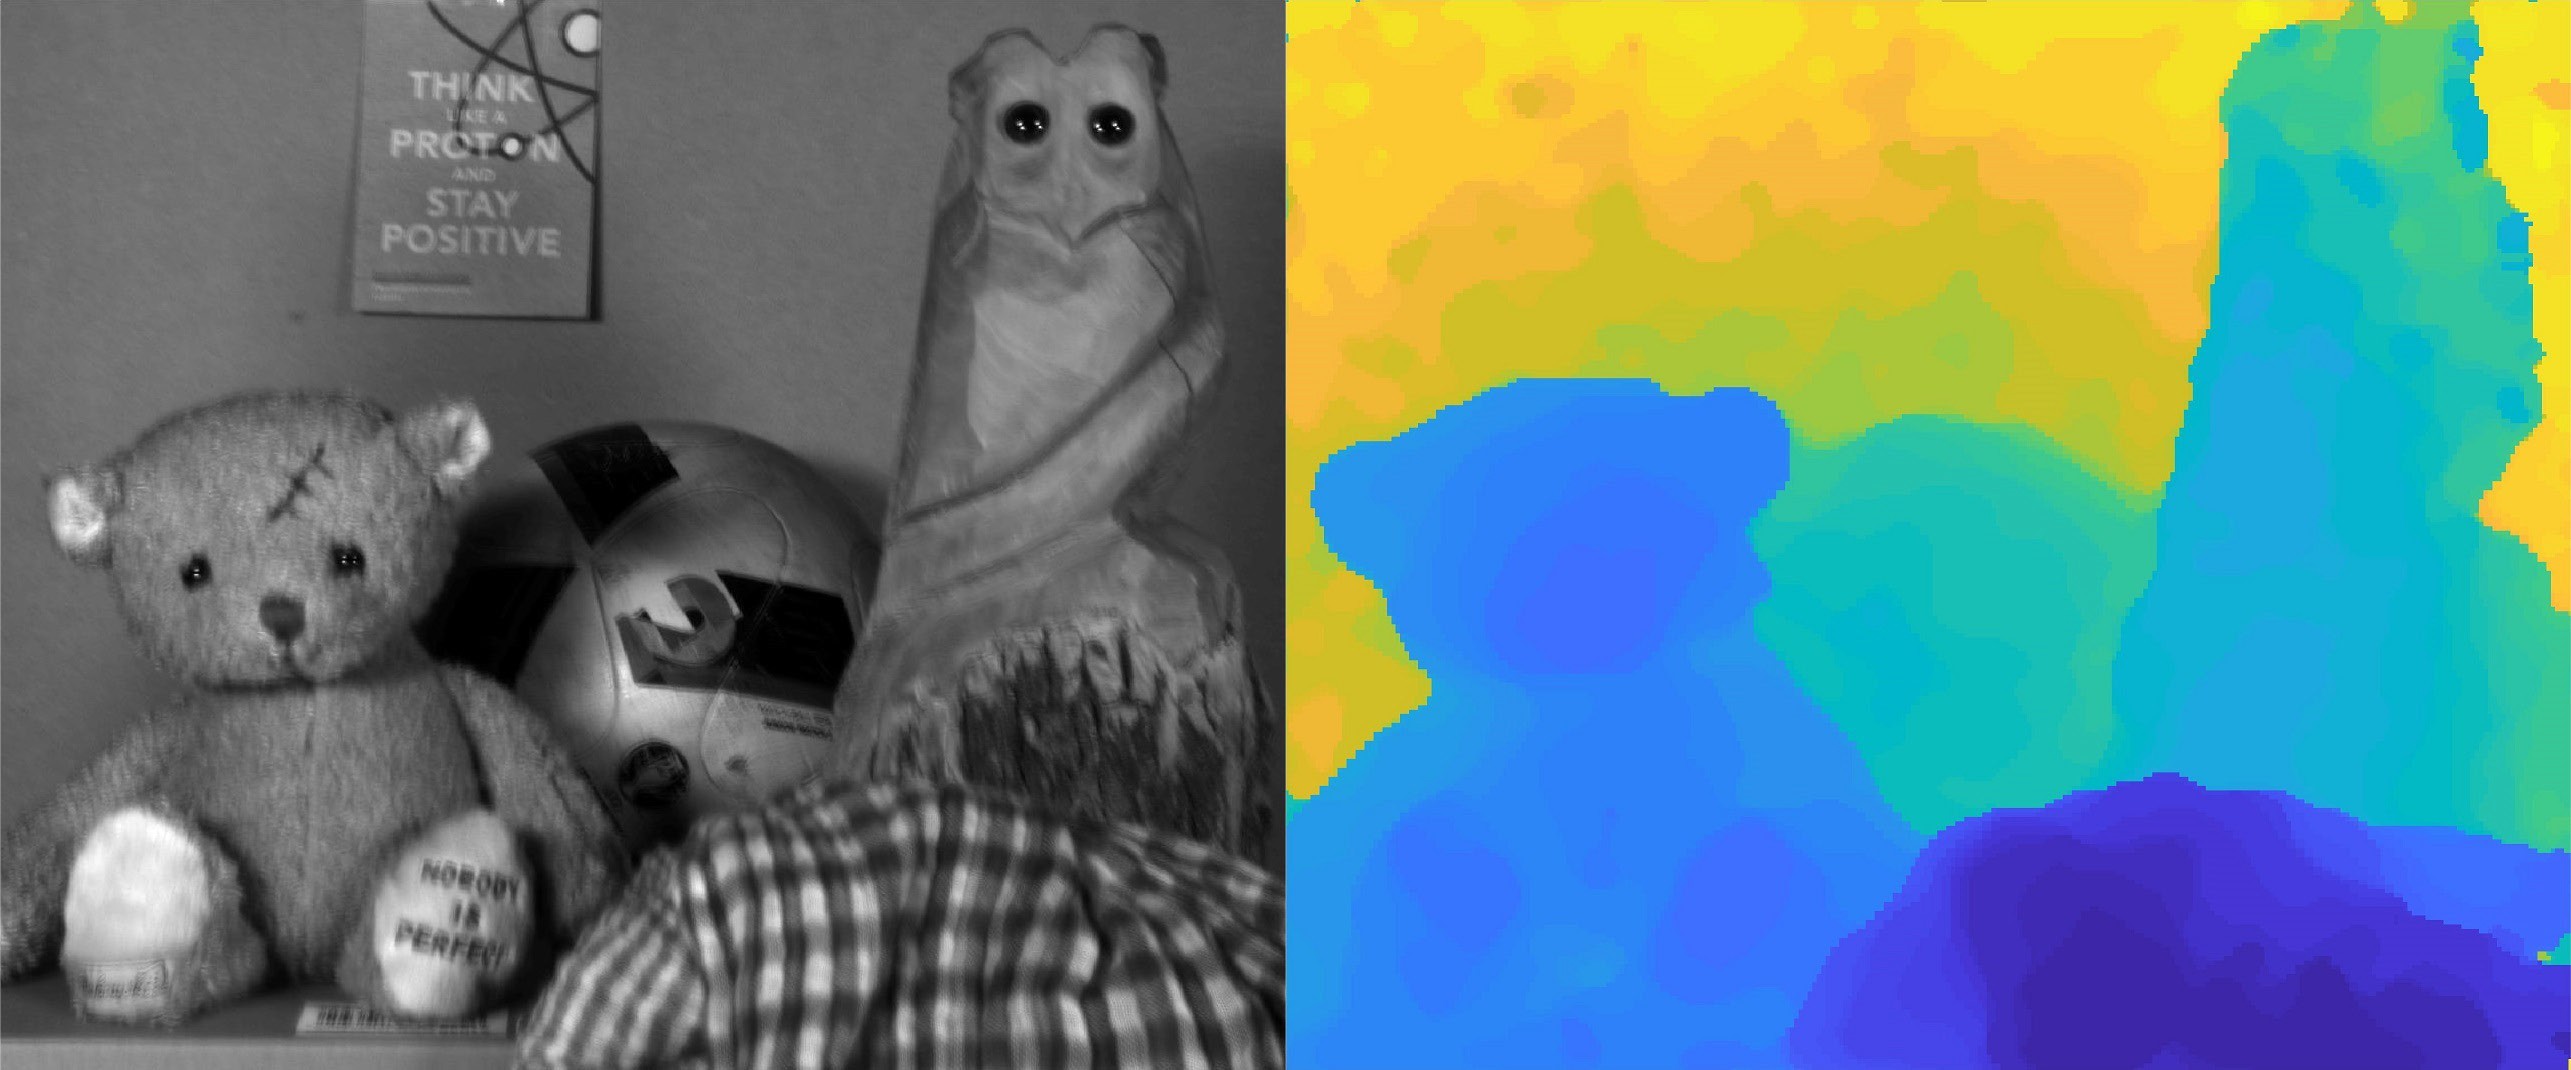
Fraunhofer IOF has developed a novel camera system for passive, optical 3D object detection. The acquisition principle is based on the integration of a micro-optical phase element within a conventional camera lens. The imaging properties of the lens are modified so that the 3D information of the object field is directly encoded in the captured raw image distribution. Adapted image post-processing can then be used to reconstruct the depth profile of the object on the one hand and the high-resolution lateral object distribution on the other. Possible applications range from human-machine interaction and quality control in manufacturing processes to the field of virtual and augmented reality.

more on monocular 3D cameras

Exhibitor: Fraunhofer IOF, Jena

Monocular 3D camera - depth profile
© Fraunhofer IOF
Acquired raw image (left) and reconstructed depth profile (right)

Non-destructive testing with optical coherence tomography

High-resolution optical coherence tomography for the measurement of thin films

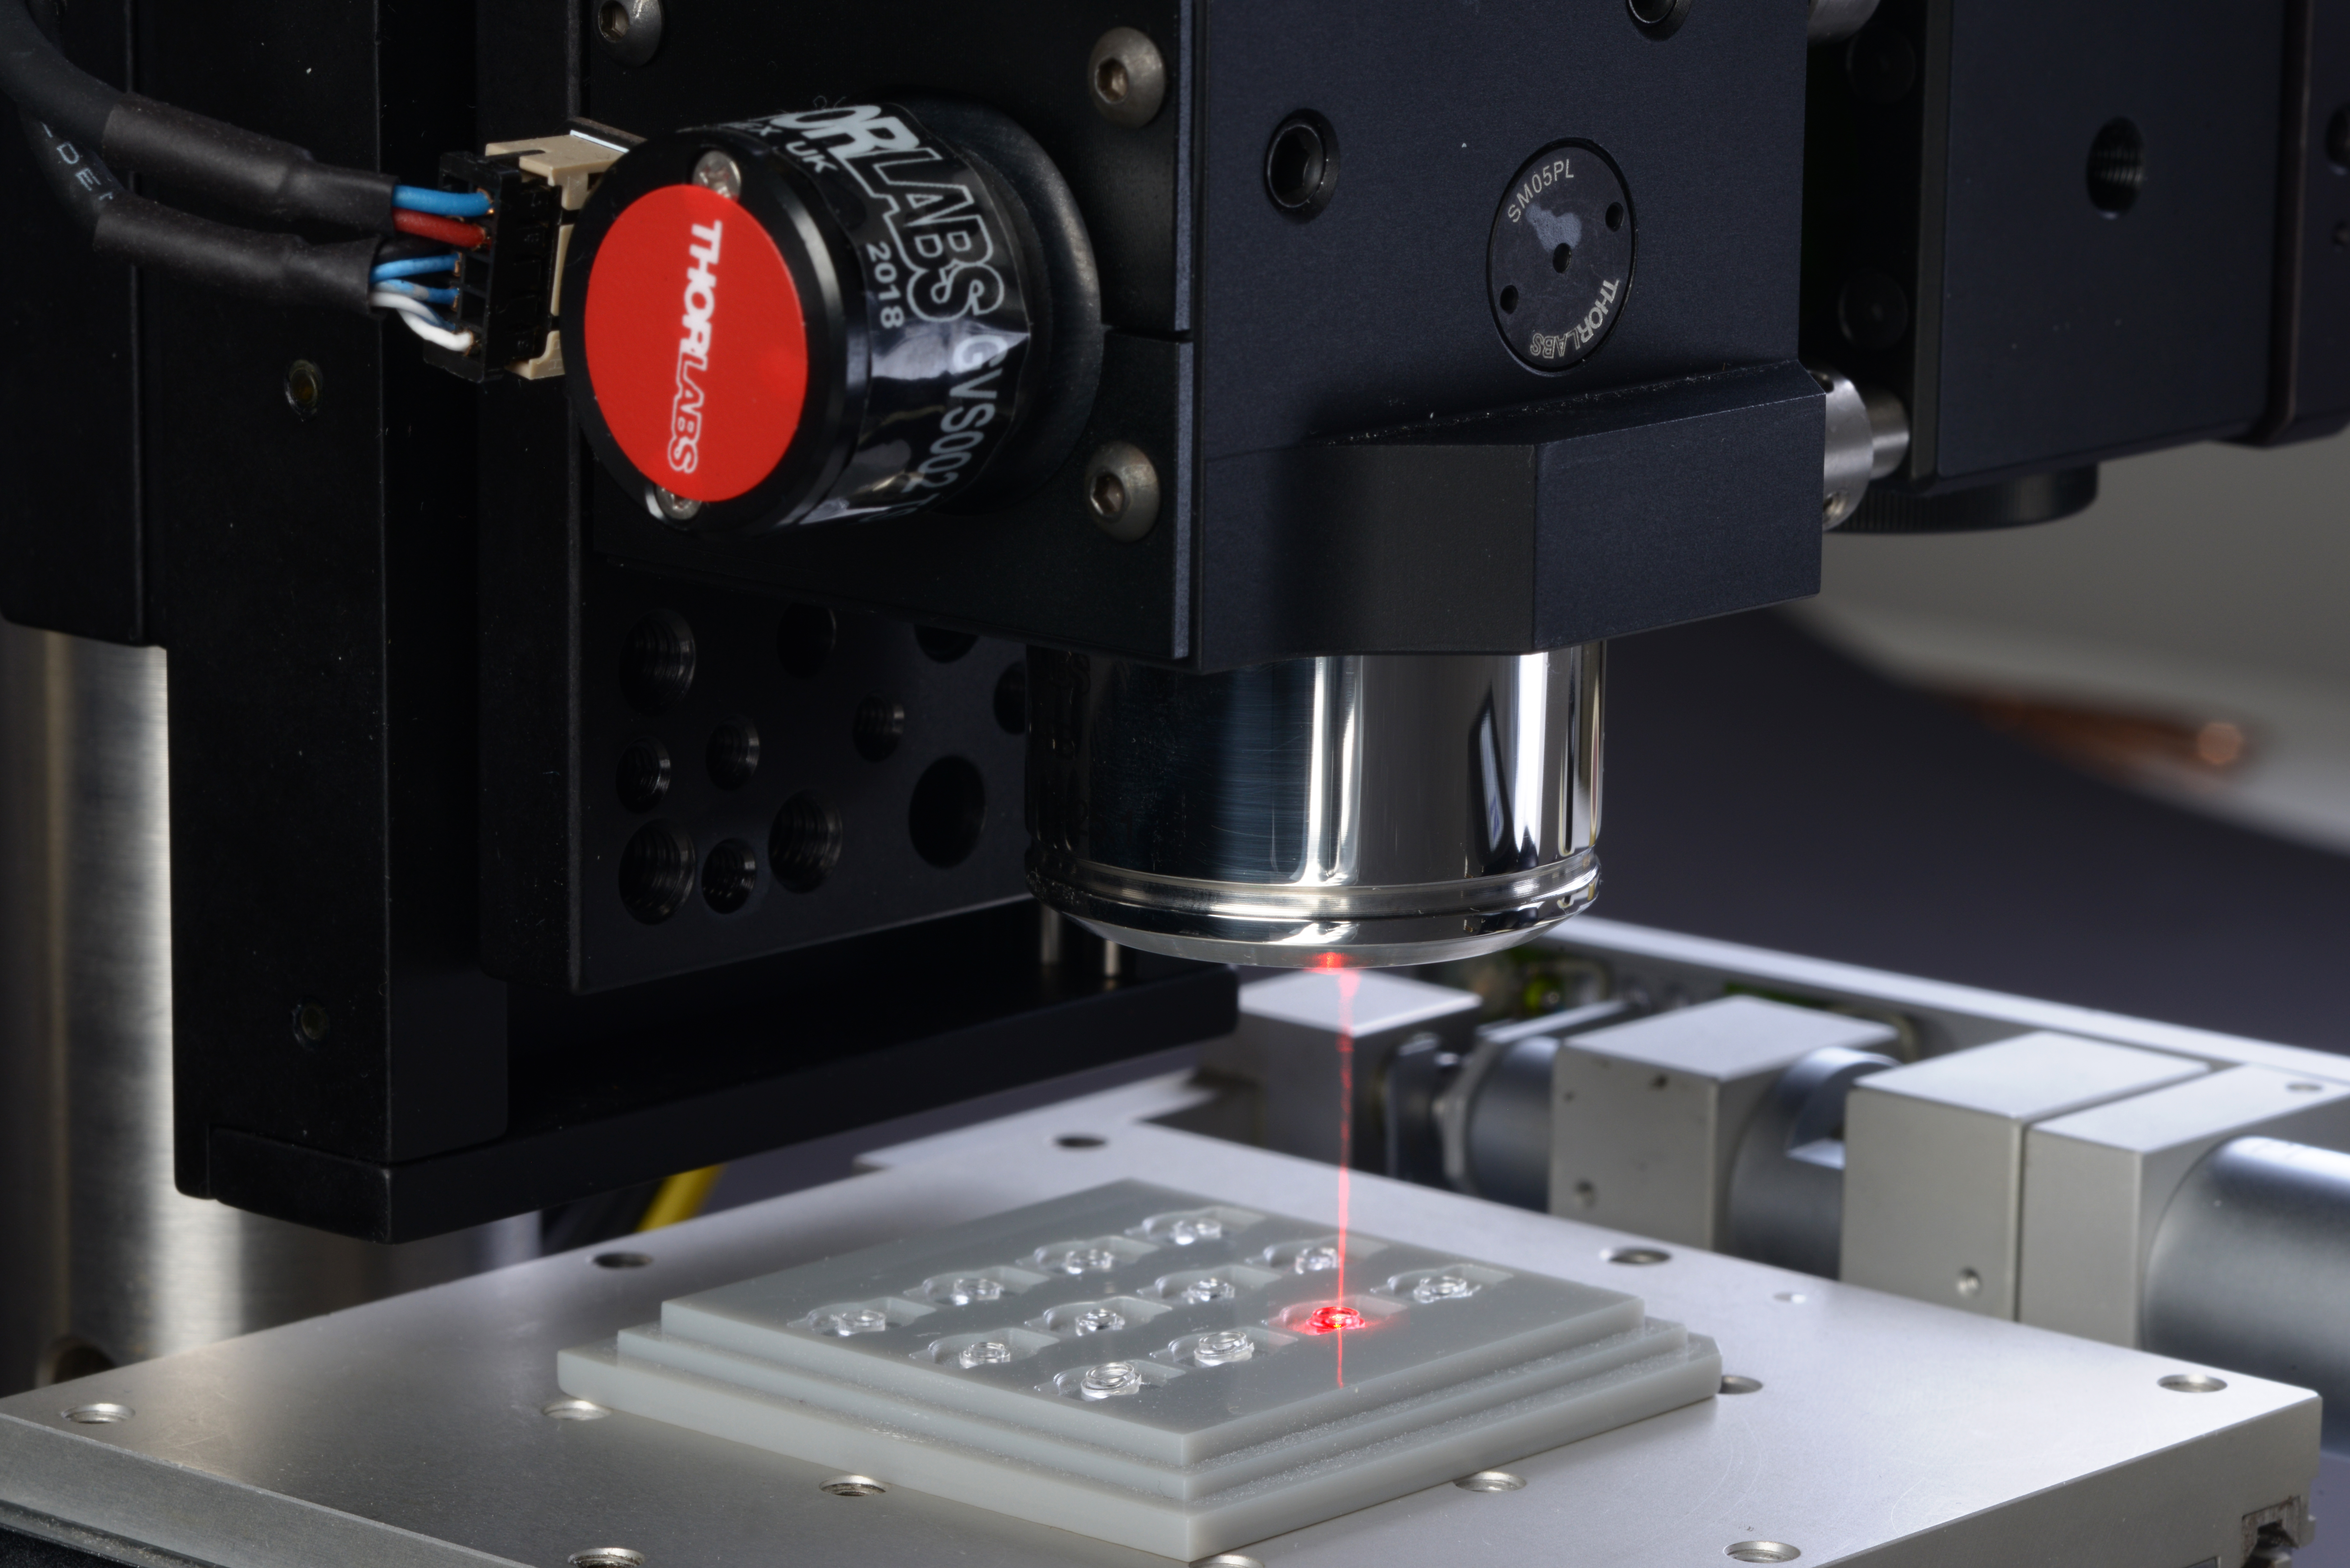
The Fraunhofer IPT, Aachen, is engaged in the development of product-accompanying measurement production-related metrology technology for the automotive industry, mechanical and plant engineering companies, the aerospace industry, medical technology and biotechnology. A large number of industrial applications require high-resolution, non-destructive measurement technology in order to record coating thicknesses in real time and thus regulate the dosage or application quantity during the process. For such applications, which include the measurement of coating layer thickness on a substrate, the Fraunhofer IPT has developed an ultra- high-resolution optical coherence tomography system (ultra high resolution OCT, UHR-OCT), which generates non-destructive cross-sectional images and allows the differentiation of layers in the range of one micrometer.

Exhibitor: Fraunhofer IPT, Aachen
Compact scan head of an OCT-system
© Fraunhofer IPT
Compact scan head of an OCT system

Non-destructive testing with heat flow thermography

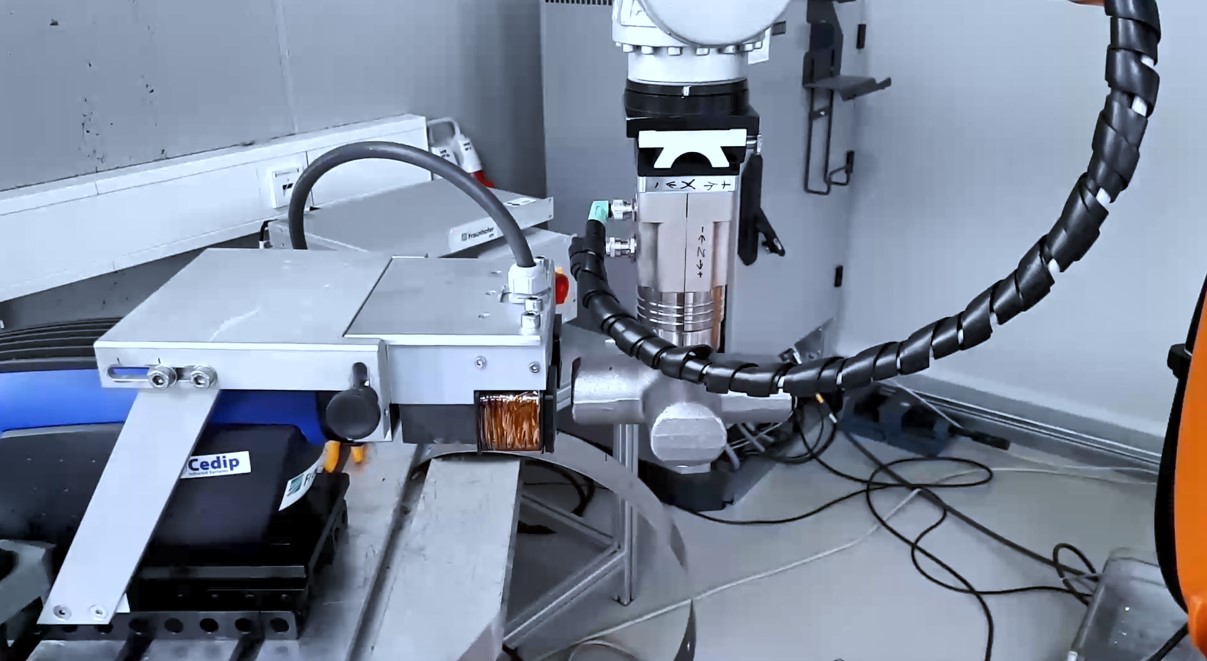
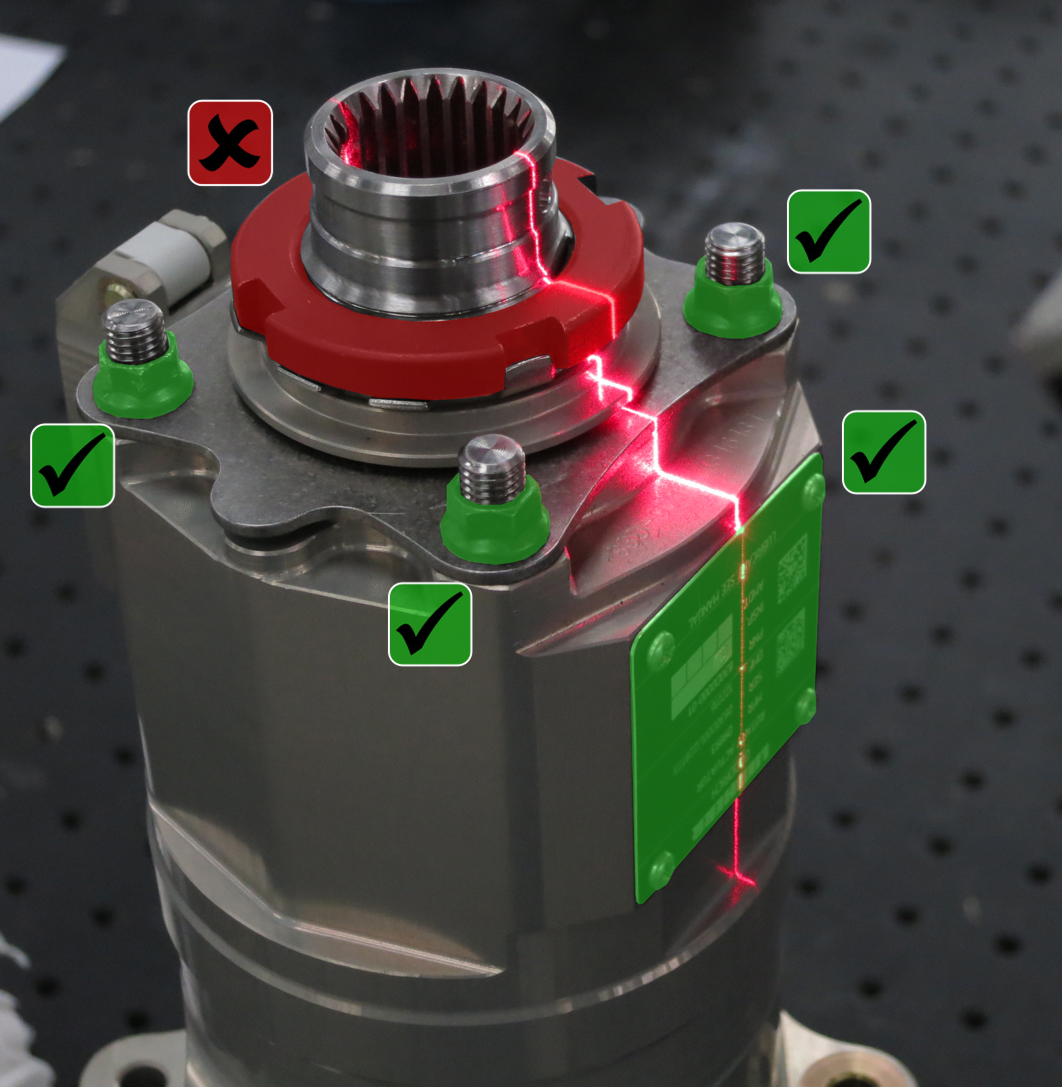
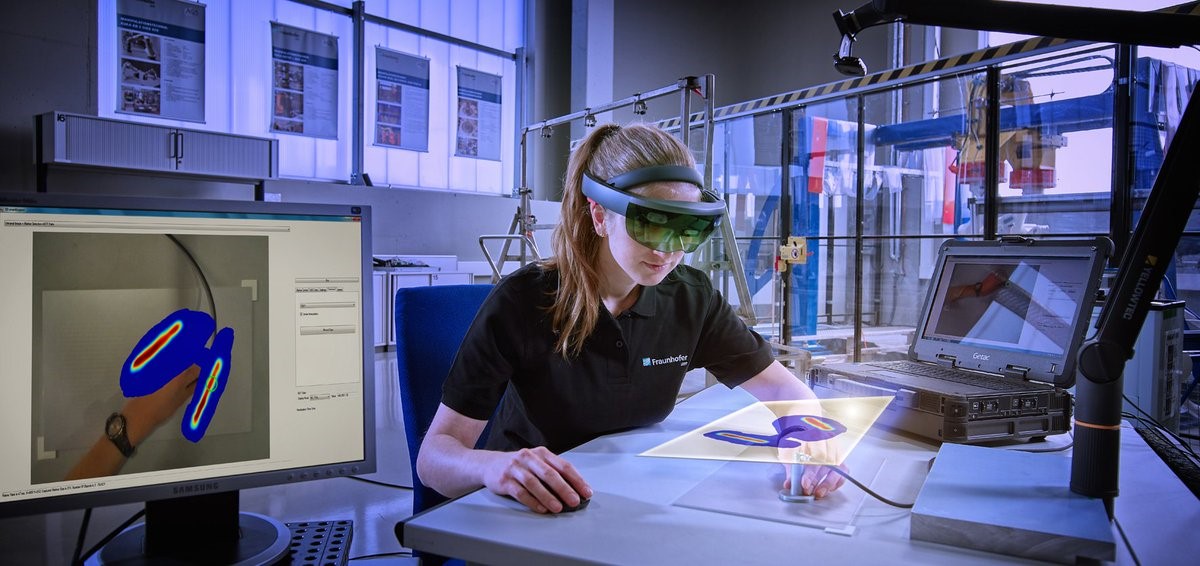
Automated inspection of forged parts for surface defects with eddy-current excited thermography and machine learning

Despite continuous improvements in manufacturing processes, defects can occur in manufactured forged components, either due to defects in the raw material or deviations from the ideal process parameters. Widely used methods of non-destructive testing are magnetic particle crack detection or dye penetrant testing. With the robot-assisted eddy-current thermography system »ForgeCheckTherm« developed at Fraunhofer IZFP, increased testing reliability can be achieved, among other advantages.

Exhibitor: Fraunhofer IZFP, Saarbrücken
System for automated inspection of forged parts for surface defects
© Fraunhofer IZFP
System for automated inspection of forged parts for surface defects using inductively excited thermography

Acoustic monitoring for quality assurance

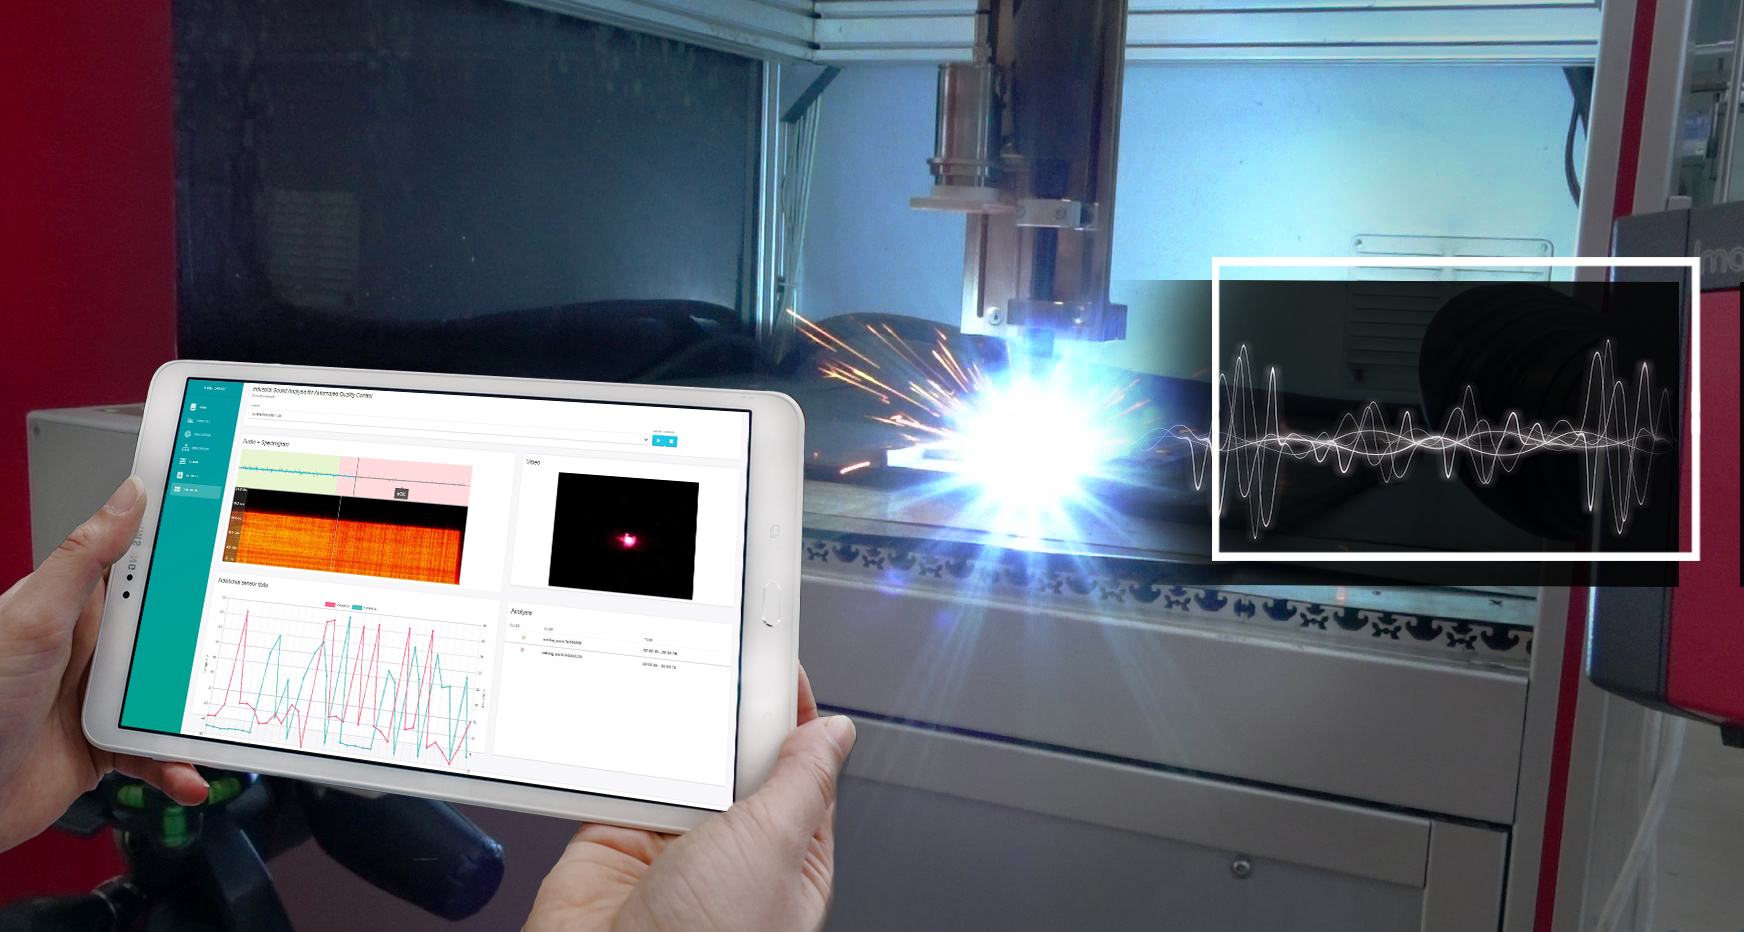
IDMT-ISAAC Software for AI-based Acoustic Quality Assurance

Fraunhofer IDMT develops intelligent acoustic monitoring applications based on the latest AI technologies for use in industrial quality assurance. Acoustic methods can provide reliable results where, for example, optical methods reach their limits. At the virtual Control Fraunhofer IDMT presents the latest developments of the prototypical software IDMT-ISAAC for AI-based, acoustic quality assurance - also for users without AI expert knowledge.

Exhibitor: Fraunhofer IDMT, Illmenau
Die prototypische Software IDMT-ISAAC des Fraunhofer IDMT liefert KI-basierte Audioanalyse-Werkzeuge, die auch von Anwendern ohne KI-Expertenwissen genutzt werden können. Angepasst an spezifische Produktionsprozesse und Anforderungen im eigenen Unternehmen, können die Nutzer ihre Qualitätssicherung durch die Analyse von Audiodaten erweitern und optimieren.
© Fraunhofer IDMT
Fraunhofer IDMT's prototype software IDMT-ISAAC provides AI-based audio analysis tools that can also be used by users without expert AI knowledge. Adapted to specific production processes and requirements in their own company, users can enhance and optimize their quality assurance by analyzing audio data.

Tracking and tracing of objects

Image based anomaly detection with artificial intelligence

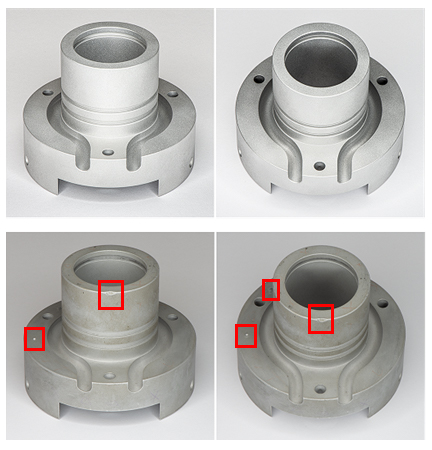
Manufacturing companies face the challenge of further raising this quality standard in order to be able to compete on the global market. To ensure functional and aesthetic properties of a product, Fraunhofer IPK is developing novel approaches for data-reduced AI applications. Thus, it is possible to integrate the advantage of AI-based image processing into the inspection process without having to accept the resulting large effort of training data collection. This is possible by reformulating the inspection task: instead of explicitly detecting learned defects in images, any deviation (anomaly) from a defined quality standard is detected (anomaly). For this purpose, the AI is trained only with defect-free products, which naturally exist in significantly larger numbers than defective products.

Exhibitor: Fraunhofer IPK, Berlin
Example of image-based anomaly detection for an aluminium heat sink
Example of image-based anomaly detection for an aluminum heat sink, target state (top) and real object with defects (center), detected anomalies (bottom).

Logic. Making AI-based image processing usable

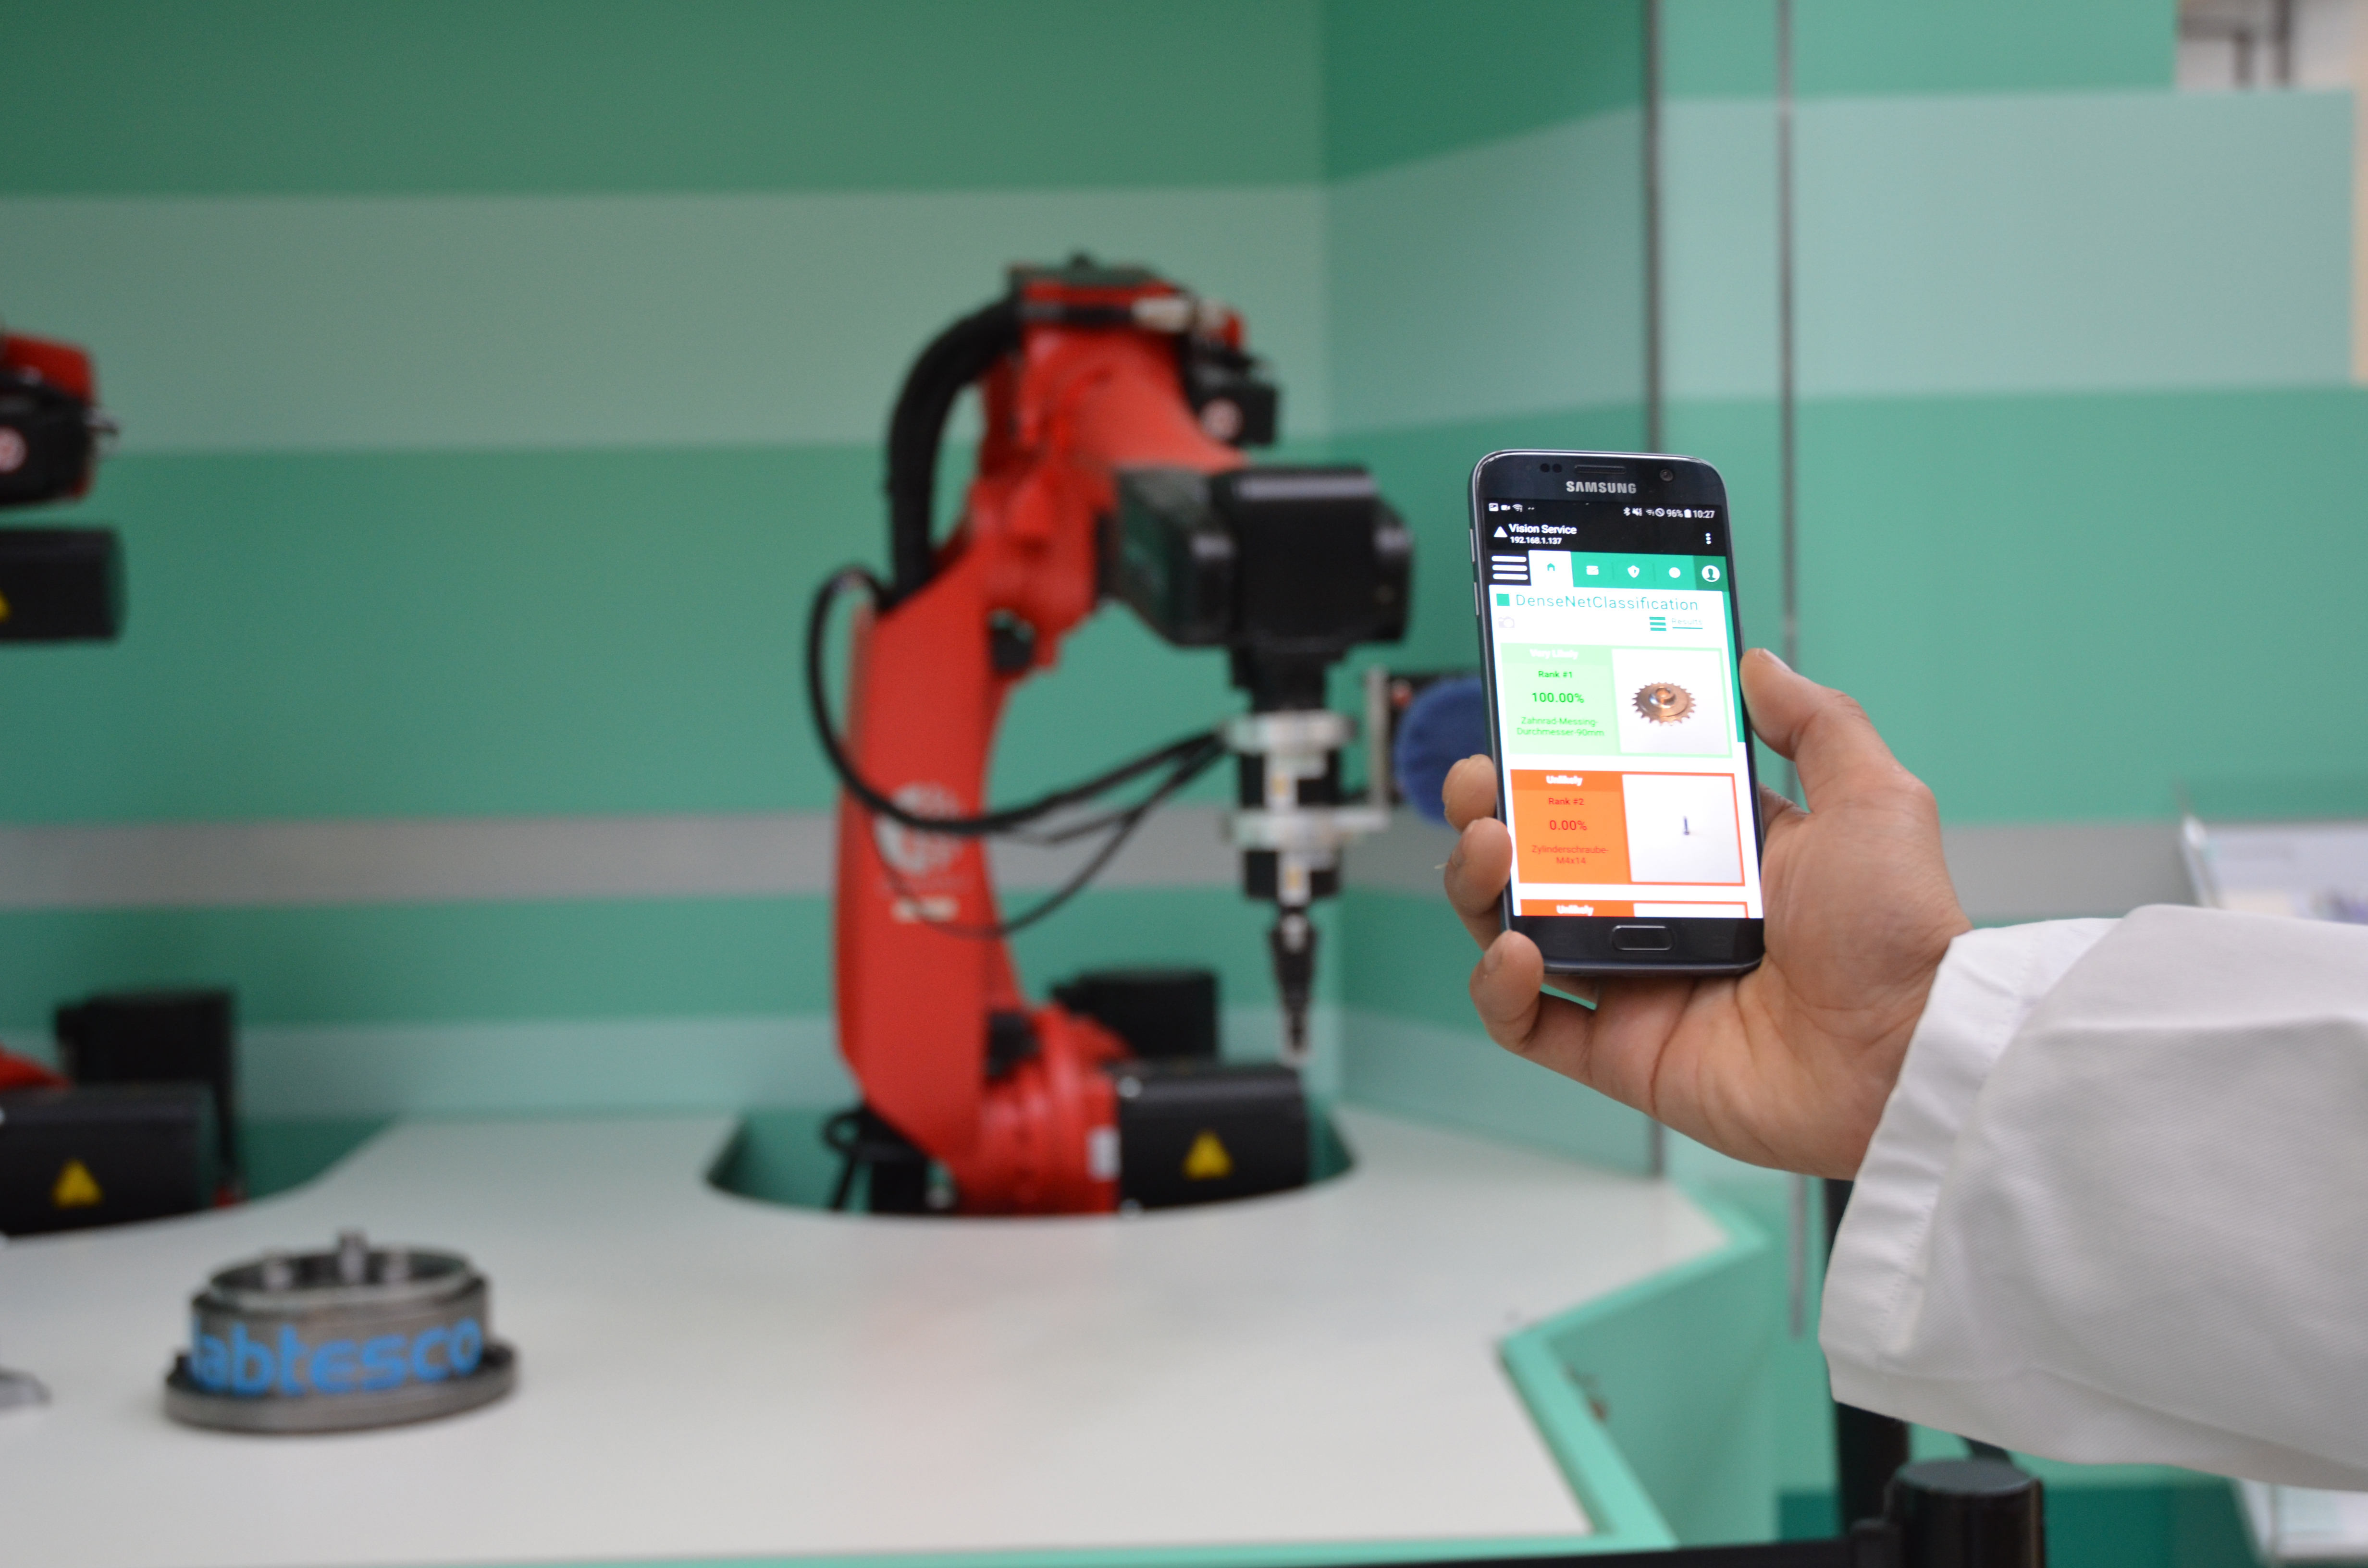
With the Logic. project, Fraunhofer IPK is pursuing the goal of supporting companies in the use of AI technologies. Logic. is based on a modular, service-based platform for solving problems in the field of industrial image processing based on artificial intelligence and offers interfaces to acquisition devices. The assistance system provides suggestions and can thus optimize the industrial process together with the users.

more on Logic. Making AI-based image processing usable

Exhibitor: Fraunhofer IPK, Berlin

Logic. AI-based image processing
© Fraunhofer IPK
Logic. is a terminal-independent technology for AI-based image processing

Mobile and marker-free tracing of components (Track & Trace Fingerprint mobile)

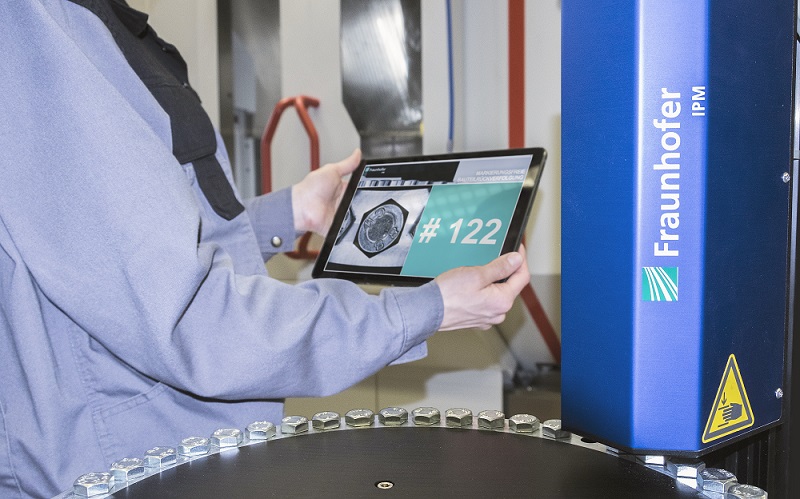
Anyone who wants to trace production data back to an individual component or check the authenticity of a component must be able to identify it unambiguously. With »Track & Trace«, the Fraunhofer Institute for Physical Measurement Techniques IPM in Freiburg has developed a system for tracing mass-produced components that recognizes workpieces without any additional markings - solely on the basis of the individual component surface, which provides an almost unique »fingerprint« for each component. The system has now been expanded to include the »Track & Trace Fingerprint mobile« variant. With this portable reading system, users can thus check the condition and history of components throughout the production hall, for example.

Exhibitor: Fraunhofer IPM, Freiburg
Track and Trace Fingerprint mobile in practical use
© Fraunhofer IPM
Track and Trace Fingerprint mobile in practical use

Inline optical spectroscopy

SmartSpectrometer - Intelligent Process Analytics for Industry 4.0

The modular and intelligent spectrometer system »SmartSpectrometer« developed by Fraunhofer IOSB enables the monitoring of quality-relevant material parameters in real-time. Individual solutions for quality and process control can be implemented easily and cost-effectively using various modules. The evaluation of the spectroscopic measurement data is performed by embedded AI (artificial intelligence) at the sensor level so that calibrated quality and material parameters can be transferred directly to programmable logic controllers. Areas of application can be found in the food industry, agriculture or the chemical and pharmaceutical industries. This technology can also be used in the recycling of plastics and textiles.

Exhibitor: Fraunhofer IOSB, Karlsruhe
Process analytics system using spectroscopy
© Fraunhofer IOSB
View of a virtual factory in which spectroscopy can be used for the analysis of products from the food sector across processes

High-speed image processing for quality assurance

High-speed image processing using Vision-System-on-Chip

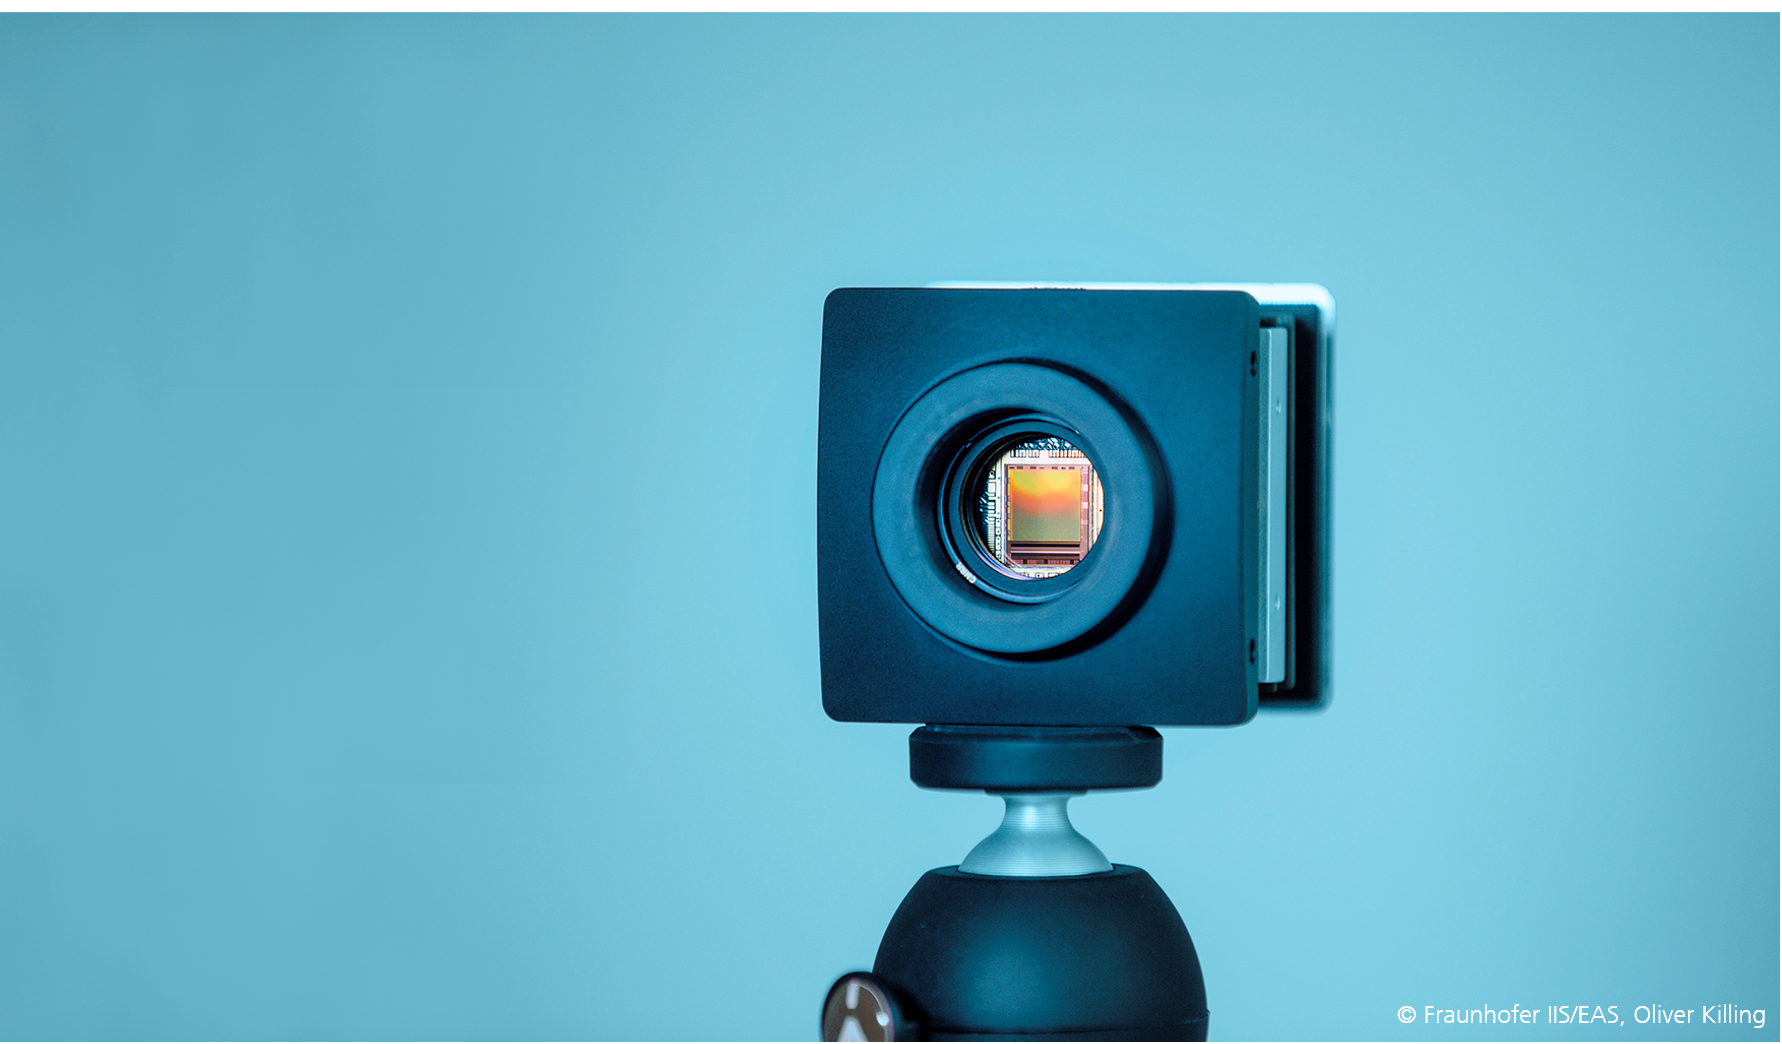
Industrial image processing is considered a key technology for the automation of production processes and is therefore an essential prerequisite for developments in the area of Industry 4.0. In order to live up to the continuously rising requirements on machine vision with minimal latency, further innovations are essential. Fraunhofer Institute for Integrated Circuits IIS, Division Engineering of Adaptive Systems EAS is therefore working on software-programmable image sensors (Vision-Systems-on-Chip or VSoC) based on a new type of processing architecture. The system ist implemented at vosla GmH for the quality assurance of light bulbs. At a testing station for the 360° final inspection very small defects on the glass bodies as well as in the paint application can be localized and measured.

Exhibitor: Fraunhofer IIS-EAS, Dresden
Vision-System-on-Chip (VSoC)

5G technology as the basis for quality assurance

5G Industry Campus Europe: Infrastructure as an enabler for machine learning applications in production

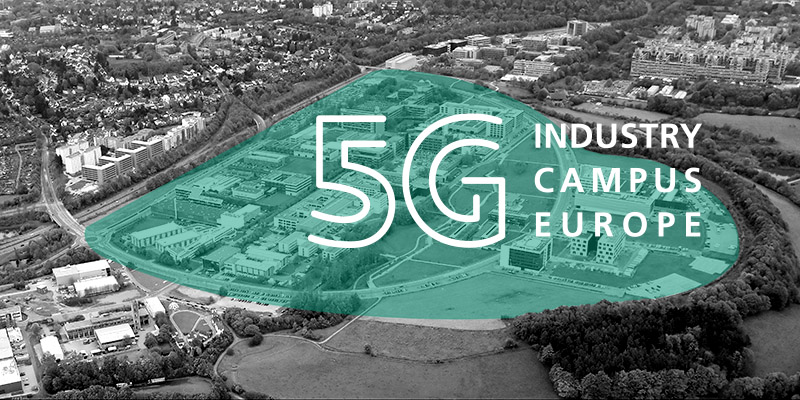
The Aachen campus will be the first location in Europe to be equipped with an area-wide 5G network in order to fully research and demonstrate the new mobile technology in production.

At the 5G-Industry Campus Europe, the project partners are investigating eight different application scenarios - from 5G sensor technology for monitoring and controlling highly complex manufacturing processes to mobile robotics and logistics to production chains spanning multiple locations. The Aachen scientists also want to test the use of modern edge cloud systems for fast processing of data in order to exploit the potential of 5G in networked, adaptive production.

The indoor and outdoor network of the 5G Industry Campus Europe in Aachen covers an outdoor area of about one square kilometer as well as nearly 7000 m2 in the machine halls of the participating partners, representing all fields of production technology. To ensure direct transferability of the research results to real industrial applications, the 5G-Industry Campus Europe network will be built in the industry-relevant frequency range of 3.7 to 3.8 GHz.

For the application scenarios, a flexible sensor-cloud communication structure is being developed in parallel within the framework of Fraunhofer projects, which will significantly increase the potential for the development of complex machine learning applications for quality assurance.

Exhibitor: Fraunhofer IPT, Aachen

Industrial 5G research campus
© Fraunhofer IPT
Industrial 5G research campus

Surface inspection

Automated view planning for complex surface inspection

Fraunhofer ITWM has developed a robot-based surface inspection system for the complete inspection of industrial components. The focus is on the objective and complete acquisition and evaluation of the surface. The special feature of the system: it has several interfaces for image acquisition, examines the component, and performs the comparison with the CAD model as well as the visualization of this CAD model; furthermore, it contains the algorithms for the automatic calculation of viewpoints. The visualization of the CAD model is successively modified according to the viewpoint of the robot, so that the regions of the part that have already been inspected are visibly marked

more on Automated view planning for complex surface inspection

Exhibitor: Fraunhofer ITWM, Kaiserslautern

Robot-assisted surface inspection system
© Fraunhofer ITWM
View planning system for complex surface inspection

Fast, optical 3D measurement of microstructures and defects on plate-sized surfaces

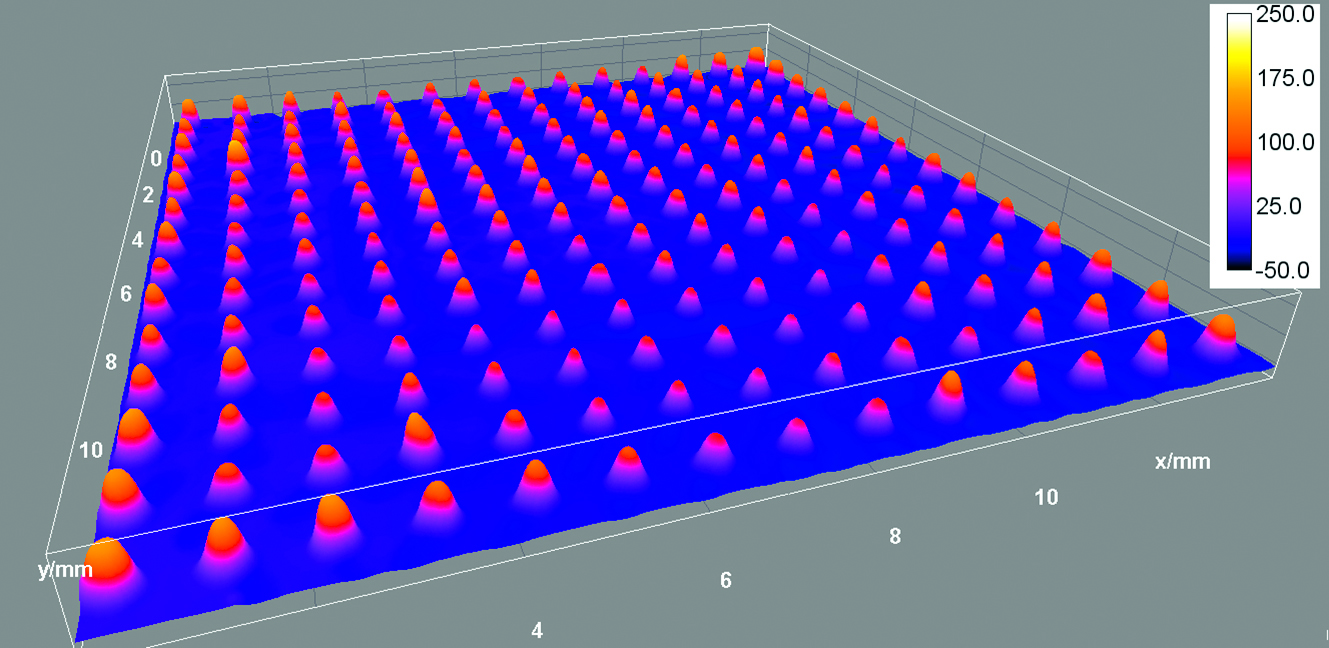
For fast and highly accurate measurements of surfaces, Fraunhofer IPM uses, among other things, the method of digital multi-wave holography, which enables measurements in the sub-micrometer range with very short measurement times. Whereas previous applications were mainly limited to small, matchbox-sized workpieces, a new development is now available that can also be used to measure components with surfaces up to 190 mm x 150 mm in size. One example of this is the quality control of high-current circuit boards for use in wind turbines. With the new holography system, these can be inspected over their entire surface for micrometer-sized defects with just one image and a measurement time of less than one second.

more on fast, optical 3D measurement of microstructures and defects on plate-sized surfaces

Exhibitor: Fraunhofer IPM, Freiburg

Example measurement on a ball grid array.
© Fraunhofer IPM
Example measurement on a ball grid array. Measuring field 13.8 × 13.8 mm². Height scale with unit μm.

System for 100 percent control of oil application on metal sheets - F-Scanner 1D

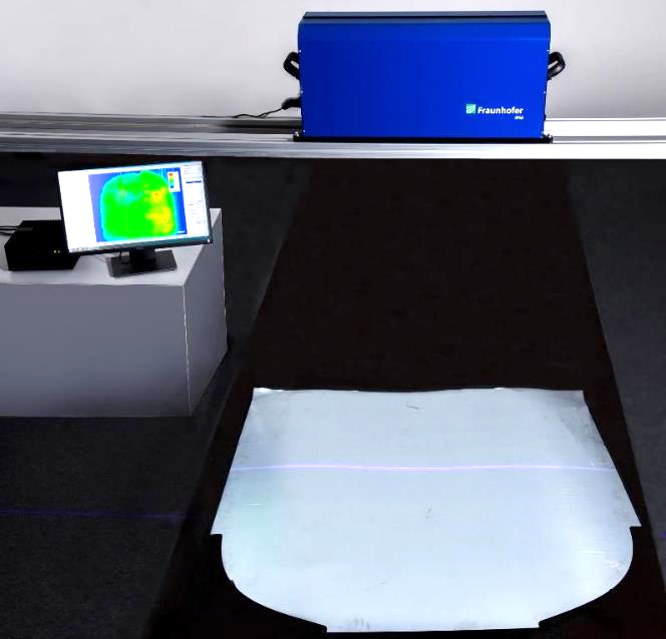
Before sheet metal is formed, the exact dosage of the oil quantity is crucial: If too little oil is applied, the metal could crack later, while overcompensation could significantly impair the next processing steps (e.g. joining processes). With the F-Scanner 1D, Fraunhofer IPM is presenting a fluorescence system that can check 100 percent of the oil applied to a sheet during the production cycle. Integrated in an oiling system, a workpiece can be selectively re-oiled in the event of a shortage.

more on the exhibit System for 100 percent control of oil application to sheet metal - F-Scanner 1D

Exhibitor: Fraunhofer IPM, Freiburg

The fluorescence system
© Fraunhofer IPM
The fluorescence system during testing.

Inspection of specular surfaces with deflectometry

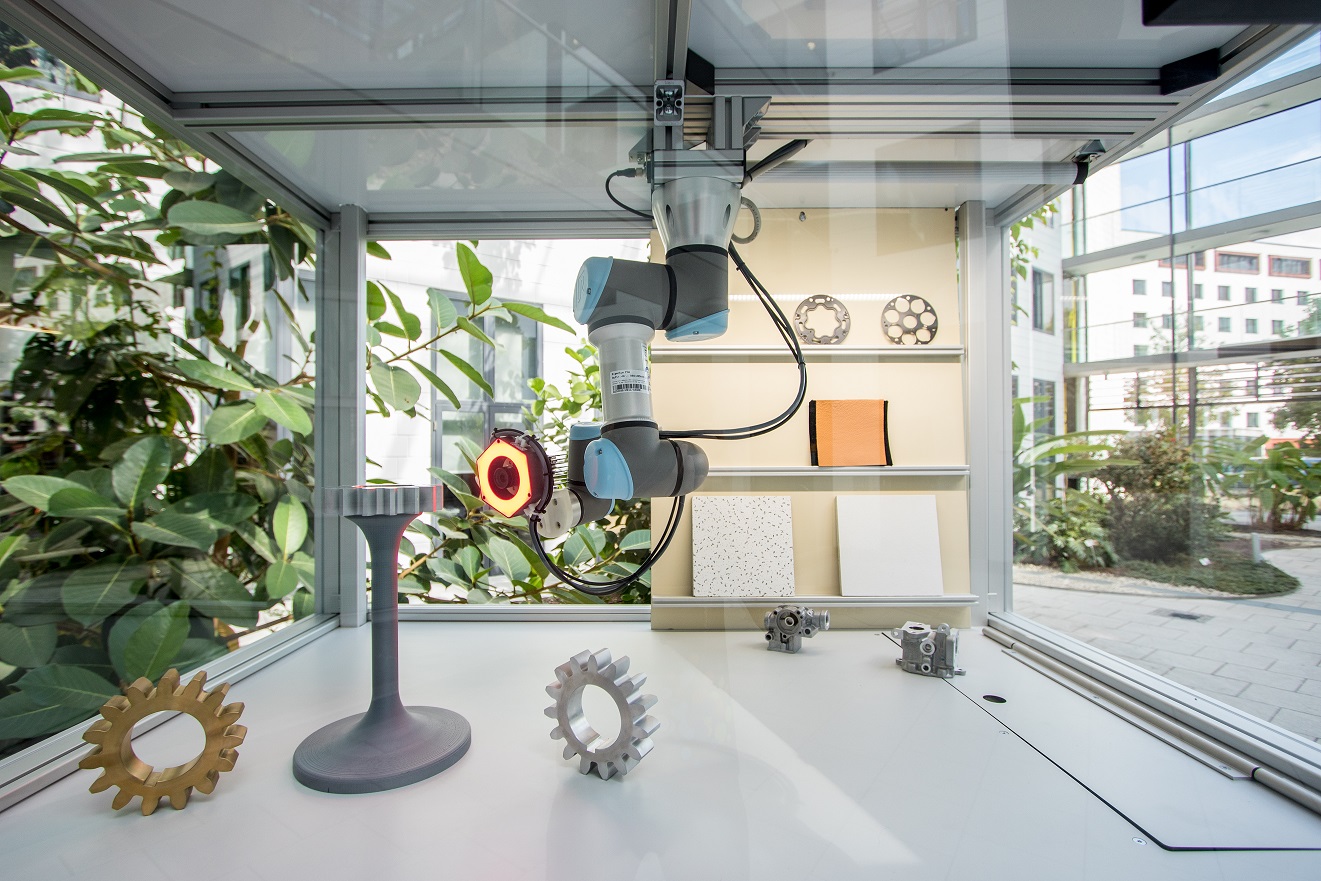
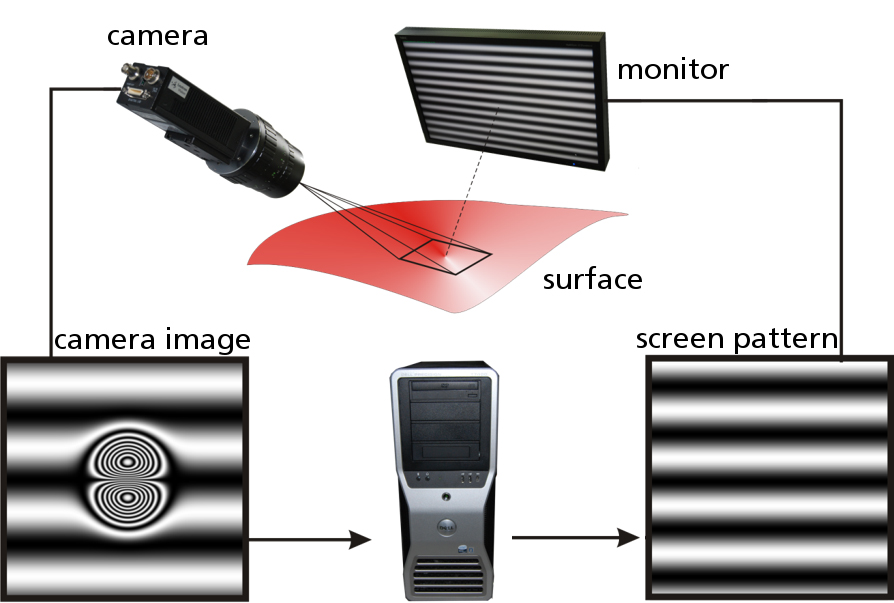
At Fraunhofer IOSB, the deflectometry method is used to inspect flat or slightly curved reflective surfaces. It can be used to examine embossed, polished, painted or glazed surfaces made of plastic, metal, glass and other materials, and the result is information about the position, size and type of aesthetic defects, as well as the shape and waviness of the surface if required. Possible areas of application for the method can be found in metal, plastic and glass processing or surface finishing and coating.

more on the exhibit Inspection of specular surfaces with deflectometry

Exhibitor: Fraunhofer IOSB, Karlsruhe

Principle of deflectometry
© Fraunhofer IOSB
Principle of deflectometry

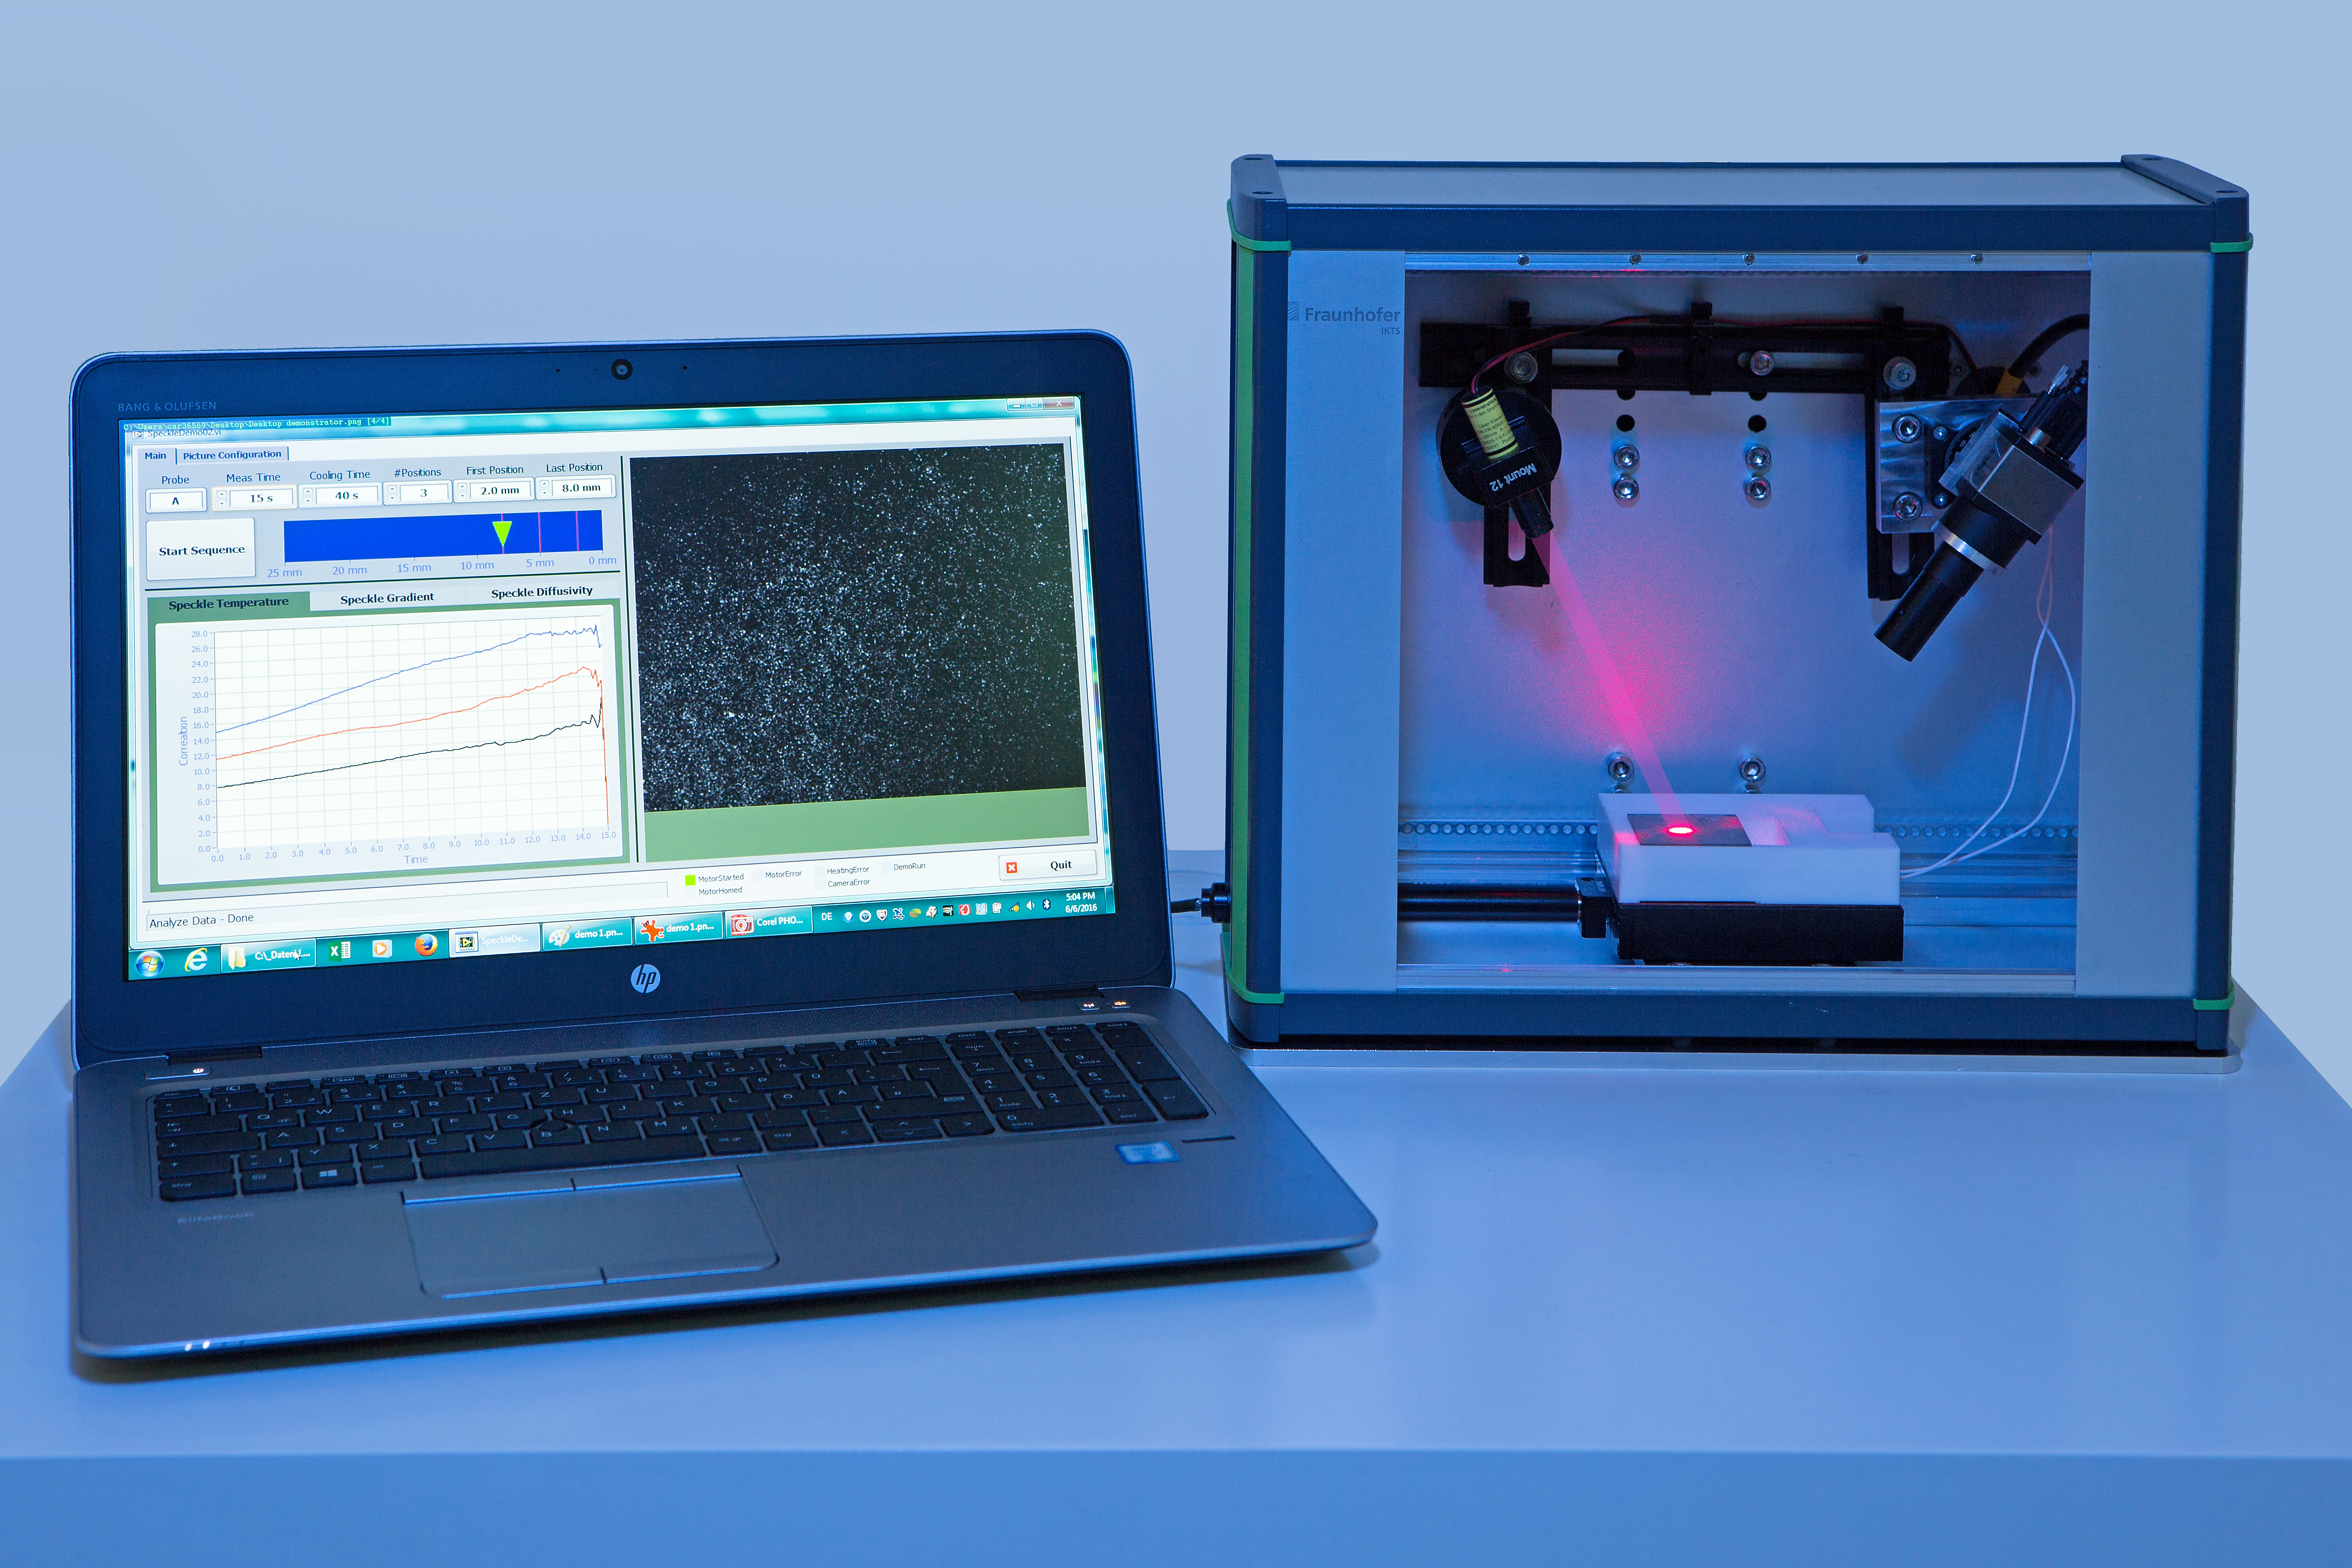
Fast, precise and non-destructive process monitoring with laser speckle photometry

Laser speckle photometry (LSP) developed at Fraunhofer IKTS is a novel method for inline monitoring of industrial processes. Systems based on LSP can analyze surface properties and draw conclusions about geometry, porosity or surface defects. The applications are manifold and range from monitoring industrial processes (additive manufacturing, biotechnology, welding processes, roll-to-roll processes, etc.) to determining material data (such as porosity or density, stress state, roughness or defect density or impurities) for many material classes, including ceramics.

more on the exhibit Process Monitoring with Laser Speckle Photometry

Exhibitor: Fraunhofer IKTS, Dresden

Laser speckle photometry for process monitoring
© Fraunhofer IKTS
Demonstrator for laser speckle photometry for inline process monitoring

Optical 3D Measurement

Model-supported digital quality control from batch size 1

In the manufacturing of individualized products with a large number of variants, more flexible and adaptive optical measuring and inspection systems are increasingly needed for inline quality inspection. The Fraunhofer IFF develops such customized and flexible 3D measuring systems for dimensional and form inspection as well as for assembly and completeness inspection. In addition, individual function modules are offered as software libraries, such as geometric evaluation of 3D scan data, simulation of optical sensors to generate synthetic target data or calibration and calibration of optical sensors.

more on the exhibit Model-based digital quality control from batch size 1

Exhibitor: Fraunhofer IFF, Magdeburg


3D-measurement technology
© Fraunhofer IFF
Model-based inspection of an assembled component for completeness and correctness

Hyperspectral Image Processing

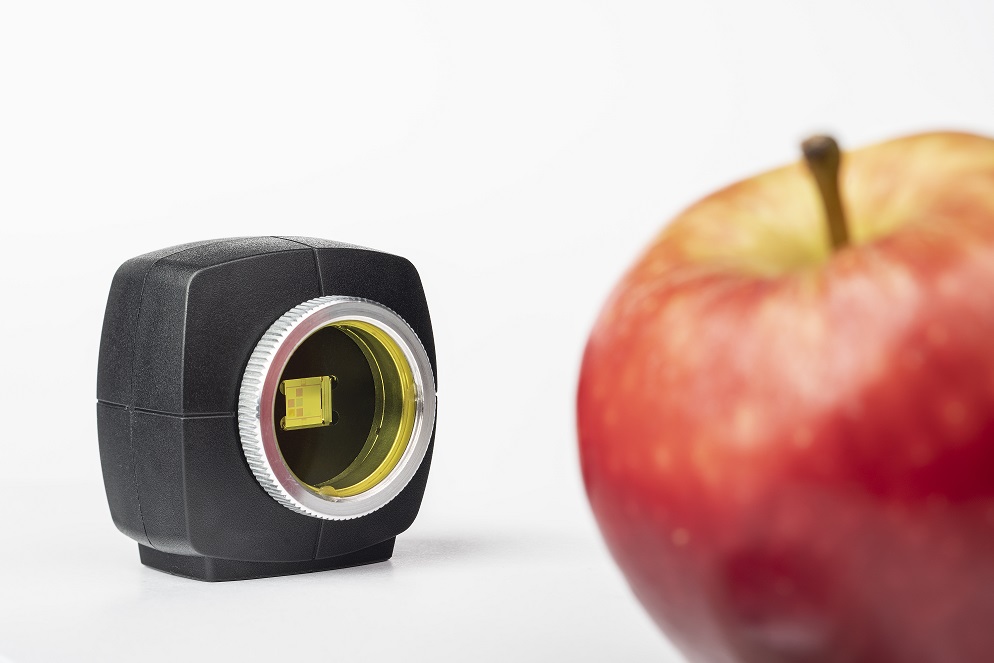
Ultra-compact multispectral cameras based on micro-optics

The special requirement for multispectral camera systems is the simultaneous recording of high-resolution spectral and spatial information. Classical solutions are often based on scanning methods with bulky setups. The new multispectral camera from Fraunhofer IOF, which is based on a multi-aperture system approach with a specifically adapted microlens array in combination with an oblique linear variable spectral filter, can overcome these limitations. The system is only 60 x 60 x 28 mm³, yet offers a large field of view of 68° and spatial sampling of 400 x 400 pixels per channel. Potential applications include environmental and agricultural monitoring, industrial production control and sorting, and biomedical imaging.

more on the exhibit Ultra-compact multispectral cameras based on micro-optics

Exhibitor: Fraunhofer IOF, Jena

Multispectral camera
© Fraunhofer IOF
Demonstrator of a compact multispectral camera with special filter array

Non-destructive Testing

NDT 4.0 - Digital transformation and its impact on NDT

At Fraunhofer IZFP, the term »NDT 4.0« or »NextGen NDT« is used to address tasks that will be faced by the »NDT of the future« in the age of Industry 4.0. The goal is to further develop NDT 4.0 into intelligent and IIoT-capable NDT sensor systems based on eddy current, ultrasound and 3MA. The focus is on interfaces using OPC-UA as well as modern documentation options by connecting the systems to DICONDE servers, enabling their integration into existing IIoT networks. It is also possible to combine both technologies to solve an inspection task.

more on NDT 4.0 - Digital Transformation and its Impact on NDT

Exhibitor: Fraunhofer IZFP, Saarbrücken

Digital transformation in Industry 4.0
© Fraunhofer IZFP
Digital transformation of NDT in Industry 4.0

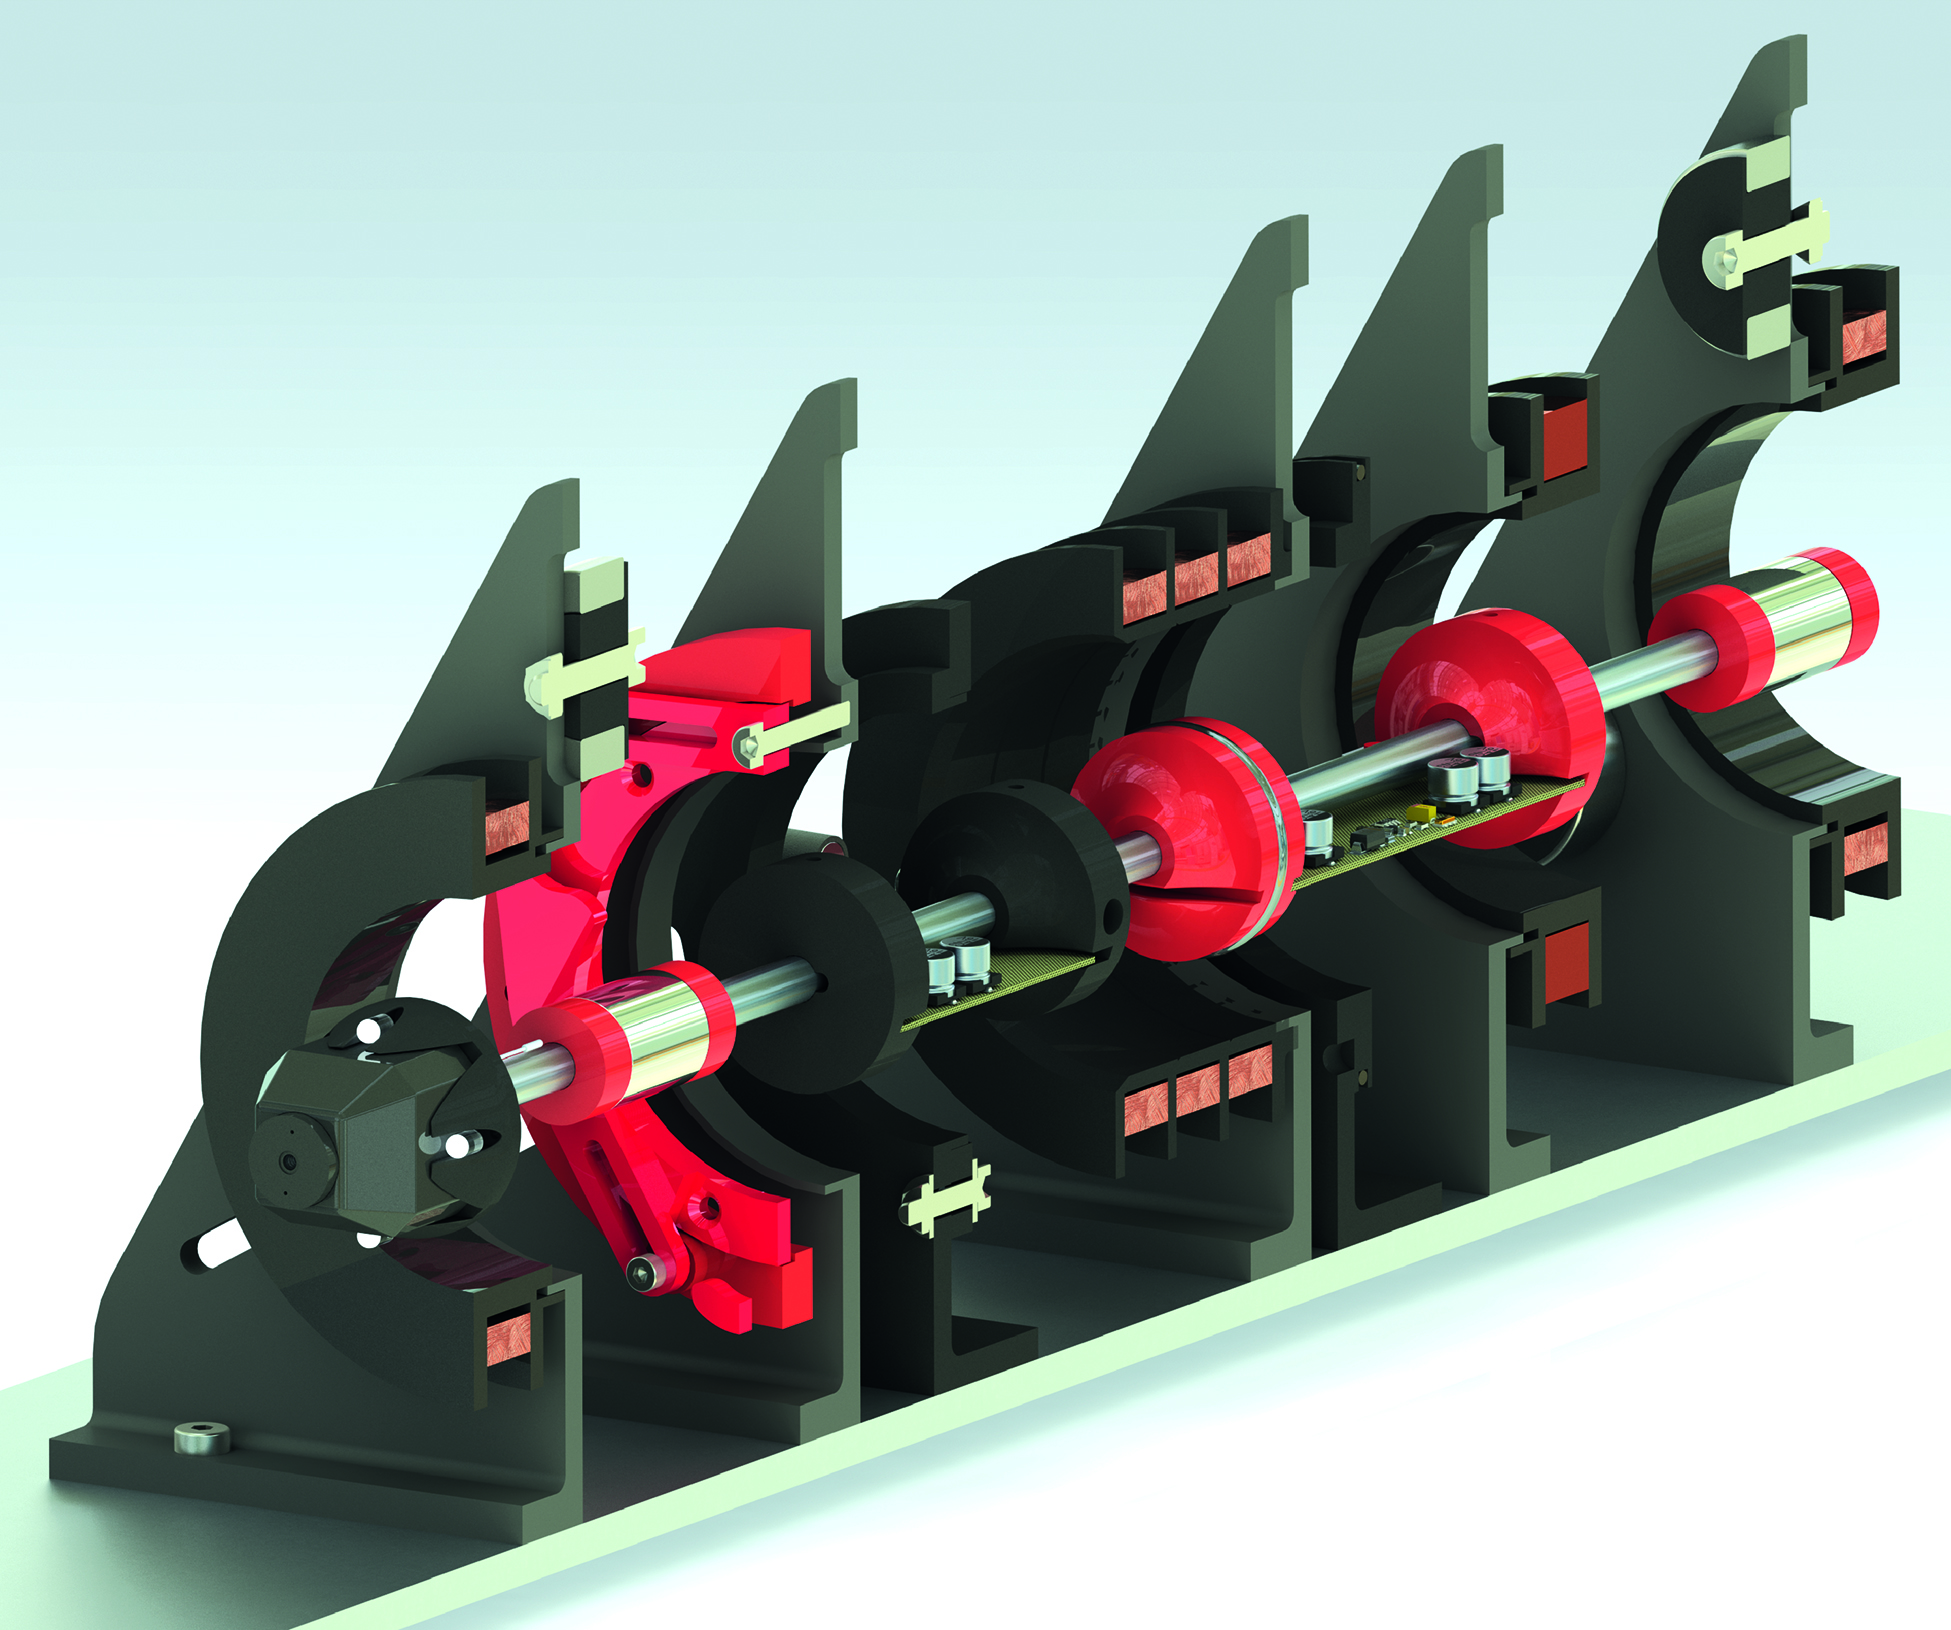
Wireless Hollow Object Inside Testing System (HOBITS)

Continuous inspection of the inside of spatially long hollow bodies such as extruded pipes is a technical challenge due to difficult accessibility. With the new, free-floating sensor carrier HOBITS, continuous internal inspection of non-magnetic and non-conductive hollow bodies is now possible for the first time. The system developed at Fraunhofer IZFP uses a magnetic bearing for autonomous, floating positioning in the test specimen and operates continuously with cable-free and contact-free supply.

Exhibitor: Fraunhofer IZFP, Saarbrücken

Hollow object inside testing system HOBITS
© Fraunhofer IZFP
HOBITS Wireless Hollow Test System

Intelligent assistance system with interactive visualization and digital documentation in networking with DICONDE environment

»3D-SmartInspect« of Fraunhofer IZFP is a new system for digital hand-guided inspection of safety-relevant industrial components and structures. The intelligent assistance system optically records the inspection process (e.g. eddy current method, 3D ultrasound), the tracking module tracks the movement of the probe and fuses inspection positions and measurement signals. Finally, the result is transferred to DICONDE (Digital Imaging and Communications for Non-Destructive Evaluation) in the form of a digital component file. The assistance system can be used in all industrial testing applications, including in the aerospace sector (safety-relevant components), energy plants (turbines, generators, high-pressure vessels, etc.) or large-scale equipment manufacturing.

Exhibitor: Fraunhofer IZFP, Saarbrücken

3D-SmartInspect Assistance system
© Fraunhofer IZFP
3D-SmartInspect Assistance system

Material characterization with 3MA

Components in mechanical, automotive and plant engineering are heat treated and machined in order to adjust the service properties in a desired manner. With the 3MA testing method developed at Fraunhofer IZFP, it is possible above all to characterize the characteristics of the surface layers, which cannot be satisfactorily tested non-destructively using conventional methods. The method can be fully automated and can be integrated into the manufacturing process. Its high inspection speed allows 100 percent inspection in most applications. The method allows rapid and simultaneous evaluation of several relevant quality characteristics of the surface layer (0 mm to 8 mm component depth).

more on the exhibit Material characterization with 3MA

Exhibitor: Fraunhofer IZFP, Saarbrücken

3MA Testing ferromagnetic materials
© Fraunhofer IZFP
3MA technology for 100 percent non-destructive testing of ferromagnetic materials

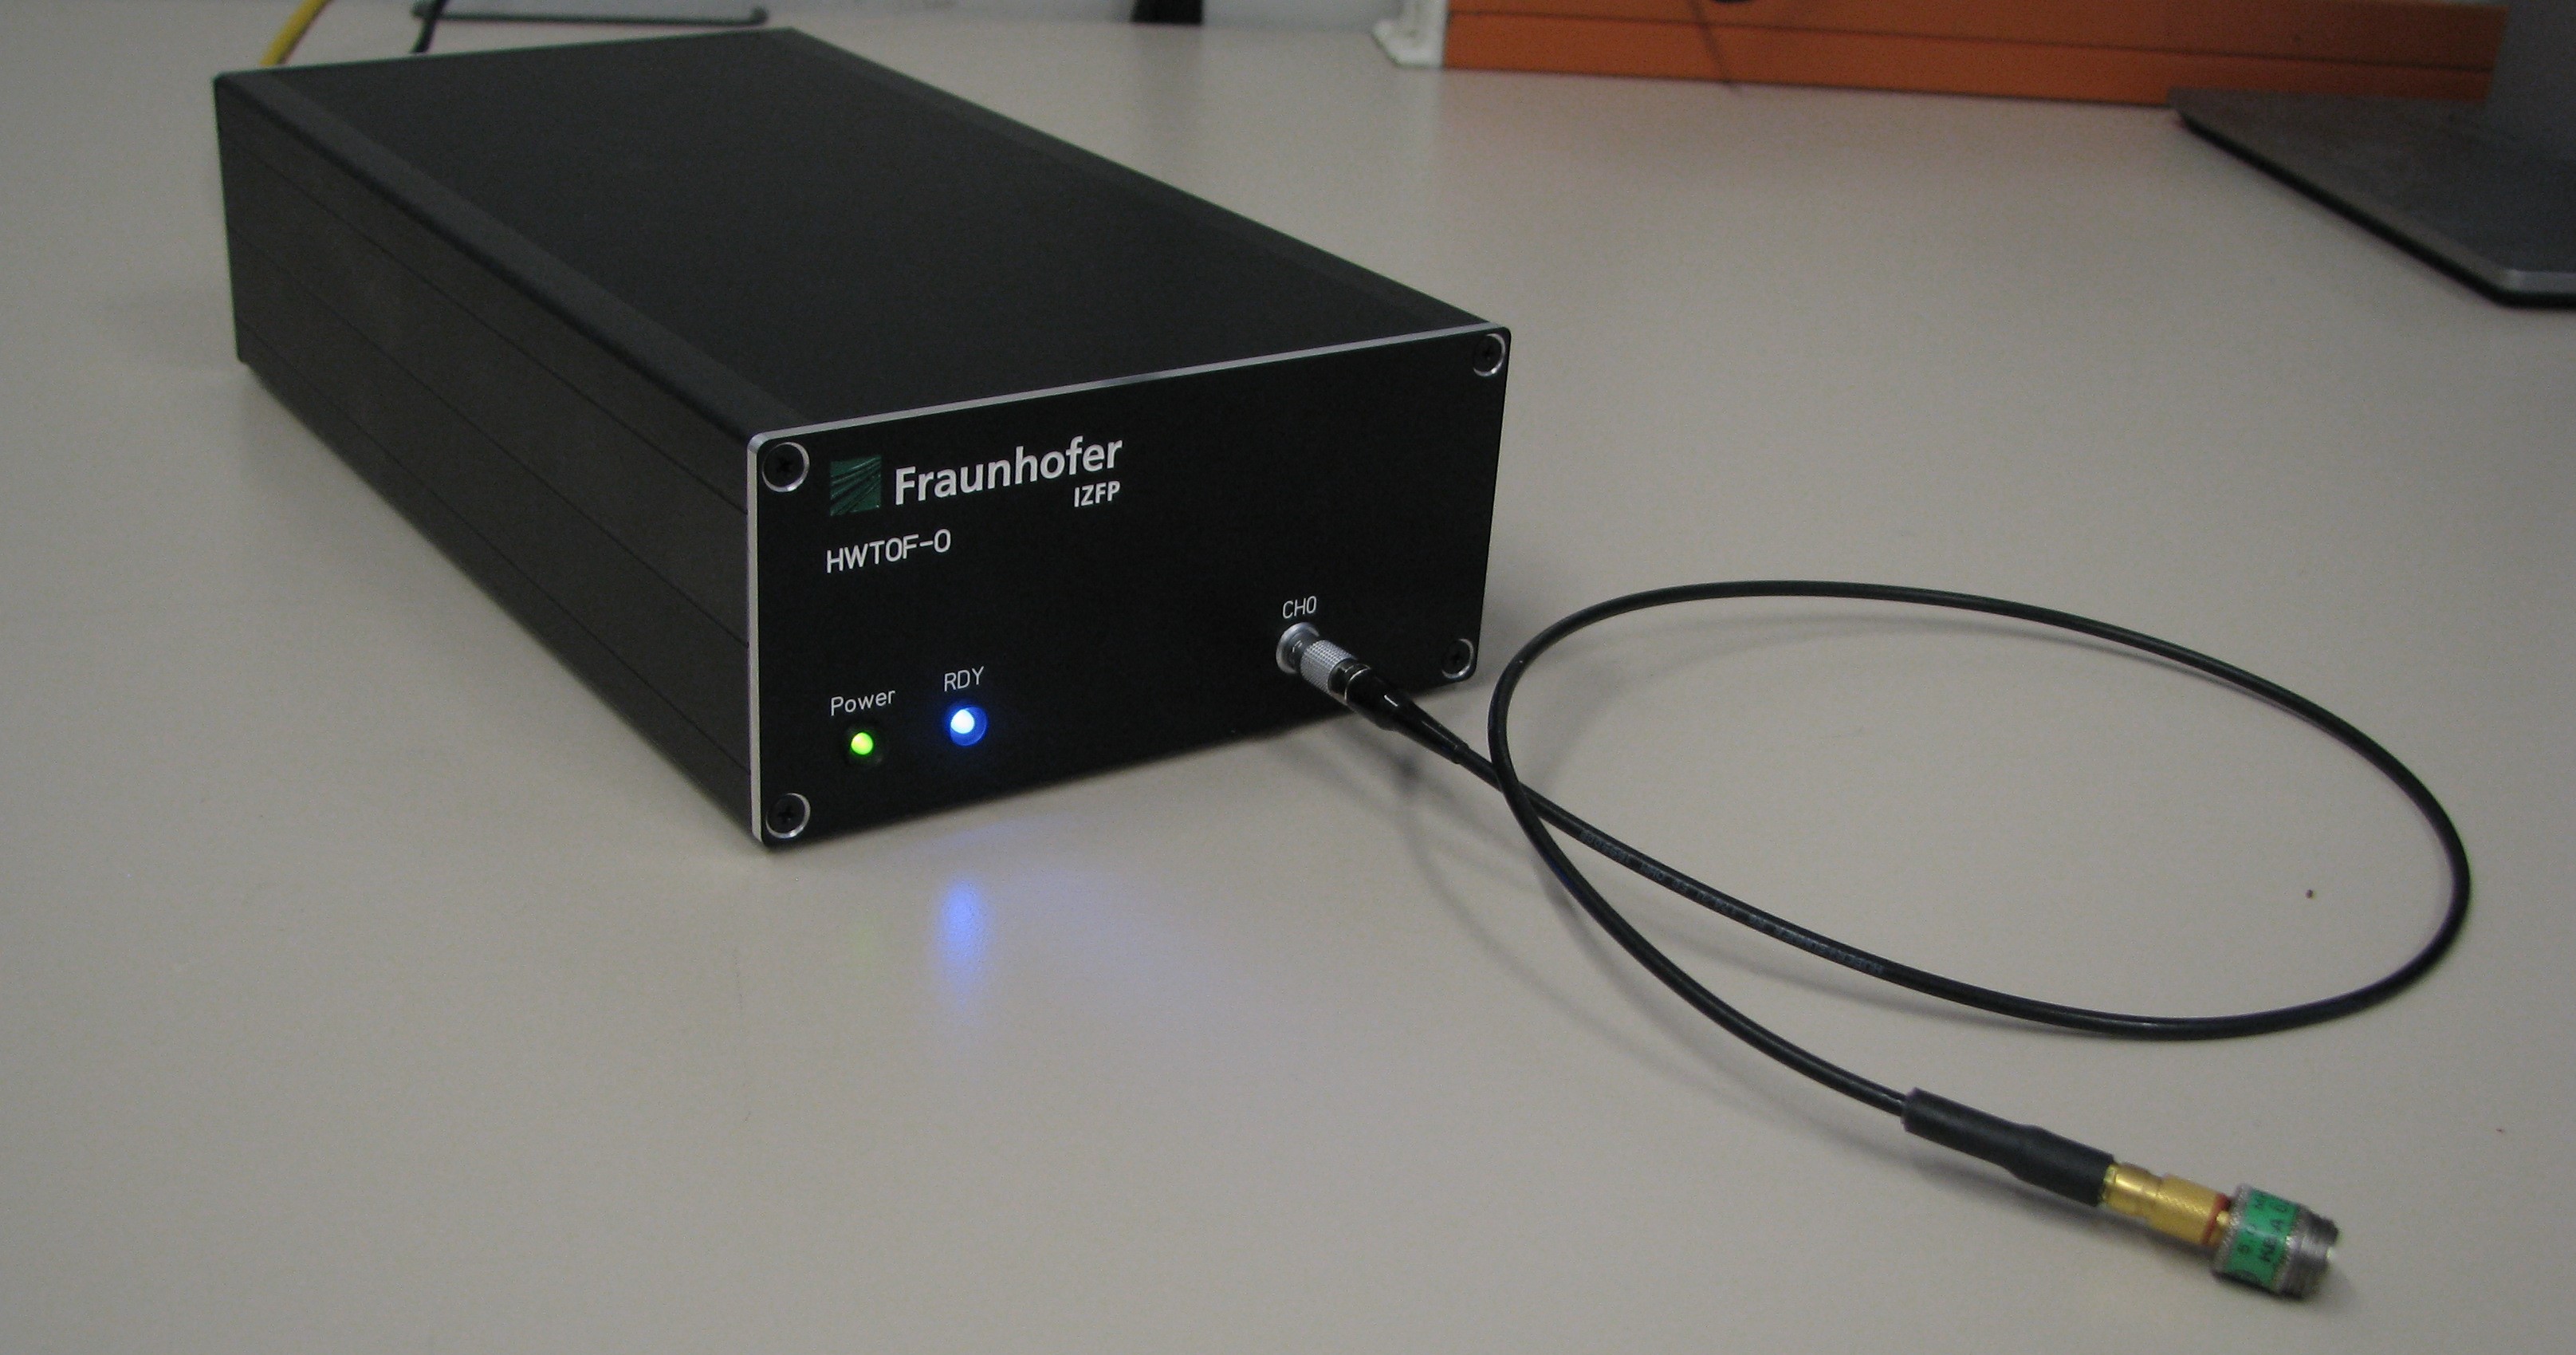
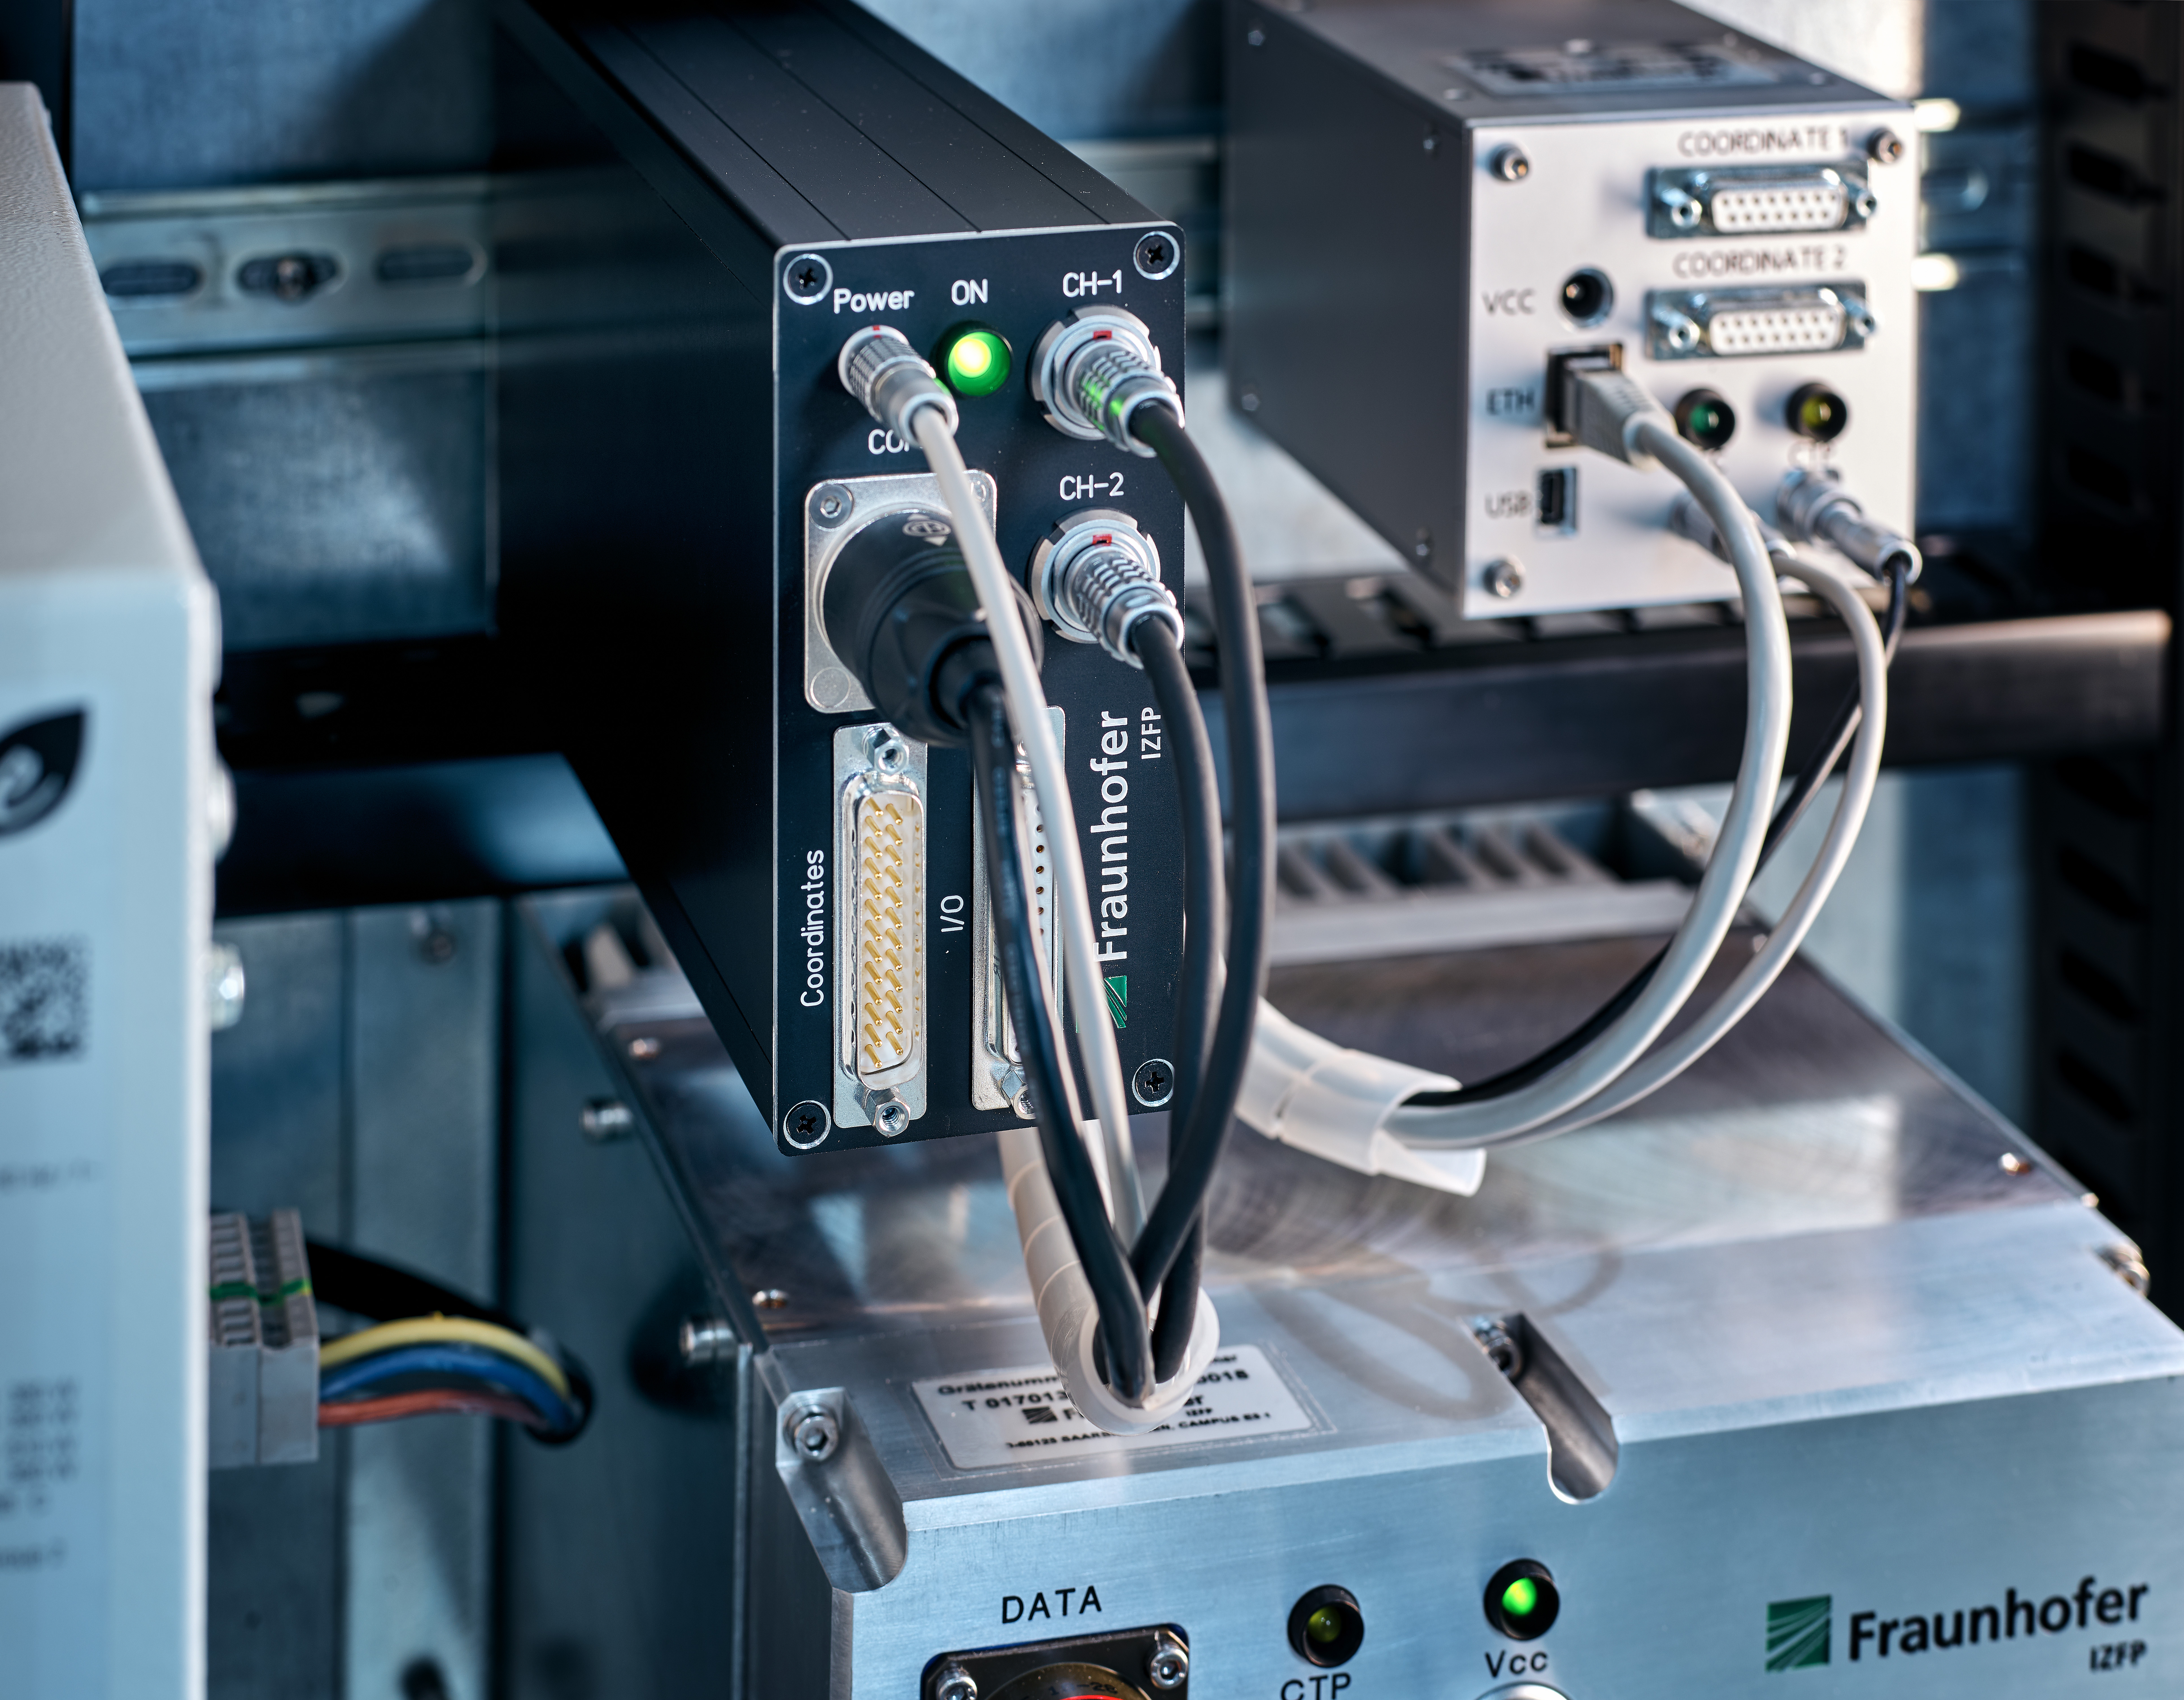
FPGA-integrated runtime measurement for connection to Industry 4.0 applications

The system for measuring ultrasonic time of flight from Fraunhofer IZFP can work directly in the field, independent of software solutions. Signal generation and recording as well as the entire processing take place close to the sensor in an FPGA. The system is based on the OPC UA standard for industrial communication. One application example is the fully integrated time-of-flight wall thickness measurement of various metals. Possible areas of application are in sectors such as the automotive and supplier industry or steel production.

Exhibitor: Fraunhofer IZFP, Saarbrücken
FPGA-integrated runtime measurement for Industry 4.0 applications
© Fraunhofer IZFP
FPGA-integrated runtime measurement for connection to Industry 4.0 applications

OPC UA-enabled Screening Check

At Fraunhofer IZFP Saarbrücken, OPC UA is used in the context of Industry 4.0 to ensure the reliable collaboration of different test systems and their integration into existing IIoT networks. The OPC UA (Open Platform Communications Unified Architecture) interface standard is a platform-independent, service-oriented structure for data exchange with mainly meta data – such as date, component type, batch, etc. – and a qualitative statement of material characteristics (OK, NOK) being transmitted. A showcase application in this concept is the inspECT-PRO eddy current screening inspection system for the seamless inspection and documentation of mass-produced parts. In addition to its established use for defect inspection and material characterization for materials such as steel, copper or aluminum, eddy current technology is also very well suited for the inspection of materials with weak electrical conductivity, such as carbon fibers (CFRP).

more on the exhibit OPC UA-enabled sorting test

Exhibitor: Fraunhofer IZFP, Saarbrücken

Eddy current sorting inspection system
© Fraunhofer IZFP
Modular eddy current platform inspECT-PRO.

Partner for system integrators: Innovative software and hardware components in the field of industrial X-ray and CT technology

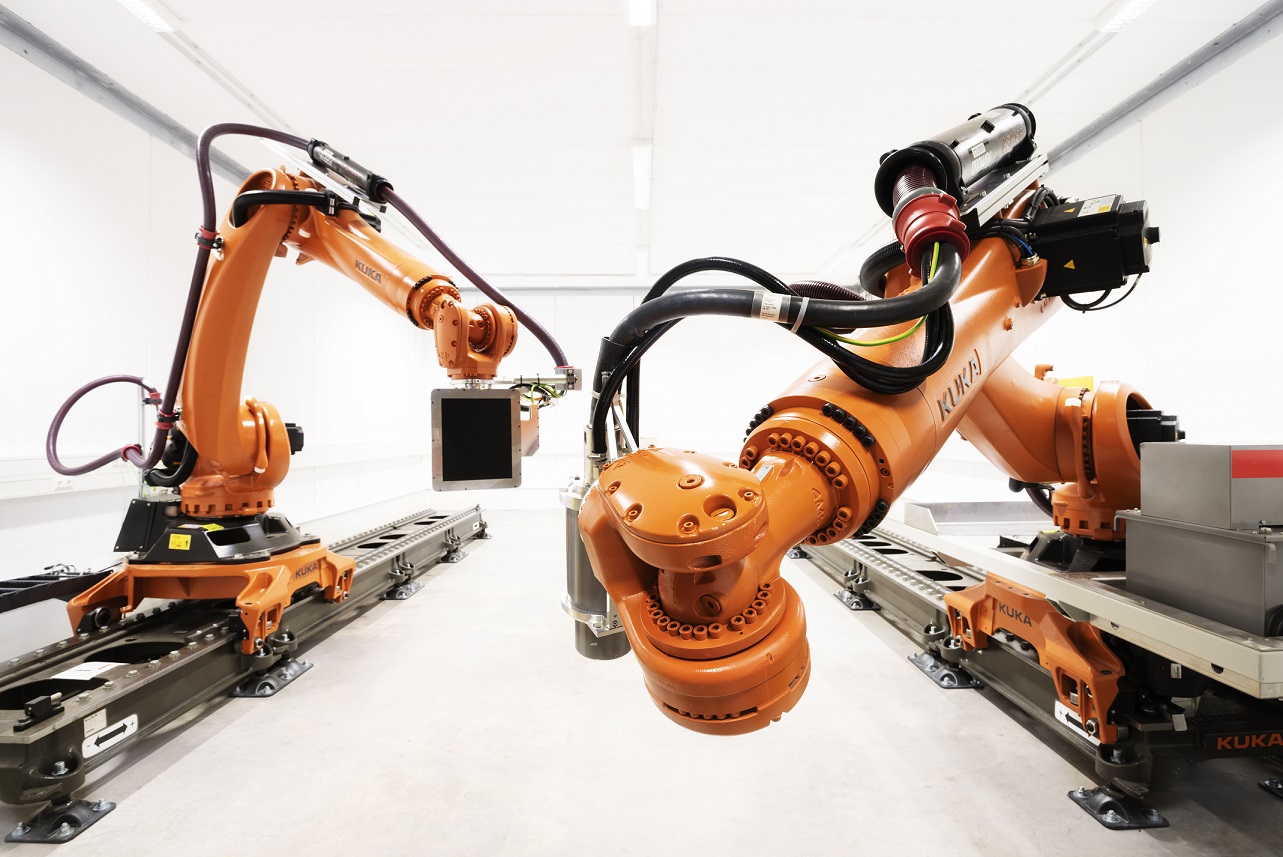
Fraunhofer EZRT has been researching and developing in the field of industrial X-ray technology for over 20 years and has extensive know-how in software and hardware components for X-ray and computed tomography systems, especially for demanding special applications. With its components and know-how, Fraunhofer EZRT is available as a partner to plant manufacturers and system integrators for the implementation of innovative projects.

Exhibitor: Fraunhofer EZRT, Fürth

RoboCT setup with X-ray source
© Fraunhofer EZRT
Setup of »RoboCT« with the imaging components X-ray source and detector

Terahertz layer thickness measurement in industrial environments

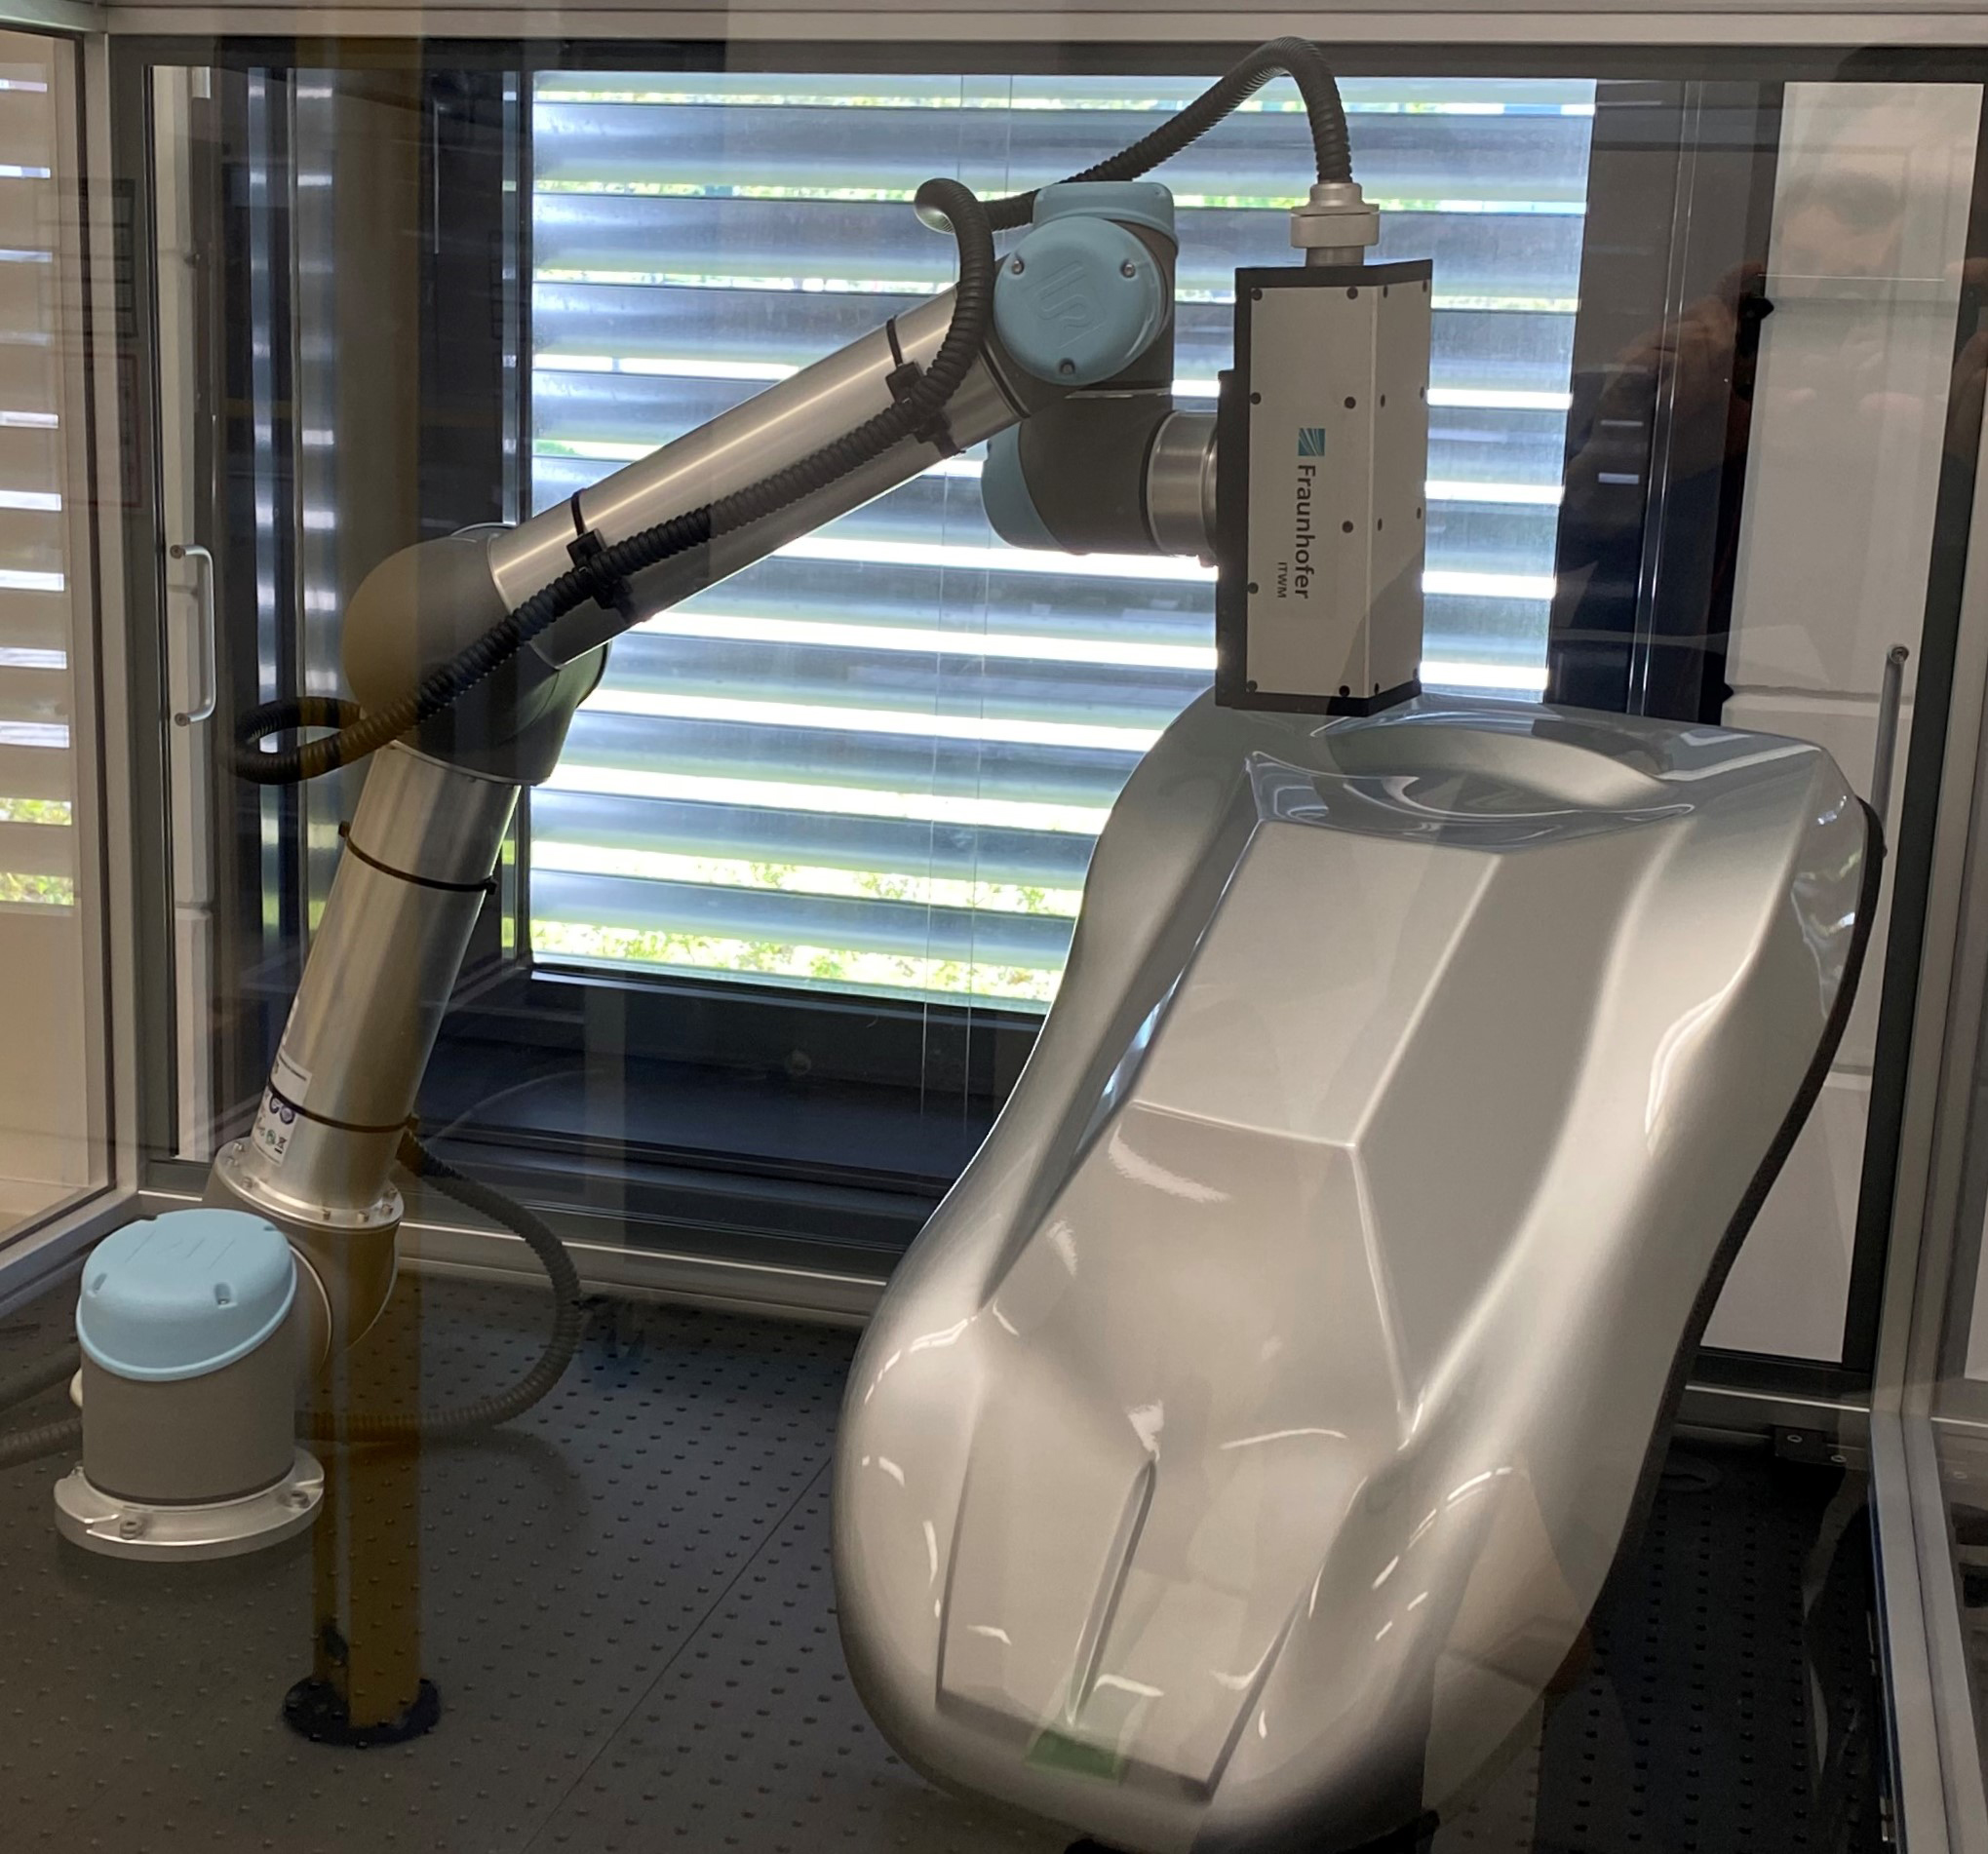
At the Fraunhofer ITWM in Kaiserslautern, terahertz measurement systems are developed which can be used, among other things, to measure layer thicknesses in an industrial environment. As the latest version of the terahertz layer thickness measurement system, a robot-assisted variant is now available, i. e., a collaborative robot, or "cobot" for short, is used for simplified integration into the working environment. The Fraunhofer ITWM system is particularly suitable for the thickness measurement of individual layers within a multilayer system, where the coating can be applied to any material. In addition, moist, sticky, and soft coatings and layers on curved surfaces can also be measured.

more on Terahertz Layer Thickness Measurement in Industrial Environments

Exhibitor: Fraunhofer ITWM, Kaiserslautern

Robot assisted terahertz measuring system for inline inspection of paint coatings
© Fraunhofer ITWM
Robot-assisted terahertz system for coating thickness measurement on free-form surfaces.

Solutions for mobile non-destructive terahertz testing  

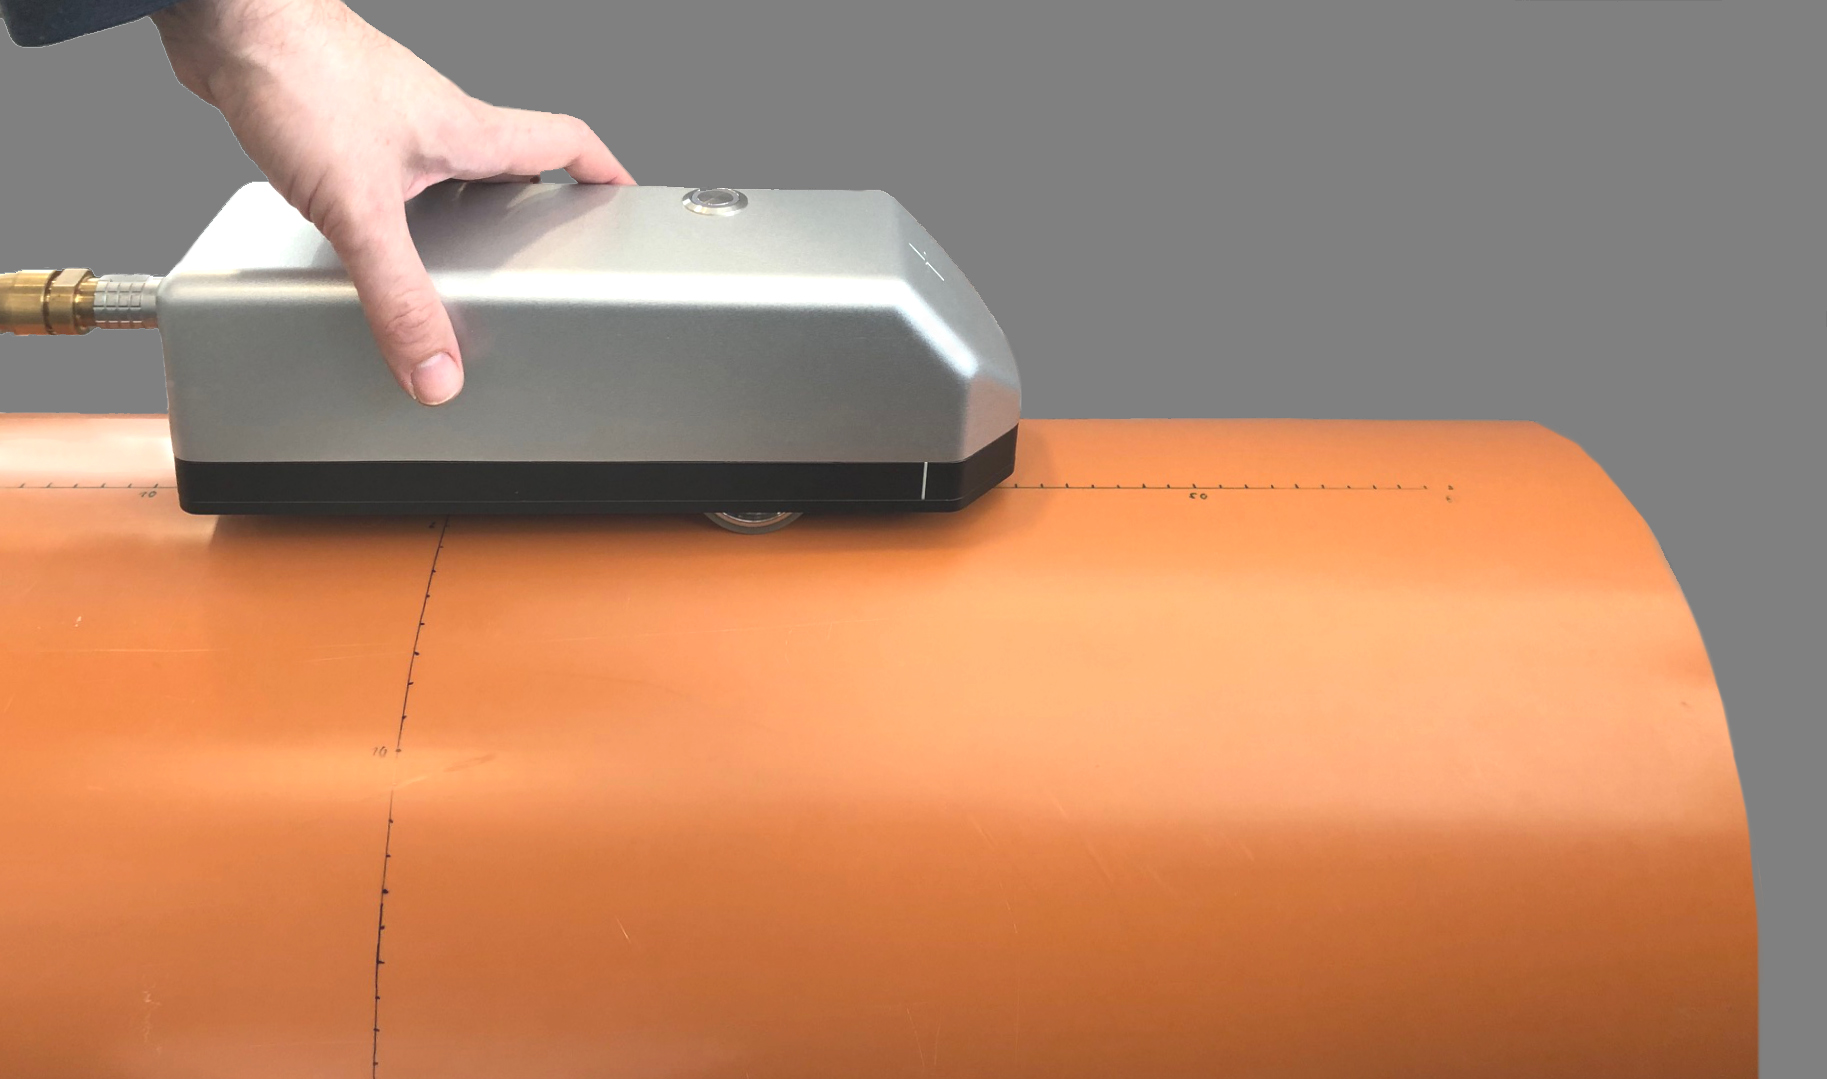
Fraunhofer ITWM has developed solutions for the mobile use of non-destructive terahertz testing. Since in many cases the sensor is brought to the component and not vice versa, the mobile solutions allow higher flexibility with respect to the location of the measurement. In addition, mobile systems can also be better adapted to the component geometry and are thus flexible with regard to the measurement arrangement. Potential applications can be found in areas such as maintenance, service and repair, especially on fixed, non-transportable objects. Typical materials are plastics, fiber composites or ceramics in industries such as automotive, rail vehicles or pipe manufacturers.

more on Solutions for mobile non-destructive terahertz testing

Exhibitor: Fraunhofer ITWM, Kaiserslautern

Mobile terahertz hand-held scanner.
© Fraunhofer ITWM
Mobile terahertz handheld scanner

»One-stop-shop« for ultrasonics – measuring, simulating, testing

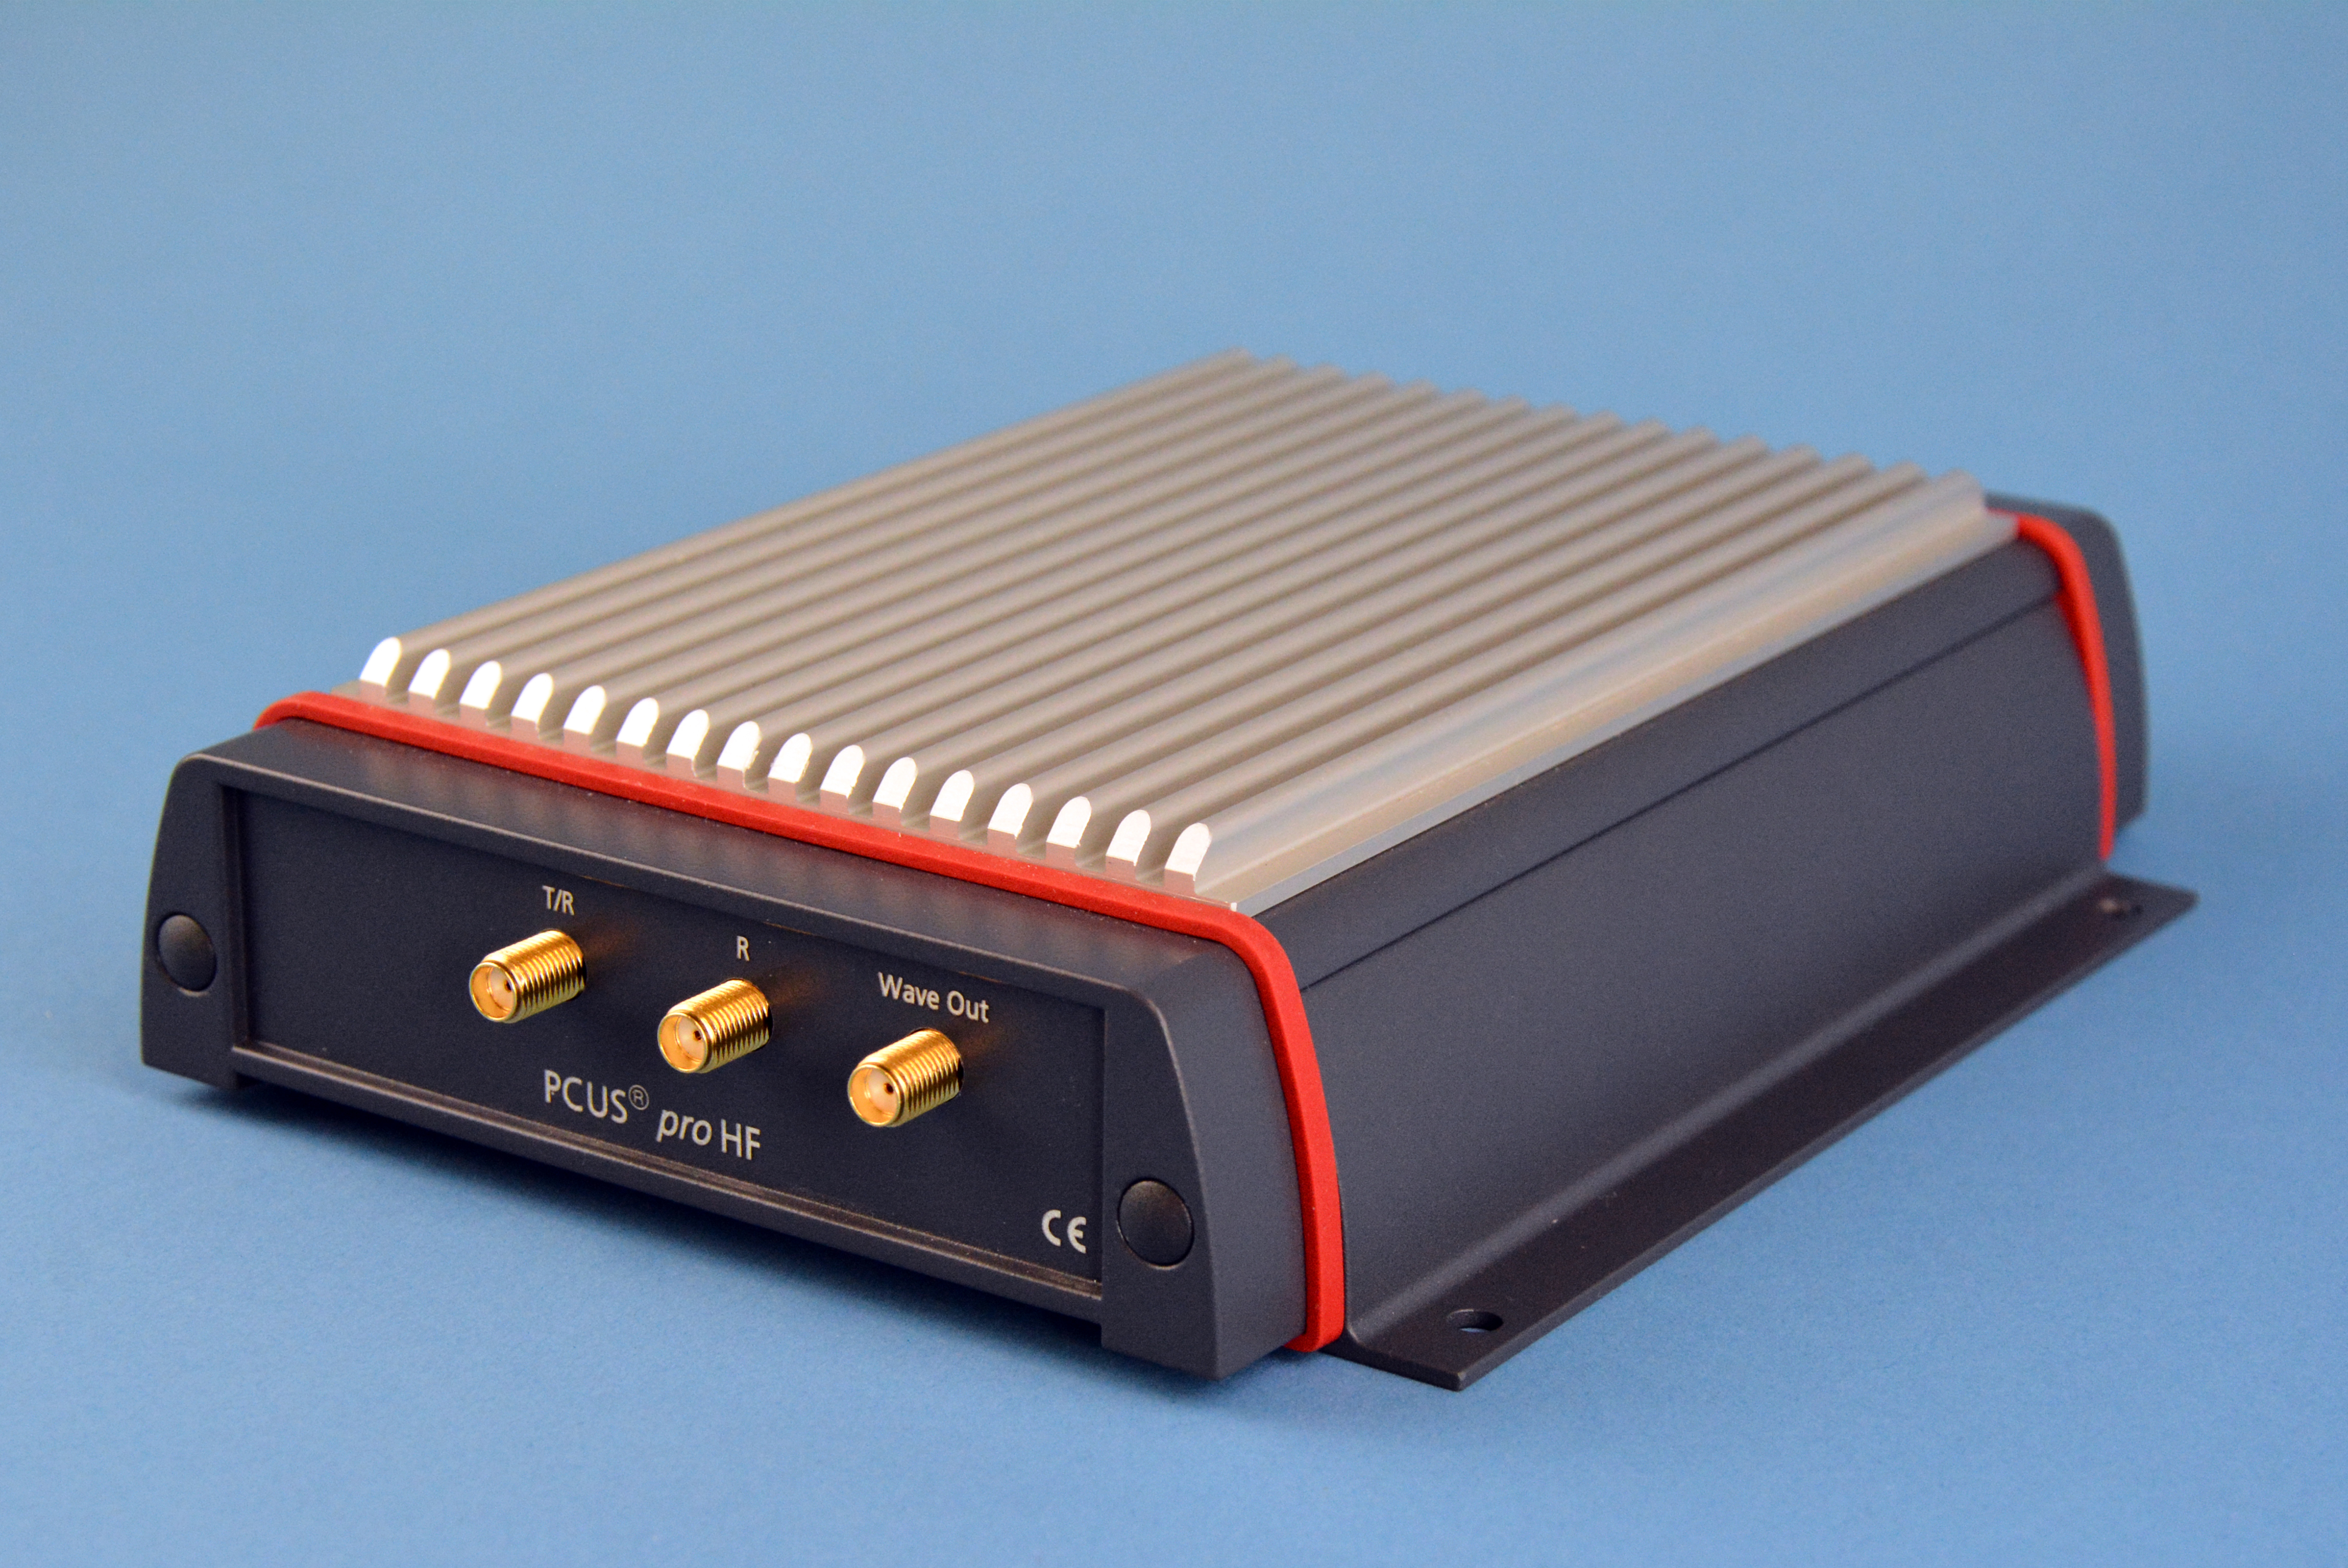
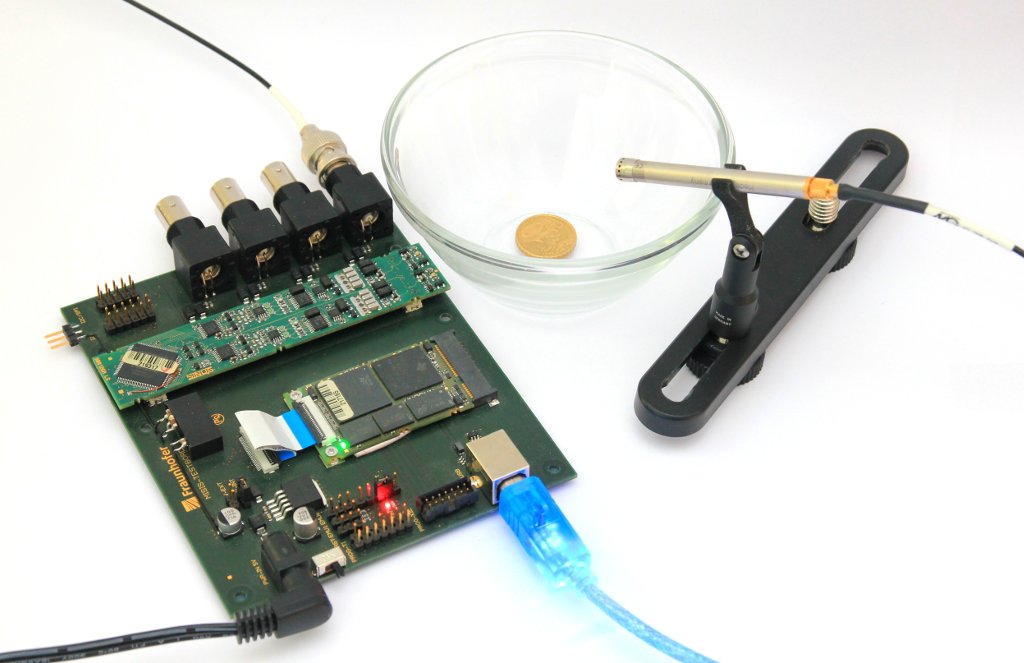
Fraunhofer IKTS, Dresden, presents new developments of the ultrasonic device family PCUS® pro, which is optimized for fast automated and, if required, robot-supported testing in metal processing as well as in the fields of railroad and automotive construction, power plant or even wind power technology. The PCUS® pro HF ultrasonic front end is used when high testing frequencies of up to 100 MHz are required, for example in the automated testing of thin sheets, composite materials, joints or electronic components. Designed as a USB front end, it can be connected to any Windows PC, laptop or tablet computer.

more on »One-stop-shop« for ultrasonics - measuring, simulating, testing

Exhibitor: Fraunhofer IKTS, Dresden

Ultrasonic front end PCUS
© Fraunhofer IKTS
The demonstrator recognizes the value of euro coins based on the sound made when the coins are inserted. The AI system was trained in advance with the sounds of various coins.

Intelligent quality assurance through AI-supported analysis of acoustic signals

In the context of Industry 4.0, more and more diverse inspection tasks are emerging, generating larger volumes of data that are often not easy to interpret. Artificial intelligence (AI) can assign meaning to these measured values and assess the overall situation. The systems for acoustic diagnosis from Fraunhofer IKTS, Dresden, can detect errors in manufacturing and operating processes. This is because defective components and critical plant and operating processes exhibit special noise patterns that are used for quality assurance.

more on Intelligent quality assurance through AI-supported analysis of acoustic signals exhibit

Exhibitor: Fraunhofer IKTS, Dresden

AI coin recognition system by sound
© Fraunhofer IKTS
The demonstrator recognizes the value of euro coins based on the sound made when the coins are inserted. The AI system was trained in advance with the sounds of various coins.